
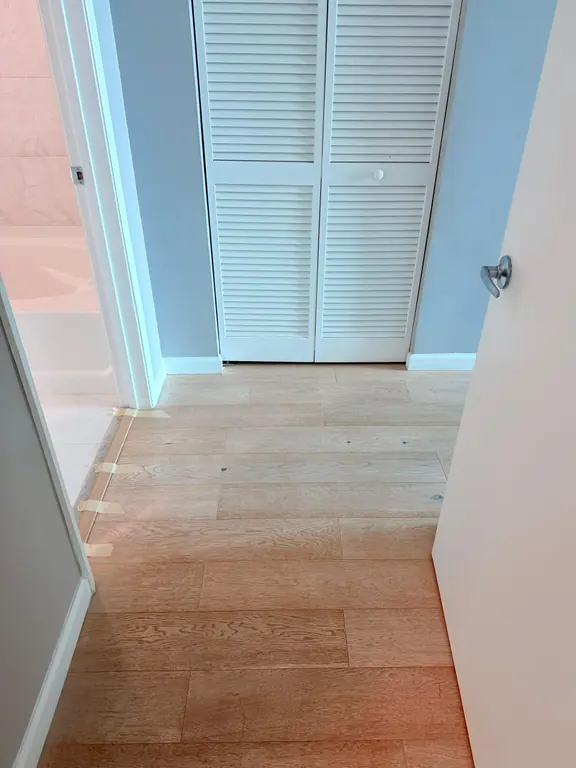
You've just moved a planter, lifted a wet rug, or noticed a pale ring beneath a cold glass. The mark may look cosmetic, but hardwood reacts to moisture in different ways. A cloudy white circle can be trapped in the finish, while a gray, brown, or black patch may mean water has reached the wood itself.
The safest answer to how to remove water stains from hardwood floors starts with diagnosis, not vinegar, baking soda, or sandpaper. Identify the stain's depth, determine whether the floor is sealed or oiled, dry the area completely, and then use the least aggressive treatment that fits what you see.
Table of Contents
- Identify the Stain and Check the Floor Finish
- Prepare the Floor Before Treating the Mark
- Remove White Rings and Hazy Surface Marks
- Treat Dark Water Stains and Set-In Damage
- Use Sanding, Oxalic Acid, and Bleaching Cautiously
- Choose Spot Repair, Board Replacement, or Refinishing
- Prevent Future Water Damage and Troubleshoot Failed Attempts
Identify the Stain and Check the Floor Finish
The assumption that every water stain has one cure causes most avoidable repair problems. A pale ring left by a cold glass and a dark patch beneath a leaking appliance may both be called water stains, but they don't occupy the same layer of the floor.
White or hazy marks usually indicate moisture trapped in or beneath the finish. The wood may still be intact, so gentle drying, mild lifting, or a carefully tested surface treatment can be appropriate. Gray, brown, or black discoloration is more concerning because water may have moved through the coating and into the wood fibers. Dark stains often need sanding, bleaching, or refinishing rather than repeated cleaning, as explained in this guide to water stains on wood floors.
Inspect the mark before choosing a product
Use strong, indirect light and inspect the stain from several angles. Look for:
- Color: White or cloudy usually points to the finish, while dark gray, brown, or black suggests deeper penetration.
- Surface feel: A smooth, intact surface is less alarming than roughness, tackiness, softness, or raised grain.
- Moisture: Press a clean, dry cloth against the area. If it picks up moisture, stop stain treatment and focus on drying.
- Board movement: Swelling, cupping, lifting edges, or separating boards indicate more than a simple surface ring.
- Finish type: Polyurethane and other sealed floors don't respond like waxed or oiled floors. Unfinished wood absorbs treatments more readily and needs extra restraint.
A sealed floor may show a cloudy coating while the wood beneath remains stable. An oiled floor can require compatible oil maintenance rather than a household acid or abrasive. Before treating the visible area, test the method in an inconspicuous spot and watch for whitening, dullness, color loss, or texture changes.
Practical rule: If you can't tell whether the discoloration is in the finish or the wood, don't sand or soak it. A flooring professional can assess the surface with less risk than an aggressive experiment.
For moisture-related damage that extends beyond a small mark, Flacks Flooring hardwood repair help offers useful restoration context. For routine care around the affected area, follow a moisture-controlled hardwood floor cleaning guide.
Prepare the Floor Before Treating the Mark
Treatment shouldn't begin while the floor is still receiving water. A leaking appliance, overflowing planter, wet rug, or damaged door threshold can keep feeding moisture beneath the finish, so find and stop the source first.
Start by removing standing water with a clean absorbent cloth. Blot rather than rub, because vigorous rubbing can spread moisture across adjoining boards and work grit into the finish. Move rugs, baskets, furniture pads, and other items away from the affected area so air can reach the boards.
Use a controlled drying routine
Place dry towels around the perimeter, not directly over the mark for an extended period. Replace damp cloths as soon as they become wet. Ventilate the room, and use a fan to move air across the floor rather than forcing a powerful stream into one small seam. Avoid steam mops, hair dryers on high heat, and additional liquid cleaners.
A recent damp patch needs drying and observation before stain lifting. A dry, stable mark can move to a carefully selected treatment. If the spot remains wet, the boards are swelling, or the darkening is spreading, stop. Those signs suggest active moisture or damage below the finish, not a cleaning challenge.
Unfinished wood needs particular care because open fibers can absorb water and chemicals quickly. Finished floors also have limits. Excess vinegar, peroxide, bleach, or paste can cloud a coating, soften it, or leave a lighter patch that becomes more noticeable than the original ring.
Pre-treatment checklist
- Stop the source: Repair the leak or remove the moisture-producing object.
- Blot standing water: Use clean, absorbent cloths and gentle pressure.
- Clear the work area: Remove rugs and objects that can hold moisture against the boards.
- Dry and observe: Use ventilation or a fan, then confirm the surface feels dry.
- Check for movement: Stop if boards cup, swell, lift, or feel soft.
- Test first: Apply any treatment to a hidden area before touching the visible mark.
Drying is not a minor preliminary step. It determines whether you're treating a finish mark or trying to conceal an active moisture problem.
Remove White Rings and Hazy Surface Marks
White rings are the best candidates for a conservative approach, but “best candidate” doesn't mean every remedy is safe for every finish. Begin with the method that introduces no product at all: wipe the area with a dry, soft cloth and allow it to dry fully.
If the ring is recent and the finish remains smooth, use a barely damp cloth with a 1:1 mixture of white vinegar and water for about 5 minutes, then wipe the area dry and reassess. This treatment is described for newer marks in restoration guidance from Oreate AI's hardwood stain removal instructions. Don't pour the solution onto the floor. Put a small amount on the cloth, wring it thoroughly, and keep the treatment confined to the ring.
For a set-in surface mark, a thin baking-soda paste can remain in place for 10–15 minutes, followed by careful removal and complete drying. Baking soda is mildly abrasive, so avoid vigorous scrubbing. Use light pressure and stop if the sheen changes.
Compare the gentler options
Low heat can help when moisture is held in the finish. Place a dry cloth over the mark and use an iron on a no-steam setting for only a few seconds at a time. Keep the iron moving, check constantly, and stop immediately if the finish becomes tacky, shinier, duller, or distorted. Steam is not appropriate because it adds moisture and heat together.
Oil-based treatment may suit some oiled floors, but it isn't a universal answer for polyurethane-coated boards. An oil can alter the appearance of a sealed surface or leave a patch that reflects light differently. Confirm the floor's maintenance requirements before using it.
Mild cleaning is suitable only while the mark remains superficial. If the ring expands, the surface becomes rough, the coating changes texture, or the area feels uneven, stop applying products. Repeating a treatment won't make a penetrated stain superficial.
Wait about 24 hours between attempts to avoid over-treating the surface, following timing guidance summarized by Homes & Gardens. A pale ring that doesn't respond to drying and one carefully tested mild treatment may need finish repair rather than another household remedy.
Treat Dark Water Stains and Set-In Damage
A wet planter left overnight can produce a pale ring if the finish contains the moisture. A slow leak under a refrigerator is different. Water can remain against the same boards, move through seams, and leave gray or black discoloration that cleaning can't reach.
A rain-marked hallway may fall between those examples. If the floor dried quickly and the mark is light, surface treatment may be reasonable. If the stain stays dark after drying, the water likely affected the wood beneath the finish. Repeated vinegar, peroxide, bleach, or scrubbing won't replace diagnosis, and aggressive rubbing can remove surrounding finish while leaving the dark color untouched.
Follow an escalation hierarchy
- Dry the area completely. Don't seal in moisture or apply a finish over a damp board.
- Clean gently. Remove surface residue with a hardwood-compatible method and a nearly dry cloth.
- Consider targeted peroxide. Hydrogen peroxide may be appropriate for selected discoloration, but test it first on the specific finish and wood.
- Reassess after drying. A dark mark that remains is a repair decision, not an invitation to use stronger chemicals.
- Abrade only with a plan. If sanding is justified, work with the grain and protect adjoining boards.
Guidance from Real Simple's wood stain removal methods describes hydrogen peroxide at a 50/50 ratio for about 10 minutes and chlorine bleach at a 1:4 bleach-to-water ratio for 10 minutes, followed by drying and reassessment. Those are treatment benchmarks, not permission to apply either product casually. Household bleach can damage wood and finishes, and peroxide can lighten more than the stain.
For dark stains that survive surface work, flooring guidance commonly recommends removing the affected finish with #100-grit sandpaper, feathering the surrounding edge with #150-grit paper, and blending with #0000 steel wool before matching the finish. Sand with the grain and mask neighboring boards to reduce haloing and finish burn-through.
If the floor remains damp, smells musty, feels soft, darkens across several boards, or has lifting edges, get an assessment. Resources such as Savera Wood Floor Refinishing restoration can help readers understand when restoration is more suitable than continued cleaning.
Use Sanding, Oxalic Acid, and Bleaching Cautiously
Deep discoloration needs a restoration mindset. The objective isn't to make the board look lighter at any cost. It's to remove or reduce the affected layer while preserving the surrounding wood, then rebuild a finish that matches the existing floor.
Begin with a dry, stable surface and a small test area. If the stain is still within the finish, gentle abrasion may be enough. Once the finish is removed, the repair becomes more complex because the exposed wood may need recoloring and the new coating must match the surrounding sheen.
A controlled restoration sequence
- Test the method: Choose an inconspicuous area or a small edge of the stain. Check color, absorption, and finish reaction after drying.
- Abrade with the grain: Use light, localized work rather than broad, forceful sanding. Flooring guidance recommends 100–150 grit paper for older dark stains, followed by 0000 steel wool, as summarized in COIT's hardwood water stain guidance.
- Feather the repair: Blend the edges into the surrounding finish so the repaired spot doesn't create a sharp boundary. Remove only what the repair requires.
- Dry before coating: Remaining moisture can darken again and weaken refinishing adhesion.
- Treat targeted discoloration: Oxalic acid wood bleach or peroxide may help with certain tannin or iron-related stains, but neither is a universal stain remover.
- Reassess before escalating: If the mark only lightens partially, decide whether another controlled attempt is justified or whether board repair makes more sense.
Oxalic acid should be treated as a wood-restoration chemical, not as a stronger version of vinegar. Peroxide also needs restraint. It can lighten the wrong area, react unevenly, or affect an existing coating if applied without removing the finish where necessary.
Wear chemical-resistant gloves and eye protection, provide ventilation, keep the treatment away from adjacent boards and metal surfaces, and follow the product label for dilution, contact time, cleanup, and disposal. Don't mix bleach with vinegar, ammonia, peroxide, or other cleaners.
For a deeper explanation of using hydrogen peroxide for wood cleaning, focus on compatibility rather than assuming that a product labeled for household cleaning belongs on every floor. Unfinished boards absorb treatment quickly, which makes a test patch especially important. Sealed boards require a separate decision about whether removing the finish is acceptable and how the replacement coating will match.
Stop when the repair starts expanding. A small dark stain that needs controlled spot work can become a large refinishing project after broad sanding, excess bleach, or repeated wet treatments.
Choose Spot Repair, Board Replacement, or Refinishing
After drying, gentle treatment, and any carefully controlled stain reduction, choose the repair based on depth, coverage, and finish continuity. The most attractive option isn't always the least expensive or the fastest. A small repair can look worse if its color or sheen doesn't blend with the surrounding boards.
| Repair option | Best suited for | Main caution |
|---|---|---|
| Localized refinishing | A small, shallow mark confined to one stable area | Color and sheen matching can leave a visible halo |
| Board replacement | A dark stain across affected boards, especially with swelling or soft wood | Replacement wood may differ in grain, age, or color |
| Professional refinishing | Multiple patches, worn finish, prominent rooms, or broad discoloration | More extensive work changes the surrounding finish and requires careful matching |
A localized repair works best when the stain is shallow and the existing finish is otherwise in good condition. The technician removes or abrades the affected finish, treats or sands the wood as appropriate, applies matching color if needed, and reseals the section. On a visible floor, matching gloss can be as difficult as matching color.
Board replacement becomes more sensible when the stain follows board edges, crosses several boards, or appears with swelling, softness, or persistent odor. Replacing one section won't solve active moisture, so the source must be corrected first.
Full-room refinishing may produce the most consistent appearance when the existing coating is already worn or several spot repairs would create disconnected patches. It also avoids placing a new sheen beside an old one, but it is a larger intervention and may not suit a rental turnover or a lease dispute without documentation.
For Miami-Dade renters, landlords, property managers, and short-term-rental hosts, photograph the stain, record the moisture source, and document the floor's condition before work begins. Avoid repairs that remove sound finish beyond the affected area or alter the property beyond its original condition. For broader restoration decisions, fixing water damaged floors provides relevant context.
Choose professional help when moisture is active, boards are structurally affected, the stain is large or prominent, or the repair requires bleaching and finish matching.
Prevent Future Water Damage and Troubleshoot Failed Attempts
Hardwood lasts longer when moisture is handled before it becomes a stain. Wipe spills promptly, use breathable mats at entry points, place waterproof barriers beneath planters, and inspect appliance hoses around refrigerators, dishwashers, washing machines, and ice makers. Keep balconies, kitchens, bathrooms, and laundry areas under observation, especially in rental properties between occupants.
Maintain the finish according to its type. Oiled floors need compatible maintenance, while sealed floors still need low-moisture cleaning. For households seeking routine care with non-toxic, eco-friendly products, eco-friendly house cleaning can support regular surface maintenance without turning every spill into a heavy treatment project.
A DIY attempt has failed if the mark gets larger, the finish looks hazy, the surface feels rough, the wood darkens again, or the treated area becomes noticeably lighter. Stop applying products, remove the moisture source, photograph the condition, and seek an assessment before trying another remedy.
The diagnostic rule is simple:
- Pale and hazy: Usually a finish-level problem.
- Dark and set in: Potentially a wood-level stain.
- Wet, swollen, soft, or spreading: An active water-damage problem.
Respond quickly during tenant turnover and guest changeovers, but don't rush a repair that could remove sound finish or hide structural moisture.
Canes Cleaners provides scheduled and on-demand cleaning for Miami-Dade homes, apartments, offices, condos, and short-term rentals, including routine kitchen and laundry-area care. Visit Canes Cleaners to book a service and keep moisture-prone areas cleaner while you arrange specialized hardwood restoration when the floor needs more than cleaning.