
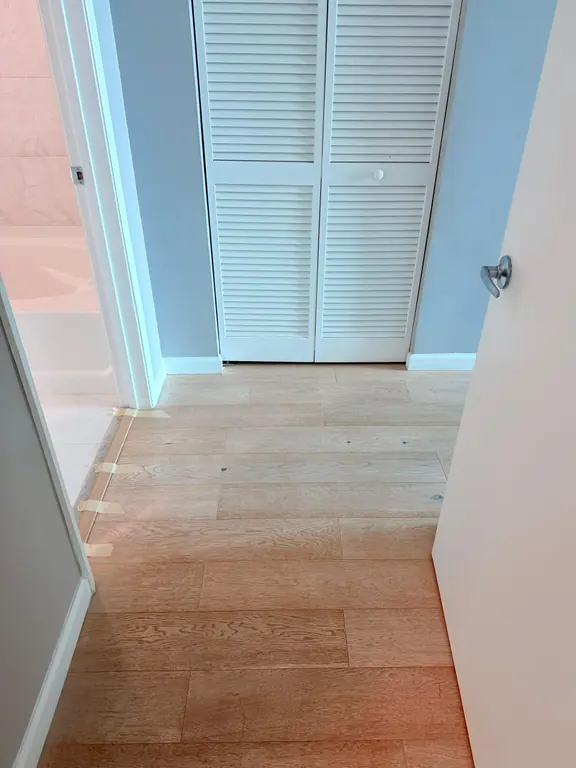
You're staring at the trim and seeing that gray line again, usually right when guests are due or you've already mopped the floors and still feel like the room isn't finished. That's baseboard grime, and in most Miami homes it isn't one dramatic mess, it's a slow mix of airborne dust, pet hair, and splash-back from regular floor cleaning. The easy way to clean baseboards isn't about scrubbing harder, it's about hitting them in the right order and using tools that don't turn a small job into a kneeling marathon.
Table of Contents
- Why Baseboards Get Filthy So Fast
- The Dry Then Wet Baseboard Method
- Low Effort Tools That Save Your Back
- Removing Scuffs and Stains From Painted, Wood, and Vinyl
- Eco Friendly Products and a Maintenance Schedule
- When to Call a Professional Cleaner Instead
Why Baseboards Get Filthy So Fast
The moment most renters notice it is simple. They look down while pulling out chairs or moving a laundry basket, and the baseboards around the living room or hallway suddenly look dull, speckled, or lined with gray dust. It feels like the house got dirty overnight, but baseboards usually collect buildup in a predictable way, not from one big spill.
Where the grime actually settles
Dust lands on the top edge first, then works into the narrow groove where the trim meets the wall. Corners by doors and along traffic paths collect even more because shoes, air movement, and vacuum exhaust keep stirring particles back into place. If you only wipe the flat face of the board, you miss the places where the buildup is anchored.
That's why a fast swipe often looks good for about ten seconds and then the line is still there. The easy way to clean baseboards starts with removing loose dust before any wet wiping, which is the same order recommended in the practical home-cleaning guidance from Home Depot and other consumer cleaning guides like Canes Cleaners' hardwood floor care guide. Once you understand that the problem is layered dust, not a stubborn stain in every case, the job gets simpler.
Practical rule: if the baseboard feels gritty when you run a finger over the top edge, dry dust first. Wet cleaner alone just turns loose dust into a paste.
That also explains why baseboards near kitchens and entryways usually look worse. Airborne debris, mop splash, and tracked-in dirt all land there first, so the fix is less about strong chemicals and more about getting the surface clean in the right sequence.
The Dry Then Wet Baseboard Method
The most reliable routine is still the one that often gets skipped because it sounds too plain. First remove the loose material, then wipe what's left with a mild cleaner, then dry the surface so it doesn't streak or spot. That's the core of the dry then wet baseboard method, and it works because each pass handles a different layer of mess.
Start by taking off the loose dust
Use a vacuum brush attachment or a microfiber cloth and work along the top edge, the face, and the corners. The goal is not shine yet, it's lift. If you have pets, this pass matters even more because hair and dust tangle together and smear when you go in with water too early.
Move to a damp wipe, not a soaking one
Mix warm water with a little mild dish soap, then dampen a clean cloth and wipe one short section at a time. Several consumer guides favor that warm-water and mild-soap approach, and a professional demonstration also shows that working in small sections keeps the cleaner from drying before you can finish the area. A lightly damp cloth is enough for most routine buildup.
Work a short stretch, rinse or refold the cloth, then keep going. If the soap film dries on the board, you've added a second cleaning step for yourself.
Finish dry so the board doesn't spot
Use a dry towel right after the wipe. That last pass sounds minor, but it keeps water from leaving streaks on painted trim and spots on glossy finishes. For grooves and corners, a soft-bristled toothbrush gives you more control than a big sponge, especially on detailed trim where dust hides in the seams.
The whole routine is simple enough to run room by room while music or a podcast is on. That's why people keep calling it the easy way to clean baseboards. It's not fancy, it just avoids wasted motion.
Low Effort Tools That Save Your Back
The problem isn't the cleaner. It's the bending, kneeling, and furniture-moving that most guides barely mention. In apartments, condos, furnished rentals, and tight Miami bedrooms, the smartest tool is often the one that lets you stay upright and still reach the top edge of the trim.
What works when you want speed
A long-handled microfiber duster is the easiest choice for quick touch-ups. It reaches well, takes almost no effort, and handles the weekly dust pass without forcing you to get on the floor. A broom wrapped with a microfiber cloth works too, especially if you angle the head around 45 degrees so the cloth rides the board instead of sliding off it.
The broom wrap is fast, but it has limits. It's good for loose dust and pet hair, not for sticky marks or kitchen residue. For that, a flat mop with a microfiber pad gives you a little more surface contact and lets you keep your hands higher, which helps in long hallways and around furniture legs.
When detail matters more than reach
A dedicated baseboard tool with a pivoting head is better when the trim has grooves or the boards have a little texture. It's slower than a duster, but it gives you more control on edges where buildup likes to hang on. I reach for that kind of tool when a room has visible scuffs and the quick pass didn't do enough.
If you can clean the board without moving the sofa, you'll do it more often. That's the real advantage of upright tools.
Canes Cleaners also lists standard and deep cleaning services that can include baseboard care as part of a room-cleaning visit, which matters if you're trying to keep the job off your weekend list. For a lot of homes, the tool choice comes down to whether you want a fast dust pass, a fuller wet wash, or a detailed cleanup in one go.
Removing Scuffs and Stains From Painted, Wood, and Vinyl
A black shoe mark on painted trim, a crayon line on wood, and a kitchen splash on vinyl all ask for a different approach. The wrong cleaner or too much pressure can leave the mark in place or wear the finish faster than the stain itself. The practical move is to match the method to the material, then keep your body out of the way by using a long-handled tool or a mop wrapped with microfiber so you are not crouched on the floor for every spot.
Pick the method by material
| Material | Best Cleaner | Best Tool | Avoid |
|---|---|---|---|
| Painted trim | Magic Eraser or baking soda paste with light pressure | Soft cloth or gentle sponge | Bleach and heavy abrasion |
| Wood | Damp cloth only, then furniture-safe polish if needed | Soft-bristled toothbrush for grooves | Soaking the wood |
| Vinyl | Mild soap solution, then a diluted vinegar pass for ground-in grime | Microfiber cloth | Abrasive pads on glossy finish |
Painted baseboards usually come clean if you keep the pressure light. A Magic Eraser can lift shoe marks and kid smears, but it needs a careful touch because glossy or older paint shows overworking fast. If the scuff is close to the floor and you want to avoid repeated bending, wrap a microfiber cloth around a flat mop head and work along the board at a low angle. That keeps the contact even and saves your back in tight apartments and hallways.
Wood needs restraint. A damp cloth handles most marks, and a soft toothbrush reaches grooves without flooding the surface. If the trim is finished wood, dry the area after wiping and use furniture-safe polish only if the mark still shows. Going heavier with water creates more trouble than it solves, especially on older boards that have seams or worn spots.
Vinyl gives you a little more room to work, which is why it shows up in busy kitchens and utility spaces. Mild soap removes the first layer, and a diluted vinegar pass can help with grime that has sat for a while. Abrasive pads should stay off glossy vinyl, because they can leave scratches that catch the light and make the baseboard look worse than the original stain.
For more detail on cleaning trim and similar surfaces, see this guide on cleaning window sills like a pro.
Eco Friendly Products and a Maintenance Schedule
The easiest routine is the one you can keep up with. In Miami homes, that usually means a small caddy, reusable tools, and a schedule that fits the week instead of adding another chore you keep putting off.
A small kit is enough
A microfiber cloth set handles dry dusting and damp wiping without much waste, and it stores easily in a tight laundry closet or cleaning tote. Add a refillable spray bottle, a mild soap such as castile or a plant-based dish soap, and a soft toothbrush for trim grooves. For vinyl, a diluted vinegar mix can cut through heavier residue. If you want a broader look at safer cleaning habits, learn more about eco-friendly house cleaning practices here. For households that want lower-toxicity products, that small set usually covers the job without filling a cabinet with one-purpose cleaners.
Keep the schedule simple
Home Depot's guidance recommends checking baseboards monthly while you move furniture and floor coverings, then vacuuming with a brush attachment and wiping them every other month with a lightly damp microfiber cloth. That schedule works because it keeps trim in maintenance mode instead of waiting until buildup turns into a longer scrub. A quick dry-dust pass during regular vacuuming saves time, while wet wiping is better when the boards have grabbed grease, salt spray, or sticky residue that dusting will not lift.
A spot check whenever a scuff appears keeps the work light. On painted trim, a careful wipe is usually enough. On wood, less water is better, since extra moisture can create more trouble than the mark itself. For most homes, tying baseboards to vacuum day or floor cleaning day is the easiest way to stay ahead of them without treating the trim like a separate project.
When to Call a Professional Cleaner Instead
There's a point where baseboards stop being a simple household task and start becoming another thing you have to chase between work, traffic, and everything else. Post-renovation dust is one of those times, because fine debris tends to land on every ledge and trim line at once. Move-outs, pre-listing cleanups, and short-term rental turnovers also push the job past “quick wipe” territory because consistency matters more than one room looking fine.
The right handoff depends on the situation
If you want a full reset after construction or a serious turnover, Canes Cleaners' 36-point Deep Clean or 48-point Move-In/Move-Out Clean fits the kind of trim work that gets lost in a rushed weekend. For recurring upkeep in homes, apartments, and short-term rentals, a Standard Clean is the more practical choice because baseboards can be handled as part of the usual room rotation rather than as a separate chore.
When mobility is the issue, handing it off makes even more sense. If bending, kneeling, or dragging furniture slows you down, hiring help is often the cleaner answer than buying more gadgets. Miami-Dade homes also deal with tight layouts, furnished spaces, and frequent guest turnover, so the job can become more about access than cleaning skill.
If you want the trim, floors, and high-touch areas handled together, book with Canes Cleaners and choose the level that matches your home, turnover, or move-out timeline. For routine upkeep or a deeper reset, it's often the easiest way to keep baseboards from becoming the job you keep postponing.