
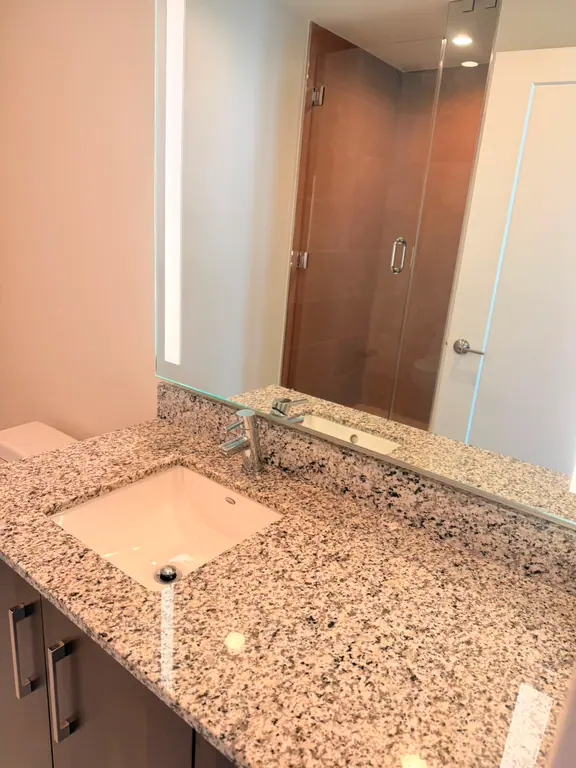
The renovation crew has left, the rooms look nearly finished, and the property is technically ready for the next handoff. Then sunlight reveals drywall dust on the ledges, adhesive on the flooring, residue around the fixtures, and fine particles sitting inside the air returns. A quick sweep and mop won't solve that problem. Dry sweeping can re-aerosolize drywall or masonry dust, while overlooked vents and high surfaces can keep feeding particles back into the room.
A reliable post-construction cleaning checklist starts with sequence, not scrubbing. The workflow below moves through rough debris removal, detailed cleaning, and final touch-up, with safety controls, high-to-low cleaning, room-by-room checks, and a documented inspection. That three-phase approach reflects professional checklist practice, while some guidance also recommends a delayed re-clean after fine dust has had time to settle. See this step by step construction cleanup guide for another practical view of the sequence.
Homeowners can use this list to manage a renovation handoff. Property managers, contractors, and professional cleaners can use it to define scope, assign responsibility, and document acceptance. Canes Cleaners, for example, offers customizable post-construction scopes and detailed checklists for homes, apartments, offices, and other properties in Miami-Dade.
Table of Contents
- 1. Dust and Debris Removal from All Surfaces
- 2. Floor and Hard Surface Restoration
- 3. Window, Glass, and Mirror Cleaning
- 4. Kitchen and Bathroom Fixture Sanitization
- 5. Wall and Ceiling Cleaning and Touch-Up Coordination
- 6. Carpet Vacuuming and Stain Remediation
- 7. HVAC System and Air Return Cleaning
- 8. Trash Removal, Recycling Coordination, Final Inspection and Quality Assurance
- 8-Point Post-Construction Cleaning Comparison
- Make the Handoff Inspection-Proof
1. Dust and Debris Removal from All Surfaces
Start by making the site safe and workable. Remove loose packaging, wood scraps, drywall pieces, fasteners, and other large debris before attempting fine cleaning. Keep occupants, pets, and nonessential personnel out of the work area, and identify anything that may be sharp, unstable, contaminated, or outside the cleaning team's scope.
Construction dust deserves more care than ordinary household dust. Respirable crystalline silica is regulated by OSHA under 29 CFR 1926.1153, which sets a permissible exposure limit of 50 micrograms per cubic meter of air as an 8-hour time-weighted average and an action level of 25 micrograms per cubic meter. The safety guidance also warns that dry sweeping drywall or masonry dust can raise airborne exposure, so HEPA vacuuming, wet wiping, and suitable respiratory protection are preferable to dry dusting methods. Review the construction cleaning safety guidance before work begins.
Work from the highest surface downward
Use a HEPA-filtered vacuum on ceilings, ceiling fans, light fixtures, shelves, cabinets, walls, ledges, baseboards, and floors. Follow with microfiber or damp wiping so particles are captured instead of pushed into the air. In a Miami renovation, drywall dust can settle across an entire home even when the visible work was limited to one room. New townhomes in Doral and office buildouts in Miami Beach often need the same full-property approach before equipment, furniture, or occupants arrive.
Seal or protect HVAC returns during the initial dust removal. Avoid scheduling this stage before dusty construction is complete, because new sanding, cutting, or drilling will undo the work. The CDC's renovation guidance recommends controls such as HEPA vacuums, physical barriers, negative pressurization, and damp cleaning, all of which support better indoor environmental quality during cleanup.
2. Floor and Hard Surface Restoration
Floors need a different approach from walls and ledges because construction residue can bond to the finish. Tile may carry grout haze, marble may show cement residue, hardwood may have paint or adhesive marks, and polished concrete can hold fine dust in its surface texture. Identify the material before choosing a pad, scraper, solvent, or detergent.
Begin with HEPA vacuuming, then remove residue in small sections. Test every product in an inconspicuous area, particularly on natural stone, stained wood, laminate, painted trim, and factory-finished surfaces. A pH-neutral cleaner is the safer starting point for natural stone because acidic products can etch it, while abrasive tools can dull chrome, polished concrete, or a new floor finish.
Match the method to the residue
Adhesive should be addressed promptly. As it hardens, removal often becomes more laborious and increases the risk of scratching or discoloring the floor. For tile-specific residue, use this practical guide to removing floor tile adhesive and confirm that the selected method matches the tile, grout, and surrounding finish.
A luxury condo in Miami Beach may need careful grout-haze removal from porcelain or marble. A Coral Gables home with hardwood flooring may require controlled spot treatment rather than aggressive scrubbing. In a Doral commercial space, polished concrete may need commercial equipment and dust-neutralizing cleaning rather than a household mop.
Schedule floor restoration after dusty work and flooring-related touch-ups are finished, but before the final inspection. Vacuum first, remove residues second, wet clean third, and allow the surface to dry before judging the result. A wet floor can hide haze, streaks, and remaining adhesive.
This short demonstration provides a visual reference for floor-cleaning technique and tool control.
3. Window, Glass, and Mirror Cleaning
Glass often makes a newly finished property look unfinished. Dust settles on window tracks and sills, protective film leaves adhesive behind, and paint overspray can create small marks that become obvious in direct light. Clean windows, glass doors, mirrors, shower panels, partitions, and accessible balcony glass as part of the same detailed pass.
Remove protective film carefully and give residue time to soften with an appropriate product. Scraping without first testing the method can scratch glass or damage adjacent frames, seals, and coatings. On high-value surfaces, use clean microfiber cloths, a suitable glass cleaner, and distilled water for the final polish when mineral spotting is a concern.
Use light and angle to find defects
Clean glass when it's cool and out of direct sunlight. Heat can accelerate drying and leave streaks before the cleaner has been properly removed. On large panes, apply the solution evenly, use a squeegee in controlled overlapping passes, and wipe the blade between sections. Finish the edges and corners with a dry microfiber cloth.
A Miami Beach high-rise with floor-to-ceiling windows may need a carefully planned interior pass and a separate discussion about exterior access. Frameless office partitions in Doral require attention to edges, joints, and fingerprints, while a Coral Gables home may have skylights or older window assemblies that need gentler handling.
Practical rule: If a mark remains after normal cleaning, don't keep escalating pressure. Photograph it, identify whether it's paint, adhesive, coating damage, or a scratch, and refer restoration or repair to the appropriate trade.
Inspect glass in natural light from more than one direction. Film residue and fine smears can disappear under artificial lighting and reappear when the owner, tenant, or inspector walks through the space. This commercial window maintenance checklist can help property teams organize recurring glass and frame checks.
4. Kitchen and Bathroom Fixture Sanitization
New fixtures can look clean while still carrying installation dust, packaging residue, fingerprints, and fine particles around seams. Work through kitchens and bathrooms after rough dust removal, but before the final presentation. Clean cabinet exteriors and interiors, countertops, sinks, faucets, toilets, tubs, shower surfaces, hardware, switches, outlets, and appliance exteriors.
Use products suited to the material. Natural stone needs a non-acidic approach, chrome can scratch under abrasive pads, and cabinet finishes can react to solvents or excess moisture. Test an unseen area before treating a broad surface, especially on painted cabinetry, specialty hardware, and appliance panels.
Clean the details that affect use
Faucet aerators deserve attention because construction debris can restrict water flow. Check sink drains, overflow openings, shower tracks, cabinet corners, drawer runners, and the spaces behind appliances where dust and packaging often remain. In a new Aventura apartment, these small checks can distinguish a simple visual wipe-down from a usable handoff.
Kitchens need cleaners suitable for food-contact areas, followed by thorough rinsing where the product instructions require it. Bathrooms need careful sanitation of handles, switches, faucets, flush controls, and other touchpoints. Disinfectants should be used according to their label directions, and products shouldn't be mixed.
A luxury Miami Beach kitchen with European appliances may require manufacturer-specific instructions rather than a general degreaser. A Coral Gables bathroom renovation may contain natural stone near spa-style fixtures, where an acidic product could cause permanent damage. If an outlet, switch, light, or appliance appears damaged, stop cleaning that component and notify the electrician or responsible trade.
For a more detailed room reference, use this deep cleaning kitchen checklist. It can help extend the construction scope into cabinets, touchpoints, fixtures, and accessible appliance surfaces.
5. Wall and Ceiling Cleaning and Touch-Up Coordination
Walls and ceilings should be cleaned gently, especially when they have flat paint. Start with a soft-bristled brush or dry microfiber method that captures dust without burnishing the finish. Use damp spot cleaning only after testing it on an inconspicuous area, because excessive rubbing can create shiny patches, remove pigment, or change the appearance of a low-sheen surface.
Look for drywall dust along ceiling lines, paint flecks near trim, scuffs around doorways, marks behind hardware, and residue near switches or newly installed fixtures. High ceilings may require extension tools or access equipment, but cleaners shouldn't improvise with unstable ladders or unsafe work positions.
Separate cleaning from paint correction
Cleaning and touch-up painting belong in a coordinated sequence. Clean the wall first, let it dry, and then give the painter a clear list of locations requiring correction. Touch-up work performed before cleaning may be marked again by dust, wiping, or later subcontractor activity.
Document the paint color, sheen, and manufacturer information when it's available. Take photographs of visible damage or disputed marks for the owner, landlord, or property manager. A new Coral Gables home may need light drywall-dust removal followed by painter touch-ups, while a Doral office buildout may need broad wall preparation before the final paint crew returns.
Use products such as a melamine sponge cautiously. It can remove marks, but it can also alter the sheen on flat paint. Avoid aggressive scrubbing when the surface is vulnerable, and never assume a dark mark is dirt until the finish has been tested.
The handoff should record what cleaning resolved and what remains a construction defect, paint issue, sealant problem, or fixture repair. That distinction protects the cleaner from being held responsible for work that belongs to another trade.
6. Carpet Vacuuming and Stain Remediation
Carpet can conceal construction dust below the visible surface. Fine particles settle between fibers, along edges, beneath doors, and around newly installed trim. Start with a HEPA-filtered vacuum and move slowly in more than one direction so the machine can reach dust at varying fiber depths.
Standard vacuuming may not be appropriate for fine construction particulate if the machine recirculates air or lacks effective filtration. The CDC's renovation guidance supports HEPA vacuuming and damp cleaning as part of dust-control practice, while the checklist approach should also account for carpet edges, transitions, closets, and areas protected during construction.
Treat stains without creating new damage
Paint, adhesive, grout, and sealant marks need identification before treatment. A water-based residue, dried adhesive, and solvent-sensitive carpet backing shouldn't receive the same product. Test the chosen solution in a hidden area, use the least aggressive method that works, and avoid saturating the carpet or backing.
A new Aventura apartment building may have dust across broad carpeted corridors and units. A high-end Coral Gables home may require more conservative treatment because the carpet fibers, dye, or backing are specialized. Commercial carpet in a Doral office needs careful attention to traffic lanes and presentation, while a Miami short-term rental needs a documented condition check before guests arrive.
Treat stains while the residue is still identifiable. A rushed scrape or untested solvent can turn a removable mark into a repair issue.
After wet cleaning, keep the area out of service until it's adequately dry. Ventilation and HVAC operation should be coordinated with the dust-control plan, not used to blow moisture and particles through an occupied space. Photograph existing stains, wear, discoloration, or damage before treatment so the final report separates construction residue from pre-existing conditions.
7. HVAC System and Air Return Cleaning
A clean room can still have an indoor-air-quality problem if dust has entered the HVAC system. Air returns, supply grilles, filter housings, and accessible duct surfaces can collect fine particles during drywall work, cutting, sanding, and finishing. Post-construction cleaning should therefore protect the system early and verify it again before handoff.
Seal returns during the initial dust-removal phase when practical. Clean accessible grilles and registers with HEPA vacuuming and damp methods, replace filters according to the system and project requirements, and record the filter specification and installation date for the property manager. Don't place a filter in service unless it fits correctly and is compatible with the equipment.
Check the system before occupants arrive
Inspect visible ductwork, return cavities, and filter areas for debris or damage. If you see substantial contamination, moisture, damaged insulation, or material beyond the cleaning scope, involve a qualified HVAC contractor rather than pushing debris deeper into the system. HVAC cleaning and system cleaning aren't interchangeable, and ductwork may require specialized access and equipment.
A new Coral Gables home may need protection before the first system startup. A Doral office buildout may have multiple zones and extensive ceiling-mounted registers. An Aventura apartment complex may require coordination across centralized equipment, while a Miami Beach condo may use zone-controlled systems that need separate verification.
Run the HVAC system after the cleaning phase and confirm that air moves correctly, registers are secure, and no visible dust plume appears at startup. Establish a future filter-change process with the property manager. For specialist support, property teams can review these local duct cleaning experts, while confirming that any vendor is qualified for the specific system and location.
Fine dust can hide in vents and grilles after visible debris is gone. That's why air-register cleaning and a post-clean verification pass belong on the post-construction cleaning checklist, particularly where occupants include children, pets, or people with asthma.
8. Trash Removal, Recycling Coordination, Final Inspection and Quality Assurance
The final stage combines waste control with proof that the property is ready for handoff. Coordinate removal timing with the construction crew so packaging, offcuts, and debris aren't placed back into cleaned rooms. Separate cardboard, plastic, metal, and other recyclable materials where local disposal arrangements allow, and keep paint, adhesive, sealant, and other potentially regulated materials identified for appropriate handling.
Cleaners shouldn't guess how to dispose of hazardous substances. Ask the contractor, waste vendor, or applicable local authority for direction, and use licensed, insured waste services when the volume or material requires specialized handling. Bulk pickup may need advance scheduling, particularly for a commercial buildout or multi-unit completion.
Make the inspection repeatable
Use the same route every time. Enter each room, look high and low, check behind doors and inside cabinets, inspect corners and ledges, confirm that fixtures and vents are clean, and review floors and glass under natural light. Mark each item complete only after the surface is dry and visible residue has been removed.
A Coral Gables home may need packaging and drywall debris removed before the owner's walkthrough. A Doral office needs handoff records that identify cleaned areas and unresolved trade work. An Aventura apartment project benefits from unit-by-unit consistency, while a Miami Beach short-term rental needs photographs that confirm readiness before a guest arrives.
Photograph before and after conditions, especially around paint, flooring, glass, fixtures, and any unresolved defect. Give the client a digital report that records completed work, exceptions, access limitations, and recommended follow-up. The Canes Cleaners post-construction cleaning service can be used as a reference point when defining a scope for a finished property.
8-Point Post-Construction Cleaning Comparison
| Service | 🔄 Complexity (implementation) | ⚡ Resource requirements | 📊 Expected outcomes (impact) | 💡 Ideal use cases | ⭐ Key advantages |
|---|---|---|---|---|---|
| Dust and Debris Removal from All Surfaces | High, systematic top-to-bottom, may need multiple passes | HEPA vacuums, microfiber, containment materials, skilled labor | Significantly reduced airborne particulates; protected HVAC and cleaner surfaces | Post-drywall/new construction; pre-flooring or painting | ⭐⭐⭐⭐⭐ Eliminates airborne hazards; prevents resettlement |
| Floor and Hard Surface Restoration | Medium–High, material-specific protocols, care to avoid damage | Specialty cleaners, polishers, test kits, trained technicians | Restored finish, removed residues (adhesive/paint), improved safety | Luxury finishes, tile/stone installs, polished concrete | ⭐⭐⭐⭐ Reveals true finish; prevents long-term surface damage |
| Window, Glass, and Mirror Cleaning | Medium, exterior work weather-dependent; safety for heights | Squeegees, specialized removers, ladders/scaffolding, safety gear | Streak-free transparency; restored light and views; removed film/overspray | High-glaze façades, floor-to-ceiling glass, premium properties | ⭐⭐⭐⭐ Restores clarity and curb appeal; improves natural light |
| Kitchen and Bathroom Fixture Sanitization | Medium, material-sensitive, electrical safety needed | Non-toxic cleaners, disinfectants, soft tools, appliance-safe agents | Sanitary touchpoints, functional fixtures, preserved finishes | New appliance installs, hospitality units, move-in readiness | ⭐⭐⭐⭐ Ensures sanitation and proper function; protects finishes |
| Wall and Ceiling Cleaning & Touch-Up Coordination | Medium, gentle methods and painter coordination required | Soft brushes, spot cleaners, documentation tools, painter liaison | Cleaned surfaces ready for touch-ups; fewer visible defects at handoff | Pre-paint or final presentation in residential/commercial sites | ⭐⭐⭐ Prepares surfaces for accurate paint touch-ups; reduces rework |
| Carpet Vacuuming and Stain Remediation | Medium, HEPA vacuuming and targeted stain treatment | HEPA vacuums, steam/spot cleaners, stain chemicals, drying equipment | Reduced allergens, restored appearance, odor removal | Carpeted units after construction, rentals, hospitality spaces | ⭐⭐⭐⭐ Removes embedded dust and stains; improves indoor air |
| HVAC System and Air Return Cleaning | Medium–High, system knowledge and potential tech referral | HEPA filters, vent tools, sealants, HVAC inspection access | Protected HVAC, improved IAQ, reduced system strain | Centralized or zone HVAC in new builds or remodels | ⭐⭐⭐⭐ Prevents contamination and costly HVAC damage |
| Trash Removal, Recycling Coordination, Final Inspection & QA | Medium, logistical coordination and documentation | Waste containers, hazardous disposal contracts, QA forms, photography | Site cleared of debris, regulatory-compliant disposal, documented handoff | End-of-project cleanups, multi-unit completions, tenant turnovers | ⭐⭐⭐⭐ Ensures move-in readiness; documents completion and compliance |
Make the Handoff Inspection-Proof
A completed cleaning job becomes valuable at handoff only when another person can verify it. Walk each room after surfaces have dried, preferably in natural light. Check that vents and registers are free of visible dust, fixtures are clean and functional, floors have no remaining haze or adhesive, and glass is clear from more than one viewing angle.
Use the inspection route consistently. Start at the entry, move around the room, check high surfaces before low ones, open cabinets and drawers, look behind doors, inspect corners and baseboards, and finish at the floor. In kitchens and bathrooms, test water flow, review faucet aerators, check drains, and inspect touchpoints. If the HVAC system runs during verification, watch for visible dust release at registers and returns.
The final pass should also confirm that construction packaging, loose debris, protective film, labels, and waste have left the property. Photograph any unresolved paint, flooring, sealant, fixture, or wall issue instead of trying to disguise it with more cleaning. A good report distinguishes between a cleaning omission and a repair that belongs to the painter, installer, electrician, plumber, HVAC contractor, or builder.
Safety limits remain part of the handoff. Cleaning teams shouldn't handle suspected hazardous materials, electrical defects, unstable debris, unsafe heights, or fragile ceiling materials outside their training and scope. Stop, isolate the area when appropriate, and coordinate with a qualified trade or responsible site manager.
Use this checklist for a self-managed cleanup when the site is safe, the materials are understood, and the time is available for repeated inspection. If you're preparing a home, apartment, office, short-term rental, or other property in Miami-Dade, request a post-construction scope from Canes Cleaners based on the property, rooms, access conditions, construction residue, and handoff requirements.
Canes Cleaners provides post-construction cleaning for homes, apartments, offices, short-term rentals, and other properties across Miami-Dade, with scopes that can be adjusted to specific rooms and priorities. Visit Canes Cleaners to review the service options, customize the cleanup, and book online.