
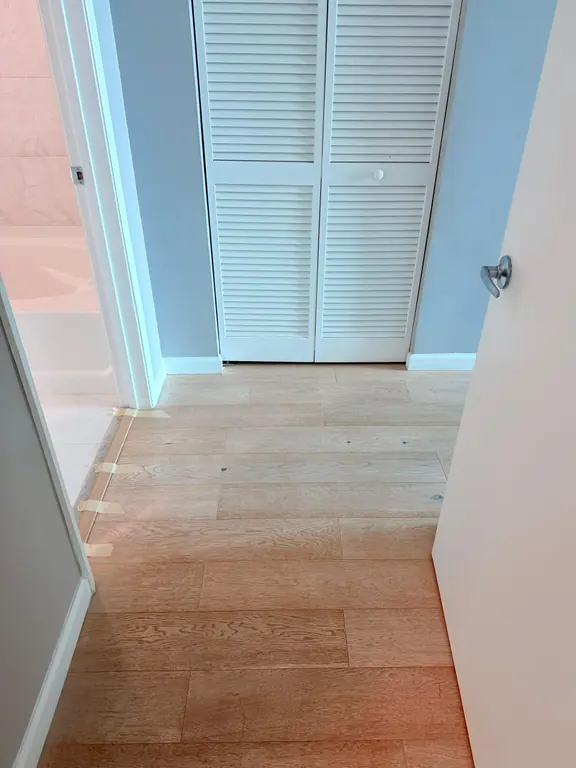
You've lifted the old tile, hauled away the broken pieces, and expected the concrete or wood beneath to be ready for the next floor. Instead, you're looking at ridges of gray mortar, brown adhesive, or a black tar-like film that seems welded to the subfloor. The instinct is to reach for the most aggressive scraper or grinder available, but that can create a bigger problem than the residue itself.
The right removal method depends on three things: adhesive type, substrate, and the flooring going back down. Sometimes a sound, thin layer can remain. Sometimes even a small amount of residue can cause bond failure, unevenness, or contamination. Older black adhesive also introduces a safety question that must be answered before you disturb it.
Table of Contents
- Identifying Your Floor Tile Adhesive Type
- Deciding Whether Full Removal Is Necessary
- Mechanical Removal Methods and Tools
- Chemical Removers and Heat Gun Techniques
- Asbestos Precautions and Dust Containment
- Preparing the Subfloor for New Flooring
- When to Call Professionals for Adhesive Removal
Identifying Your Floor Tile Adhesive Type
Before choosing a scraper, grinder, or remover, identify what is holding the old tile down. Thinset mortar is cement-based, hard, and usually gray or off-white. Its trowel ridges feel like stone and resist a handheld scraper. On concrete, a stiff blade may chip it, but firmly bonded areas generally need controlled mechanical removal. A thin, stable layer may still be acceptable under some new flooring systems, so its type alone does not decide whether it must come out.
Mastic is an organic adhesive that may be tan, brown, or dark. Depending on age and moisture exposure, it can feel gummy, brittle, or slightly tacky. Water or heat may soften it for scraping, but softened adhesive can interfere with a new installation, particularly where moisture or direct bonding is involved.
Black, tar-like residue requires a separate safety decision. Cutback adhesive, often found beneath older resilient flooring, can smear when warm and may contain asbestos. The Scrap Reuse and Construction Team guidance on solvent removal explains that sanding is prohibited where asbestos-containing material may be present, while wet scraping and wet HEPA vacuuming are the approved approach.
Test a small area first
Work in an inconspicuous spot and press a sharp putty knife into the residue.
- Thinset: It chips, powders, or breaks into hard fragments.
- Mastic: The blade may gum up, lift flakes, or reveal a softer layer.
- Cutback: The residue smears or stretches, especially after warming.
The substrate changes the risk. Concrete generally tolerates controlled scraping and grinding better than plywood. Cement backer board can crumble under excessive force, while plywood can be gouged and weakened. Clean nearby surfaces only after identifying the residue. This guide to how to clean ceramic tiles can help remove settled dust and fragments without spreading them.
Practical rule: Test the adhesive and substrate together. A method suitable for thinset over concrete may damage plywood or spread black cutback across a larger area.
Deciding Whether Full Removal Is Necessary
Full removal isn't automatically the correct starting point. The decision should follow the flooring manufacturer's requirements and the condition of the surface, not a blanket rule that every dark mark must disappear.
Start with the new flooring. A rigid tile system installed over concrete may tolerate a thin, firmly bonded layer of old thinset if the surface is flat, clean, and free of loose ridges. A floating LVP or laminate floor is less forgiving of bumps because imperfections can telegraph through the finished floor. Flexible sheet goods and systems that rely on direct adhesive contact also need a surface that won't interfere with bonding.
Make the decision in three checks
First, check the residue's bond. Scrape at the edges and tap the surrounding surface. Loose, hollow, flaking, or raised areas need to come out. A residue layer that is thin, stable, and well bonded may be suitable for profiling or encapsulation, depending on the next system.
Second, inspect the substrate. Concrete gives you more room for controlled mechanical preparation. Wood needs a lighter touch because deep gouges can affect the panel's integrity and create visible defects beneath resilient flooring. Backer board may be replaceable if damaged, but grinding it aggressively is rarely a sensible shortcut.
Third, check moisture and warranty requirements. A concrete slab with moisture problems can undermine a new installation regardless of how clean it looks. A calcium chloride test or the flooring system's required moisture-testing method can reveal whether a vapor-control product is needed. The new flooring manufacturer may also specify whether old adhesive must be removed, mechanically profiled, or covered with an approved underlayment.
Mastic and cutback require particular restraint. Moisture from thinset, patching products, or self-leveling compounds can soften incompatible residues and contribute to bond failure. If the adhesive is unidentified, black, or reactive during testing, stop before committing to partial removal.
Mechanical Removal Methods and Tools
Mechanical removal is usually the practical choice for hard thinset, thick ridges, and firmly bonded residue, but the tool must suit the adhesive and substrate. On a small concrete area, start with a sharp floor scraper or masonry chisel. Lift high spots rather than driving the tool into the slab. If the residue is stable and the next flooring system allows an approved covering or profile, full removal may create unnecessary damage and dust.
For open areas, a long-handled floor scraper with a carbide blade gives good control. Keep the blade low and shave ridges instead of striking downward. An oscillating multi-tool with a rigid scraper blade handles edges, cabinet lines, and door jambs where a larger machine cannot sit flat.
Grinding removes stubborn thinset faster, though it produces substantial dust and sharp debris. The RUBI guide to tile-adhesive removal also emphasizes protective equipment and dust control for mechanical work. Use a diamond cup wheel only with a fitted shroud and a HEPA-rated dust extractor. Do not dry-grind suspected cutback. On wood, a belt sander with coarse paper allows more control than aggressive grinding, while concrete can tolerate heavier equipment.
Match the tool to the adhesive and substrate
| Tool | Best For | Working Pace | Subfloor Compatibility |
|---|---|---|---|
| Carbide floor scraper | Thinset ridges and loose mastic | Depends on bond and thickness | Concrete, cautious use on backer board |
| Oscillating multi-tool | Edges, corners, and detail work | Small-area work | Concrete, plywood, and backer board with light pressure |
| Diamond cup grinder with shroud | Hardened thinset and high spots | Fast, but dust-intensive | Concrete only unless the manufacturer allows otherwise |
| Coarse abrasive floor machine | Thin mastic residue and surface scarification | Open areas | Concrete, with careful dust collection |
| Belt sander with coarse paper | Controlled adhesive removal on wood | Slower detail work | Plywood, without aggressive grinding |
| Rotary hammer with scraper attachment | Thick bonded mortar and demolition residue | Heavy buildup | Concrete, not delicate wood panels |
Mechanical removal becomes risky when pressure replaces control. A blunt blade makes the operator push harder, which can gouge concrete, damage wood panels, or tear backer board. Stop and change tools when the residue changes from brittle to rubbery instead of forcing the same method across the whole floor.
Wear impact-rated eye protection, hearing protection, gloves, and a properly selected respirator. Knee pads help during hand scraping, and a disposable cover layer keeps fine residue off clothing. A quick guide for Southwest Michigan homeowners provides another practical overview of matching tile-removal tools to the surface and work area. Vacuum frequently. Dry sweeping puts settled dust back into the air.
Chemical Removers and Heat Gun Techniques
A floor can look ready after scraping and still carry a thin, sticky film. Before reaching for chemicals or heat, check the adhesive type, substrate, and planned flooring system. A remover may suit soft mastic on concrete, yet create bonding problems under new adhesive. On plywood or backer board, aggressive softening can damage the surface faster than careful hand work.
Chemical removers work best on softer mastic and selected bitumen-based residues. Citrus formulas are often selected for lower odor, soy-based gels can remain on uneven or vertical residue, and stronger solvent strippers may soften petroleum-based adhesive. Read the product label for application thickness, ventilation, substrate compatibility, dwell time, and cleanup. Depending on the formulation and buildup, the product may need to sit from part of an hour to several hours.
Chemical and heat methods compared
| Factor | Chemical Removers | Heat Gun Methods |
|---|---|---|
| Best use | Mastic, soft residue, and selected cutback films | Small stubborn areas of mastic or bitumen |
| Working rhythm | Apply, wait for the stated dwell period, scrape, then clean | Warm a small area, move the gun continuously, and scrape |
| Main advantage | Can soften residue without aggressive impact | Avoids adding chemical residue to the floor |
| Main drawback | Leftover stripper can interfere with new bonding | Slow process with fire and fume hazards |
| Ventilation | Strong ventilation is required | Ventilation is still required, especially with old adhesive |
| Protective equipment | Chemical-resistant gloves, eye protection, and the respirator specified by the product | Heat-resistant gloves, eye protection, and respiratory protection appropriate to the material |
| Final preparation | Remove the softened slurry, rinse or clean as directed, and dry fully | Remove softened residue and inspect for scorching or remaining film |
Do not pour solvent onto unidentified black adhesive. Chemical softening can spread the residue and make containment harder. Heat may release unpleasant or hazardous fumes from older products, so keep the gun moving and never use an open flame. A torch is unsafe on wood because it can scorch the substrate or ignite nearby materials.
Dwell time determines whether the remover works. Too little leaves a sticky skin that still demands hard scraping. Too much product can create a wet slurry, and every trace must be removed before primer or flooring adhesive is applied. Rinse or clean the surface as directed, then let it dry completely. This final step matters because chemical residue can interfere with the bond of the next flooring layer.
Asbestos Precautions and Dust Containment
Black cutback in an older building should be treated as potentially hazardous until testing identifies the material. Floor age alone proves nothing, yet older resilient flooring and mastics can contain asbestos. Before deciding whether removal is needed for the next flooring system, arrange testing. Do not sand, grind, dry scrape, or heat suspicious residue.
Have a qualified testing service send a representative sample to an accredited laboratory. If asbestos is confirmed, or the material is presumed to contain it, this is no longer ordinary adhesive removal. Local environmental and workplace-safety authorities can explain the applicable licensing, containment, and disposal requirements before work begins.
Wet removal and controlled cleanup
Where asbestos precautions apply, flooring and its backing should not be sanded. Wet scraping and wet HEPA vacuuming are used for residual adhesive when asbestos-containing mastic may be present.
Keep the material damp, work with a stiff blade, and collect slurry with a HEPA vacuum. Place waste in sealed, labeled containers. Wet methods reduce airborne dust, but they do not replace respiratory protection, restricted access, controlled cleanup, or compliant disposal.
Seal door gaps and HVAC openings to keep residue out of occupied rooms. Set up plastic containment appropriate to the work, keep people and pets outside the area, and clean tools before removing them. A household vacuum is not suitable for suspected asbestos debris.
Stop work immediately if black adhesive appears beneath older resilient flooring and its contents have not been established.
P100 protection, disposable coveralls, gloves, and controlled waste handling may be required. Equipment does not qualify an untrained homeowner to perform abatement work. Guidance on why house cleaning improves indoor air quality applies to ordinary dust control. Asbestos requires a separate, regulated response.
Preparing the Subfloor for New Flooring
A scraped floor isn't necessarily an installation-ready floor. The finished surface must be clean, flat, dry, and structurally sound, with no loose residue that can interfere with primer, patch, thinset, or flooring adhesive.
Start by removing loose fragments and vacuuming the entire area with a HEPA-filtered machine. Pay attention to wall lines, pores in concrete, joints in plywood, and the spaces around door casings. If a chemical remover was used, follow its cleanup instructions precisely. A solvent wipe or compatible detergent wash may be appropriate, but never assume that a strong cleaner is safe for every substrate or flooring system.
Correct defects before installing
Use a straightedge to locate ridges, depressions, and transitions. Small isolated defects may respond to a compatible patching mortar, while broader unevenness may require a self-leveling underlayment. Read the product instructions for primer, depth, expansion joints, edge dams, curing, and moisture limitations. A patch applied over oily residue or unprimed concrete can debond even when the surface initially looks smooth.
Concrete also needs moisture evaluation before resilient flooring, wood products, or moisture-sensitive adhesives are installed. Use the testing method required by the flooring and adhesive manufacturers, then address excessive moisture with an approved vapor-retarding primer or moisture-control system. Don't seal a damp slab with an incompatible product and hope the floor will correct the problem.
For wood subfloors, replace or secure soft and moving sections, fasten loose panels, and sand high spots carefully. Avoid creating low areas while chasing every dark mark. The Australian surface-preparation guidance summarized by Mineral Tiles reflects the broader industry position that existing coverings and adhesives should be removed by mechanical means before leveling compounds are installed.
Use the embedded video as a visual reference for the removal and preparation sequence, but follow the installation instructions for your specific flooring system.
Before installation, run your hand across the floor, inspect it under strong side lighting, vacuum again, and confirm that the surface is dry. If the transition or leveling work is beyond your experience, a licensed tiler in Melbourne can provide a useful benchmark for professional substrate preparation and installation practice.
When to Call Professionals for Adhesive Removal
Call a professional when the material is suspected asbestos, the substrate is failing, or the removal method requires equipment and containment you can't operate safely. Black cutback adhesive in an older home is the clearest warning. Testing should come before scraping, and a positive result should be handled by a qualified asbestos professional under the rules that apply in your jurisdiction.
A flooring contractor is also the sensible choice when the adhesive is epoxy-like, the slab is severely uneven, or mechanical preparation risks exposing structural damage. Cracking, delamination, crumbling concrete, widespread dampness, and soft wood panels aren't cosmetic issues. Removing adhesive over a failing substrate only reveals a problem that still needs repair.
Vet the contractor, not just the quote
Ask how the contractor will identify the adhesive, control dust, protect occupied areas, and dispose of waste. For asbestos-related work, request evidence of applicable licensing or certification and written disposal documentation. For ordinary grinding, confirm that the equipment includes a shroud and HEPA dust extraction rather than relying on a shop vacuum.
Get the scope in writing. It should state whether the price includes adhesive removal, edge work, dust control, patching, moisture testing, primer, waste handling, and final cleanup. Be cautious of any proposal that promises a perfectly bare substrate without first inspecting the adhesive and subfloor.
After the trades leave, fine particulate can remain in baseboards, vents, cabinets, and adjacent rooms. For homes and commercial spaces in Miami-Dade County, Canes Cleaners' post-construction cleaning service can be scoped around renovation dust, residues, and job-site debris after the removal work is complete. That cleaning supports the final handoff, but it isn't a substitute for asbestos abatement or regulated hazardous-waste handling.
If adhesive removal has left dust, residue, or construction debris across your Miami-Dade property, Canes Cleaners can tailor a post-construction cleanup to the rooms and surfaces that need attention. Visit Canes Cleaners to review service options and book a cleaning that gets the space ready for the next flooring installation.