
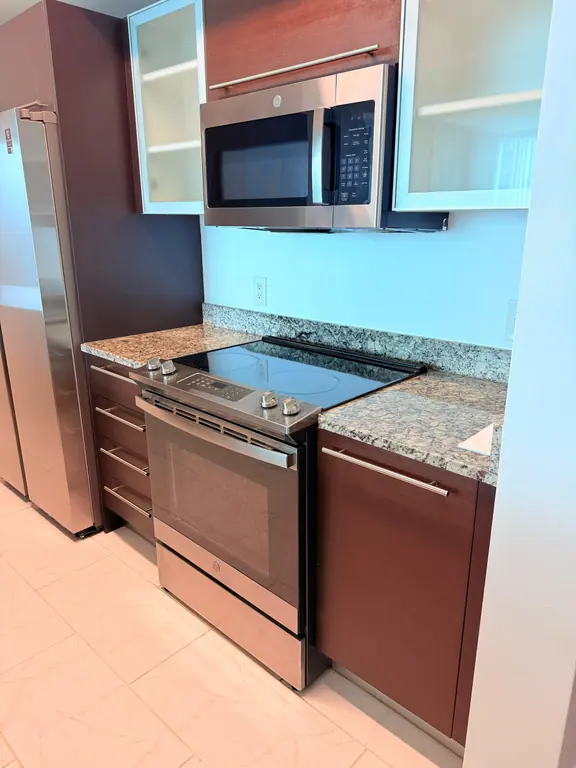
A deep-clean result depends as much on sequence as effort. The popular advice to “start wherever the mess looks worst” usually creates rework, because dust, grease, and crumbs fall onto areas you've already cleaned. A better deep cleaning kitchen checklist follows a top-to-bottom, dry-to-wet workflow: clear the room, ventilate it, gather non-toxic supplies, identify sensitive materials, clean high and hidden areas first, then finish with floors and touchpoints.
This approach also separates routine cleaning from deep cleaning. A daily wipe can remove visible spills, but it won't reach cabinet interiors, appliance edges, hood filters, grout, door seals, or the underside of fixtures. Food-surface guidance from Virginia Tech's cleaning and sanitizing resource supports a key distinction, remove soil with water and detergent first, then sanitize or disinfect when the surface and situation call for it.
The 10-task checklist below starts with dry, high-level work and moves through appliances, storage, counters, the sink, and floors. It also includes material-safe methods, eco-friendly product notes, dwell-time guidance, and a clear point to stop or call a specialist. Canes Cleaners uses eco-friendly products and customizable deep-clean scopes for homes and rentals across Miami-Dade. For another sequence reference, compare this workflow with the Facility Management Insights kitchen cleaning guide.
Table of Contents
- 1. Degreasing and Cleaning Stovetop and Range
- 2. Oven Interior Deep Cleaning and Degreasing
- 3. Refrigerator Interior and Exterior Deep Clean
- 4. Cabinet Interior and Hardware Cleaning
- 5. Microwave Interior Sanitization and Degreasing
- 6. Countertop Deep Cleaning and Sealing Assessment
- 7. Sink and Faucet Cleaning, Polishing, and Hardware Inspection
- 8. Floor Mopping, Grout Cleaning, and Baseboard Detailing
- 9. Light Fixtures, Ceiling, and Ventilation Hood Cleaning
- 10. Backsplash and Wall Surface Deep Cleaning
- 10-Point Deep Kitchen Cleaning Checklist Comparison
- Finish With a Repeatable Kitchen Reset
1. Degreasing and Cleaning Stovetop and Range
Grease near the range is rarely limited to the cooking surface. It settles on burner grates, control knobs, the front panel, the underside of upper cabinets, and the seam where the appliance meets the counter. A deep clean removes the film before it attracts dust, holds odors, or turns into carbonized residue.
Start by turning the appliance off and letting it cool completely. Remove gas grates, burner caps, drip pans, and knobs when the design allows it. Brush away loose crumbs before applying a small amount of eco-friendly degreaser. Give the product five to 10 minutes of dwell time, following its label, then work with a non-abrasive pad or microfiber cloth.
For stainless steel, wipe with the grain and avoid steel wool. Glass cooktops need a scraper and cleaner specifically approved for that finish, while painted or enamel surfaces can discolor under aggressive abrasives. A practical reference for breaking down stubborn residue is this guide to cleaning stove grease.
Practical rule: Degreaser needs contact time, not a heavier spray. More product can leave residue or damage a finish, while the correct dwell time loosens buildup with less scrubbing.
Rinse removable parts thoroughly and dry them before replacing them. Stop if the manual prohibits a cleaner, if a coating is lifting, or if grease has entered electrical controls. Persistent smoke, damaged burners, or a range hood that can't exhaust properly deserves appliance or ventilation service rather than more cleaning.
2. Oven Interior Deep Cleaning and Degreasing
Oven residue often hides in the ceiling, corners, door edges, and behind the rack supports. A quick wipe of the bottom may improve appearance, but baked-on grease remains where heat repeatedly carbonizes it. Schedule this task when the oven has been unused long enough to cool completely.
Remove the racks and soak them separately in warm water with a small amount of mild detergent. Protect the floor and adjacent cabinets before applying an eco-friendly degreaser to the interior. On difficult deposits, allow 15 to 30 minutes of dwell time, then lift softened residue with a non-scratch pad. Don't flood heating elements, vents, door seals, or control panels.
Steam can loosen splatter without relying on harsh oven chemicals, but it isn't a substitute for removing thick carbon. Use a damp cloth to collect residue rather than pushing it into seams. The natural oven cleaning guide from Canes Cleaners provides a material-conscious approach, especially for households avoiding strong fumes.
The glass door may need separate passes. Degrease first, then use a suitable glass cleaner, and check whether the inner glass panel is designed to be removed before attempting to clean between panes.
If deposits remain hard after repeated dwell-and-lift cycles, don't use excessive force. A damaged heating element, cracked glass, failing seal, or self-cleaning oven with a malfunctioning lock should be handled by an appliance technician.
3. Refrigerator Interior and Exterior Deep Clean
Empty the refrigerator before you clean it. Working around food leaves spills hidden under containers and makes it difficult to inspect shelves, drawers, and door seals. Place perishable items somewhere cold, discard questionable food, and bring removable glass parts toward room temperature before washing them.
Wash shelves and drawers separately with warm, slightly soapy water. Wipe interior walls, the ceiling, the floor, and the channels around drawers with a food-contact-safe cleaner. Use a separate cloth for the refrigerator interior, and finish with a clean damp cloth so cleaner residue doesn't remain near food.
Door gaskets need close attention. Work a damp microfiber cloth into the folds, then dry the seal completely. A mild cleaner is usually sufficient for routine residue, but visible mold, a torn gasket, or persistent odor may indicate a maintenance problem rather than a cleaning problem.
Clean the exterior from top to bottom. The top and sides collect dust and cooking film, while handles deserve a dedicated pass because people touch them repeatedly. If you need to access rear coils, follow the appliance manual and disconnect power as directed. Don't pull a heavy refrigerator aggressively or bend tubing.
Use the material's finish as your guide. Stainless steel should be wiped with the grain, while coated surfaces may require only mild detergent. Stop if a shelf is cracked, a seal no longer grips, or coils are inaccessible without dismantling the appliance. The Canes Cleaners refrigerator cleaning guide offers a useful reference for separating food-safe interior work from exterior degreasing.
4. Cabinet Interior and Hardware Cleaning
Cabinet cleaning becomes more effective when you empty one section completely instead of wiping around stored items. Remove dishes, containers, shelf liners, and crumbs, then inspect the shelf surface, corners, hinges, and back panel. This also gives you a chance to identify leaks, swollen wood, or pest evidence before you put anything back.
Begin at the highest cabinet and work downward. Use warm water with a small amount of mild detergent on sealed wood, laminate, and painted surfaces unless the manufacturer specifies another method. Grease near the range may need an eco-friendly degreaser, but test it in an inconspicuous area first. Apply cleaner to the cloth rather than saturating unfinished edges.
Hardware needs a separate pass because handles and knobs collect hand oils and cooking residue. Remove what you can safely remove, wash or wipe it according to its finish, and dry it before reinstalling. Avoid soaking hinges, soft-close mechanisms, or electronics.
Cabinets should feel clean, not wet. Excess moisture can swell engineered wood, lift veneer, and leave odor inside enclosed storage.
Replace shelf liners only after the cabinet is completely dry. Don't automatically discard every item, but remove expired or damaged packaging and return frequently used pieces where they're easy to reach. If you find swollen panels, loose hinges, persistent mildew, or a leak under the sink, stop cleaning that area and arrange carpentry, plumbing, or remediation work.
5. Microwave Interior Sanitization and Degreasing
The microwave is small, but its interior can hold concentrated splatter. Hardened food on the ceiling and side walls becomes easier to remove when steam softens it first. Unplug the appliance before cleaning areas near vents, and never spray directly into controls or openings.
Place a microwave-safe bowl of water inside and heat it until the chamber is visibly steamy. Let the steam work with the door closed for several minutes, then remove the bowl carefully. Take out the turntable and roller ring, wash them separately, and wipe the chamber with a non-abrasive cloth.
Use an eco-friendly degreaser only when water and mild detergent aren't enough, and keep it away from ventilation slots. The aim is to loosen and collect residue, not to push liquid behind the interior panels. For the exterior, spray the cloth instead of the appliance, especially around the keypad and door seams.
Material matters inside, too. Don't use abrasive pads that scratch the coating, and don't use metal tools to chip residue. A scratched or flaking interior can become difficult to clean safely and may justify appliance replacement.
Clean the handle and control panel as high-touch areas. If food residue has entered the door seal, fan opening, or electrical housing, stop and seek appliance service. Odor that remains after thorough cleaning can signal residue behind the cavity or a mechanical issue.
6. Countertop Deep Cleaning and Sealing Assessment
A countertop can look clean while grease and crumbs remain beneath appliances, along seams, and where the backsplash meets the worktop. Remove everything first. Vacuum or brush away dry debris, then wash with warm water and a material-compatible detergent.
Identify the surface before selecting a product. Natural stone, such as granite or marble, generally needs a pH-neutral cleaner. Laminate, quartz, and butcher block require different care. Acidic products may etch or dull some stone finishes, while excess water can damage seams or wood.
Remove soil with detergent before applying sanitizer or disinfectant. Sanitizing cannot work properly through grease, and disinfectant does not replace physical cleaning. Use a separate sanitizing step only where the surface and product instructions permit it.
Surface-safety check: If the material is unknown, choose the mildest approved method and test it in a hidden area first.
Let the surface dry fully before assessing its condition. Water darkening, rough patches, stains that remain, or areas that absorb moisture can indicate a sealing or repair problem. Stop rather than applying a sealer solely for shine. Follow the countertop or stone manufacturer's instructions, and consult this 2026 laminate maintenance advice for laminate care. If damage persists after appropriate cleaning, arrange professional assessment instead of escalating to harsher chemicals.
7. Sink and Faucet Cleaning, Polishing, and Hardware Inspection
Leave the sink until the end of the wet cleaning sequence. It functions as the work area for rinsing cloths, washing removable parts, and collecting dirty water, so cleaning it earlier often means cleaning it twice. This order is also recommended in the practical kitchen deep-clean checklist from Members 1st.
The sink deserves special attention because it combines food residue, moisture, dishwashing, and frequent hand contact. A 2026 kitchen hygiene study found that 91.4% of household kitchen sinks weren't thoroughly cleaned, and a separate study of 100 Philadelphia households found fecal coliforms in 44% of kitchens and E. coli in 15%. The study also identified sponges and dishcloths as contamination reservoirs, so don't finish the sink with a used, damp cloth. The peer-reviewed kitchen hygiene study provides the evidence behind this priority.
Scrub the basin with a material-safe cleaner and non-abrasive pad. Use a soft brush around the drain, overflow opening, faucet base, handles, and underside of the rim. For mineral deposits, remove the aerator when possible and soak it in vinegar only if the fixture manufacturer permits it. Vinegar can damage some finishes and natural stone.
Choose stainless steel polish for stainless steel, and a porcelain-compatible cleaner for porcelain. Sanitize after soil removal, following the product label for contact time. Avoid pouring bleach into a drain unless the product and plumbing guidance specifically allow it, and never mix bleach with acids or ammonia.
Stop if the faucet leaks, the drain backs up, the basin coating is damaged, or an odor returns quickly after cleaning. Those conditions need plumbing or fixture repair, not stronger chemicals. If the kitchen uses a reverse-osmosis system, inspect it according to the manufacturer's maintenance instructions, such as those described in this kitchen RO system guide.
8. Floor Mopping, Grout Cleaning, and Baseboard Detailing
Floors come after overhead, appliance, cabinet, counter, backsplash, and sink work. Otherwise, falling dust and rinse water undo the final appearance. Start by vacuuming or sweeping thoroughly, including corners, toe-kicks, and accessible areas beneath appliances.
Treat grout separately from the flooring field. Apply a compatible degreaser to stained lines, allow the label-directed dwell time, and scrub with a narrow grout brush. Don't use an aggressive acid on unknown tile or grout, and don't assume a natural-stone floor can tolerate the same product as ceramic tile.
The floor cleaner must match the material. Tile, sealed stone, laminate, and vinyl each have different water and chemical tolerances. Use enough solution to lift soil, not enough to leave standing water. A microfiber mop helps collect residue, while a final dry pass reduces slip risk.
Baseboards often need a vacuum nozzle before wiping. Use a damp cloth and mild degreaser where cooking film has settled, taking care around painted edges and caulk lines.
Stop-or-escalate decision: If grout is crumbling, tiles move, flooring is swollen, or water enters a seam, stop scrubbing and arrange flooring or moisture inspection.
Allow the floor to dry before returning mats, bins, and movable appliances. If grout remains discolored after cleaning, it may need resealing, recoloring, or replacement rather than repeated chemical treatment.
9. Light Fixtures, Ceiling, and Ventilation Hood Cleaning
Overhead cleaning belongs near the start of the sequence, before counters and floors. Switch off lights, let bulbs cool, and use a stable ladder with someone nearby when height access is necessary. Never stand on a countertop or position a ladder where it may shift.
Remove washable light covers and clean them separately in warm water with a small amount of mild soap. Dry them completely before refitting. Wipe fixture bodies and bulbs with a barely damp cloth, keeping moisture away from sockets and electrical connections. For ceilings and upper walls, begin with a dry microfiber duster. If cooking film remains, follow with a lightly damp cloth and mild cleaner, stopping if paint softens or discolors.
Inspect the ventilation hood rather than cleaning only its visible face. If the manufacturer allows removal, take out the metal filters, soak them in a suitable degreaser for the label-directed dwell time, scrub gently, rinse thoroughly, and dry fully. Wipe the hood exterior and accessible interior surfaces, keeping liquid away from the motor, controls, and wiring. Check the exhaust opening for visible blockage.
The Safefood survey's gap between confidence and consistent practice supports giving hidden and frequently touched areas the same attention as visibly dirty ones. Clean cloths, brushes, and other tools after use so they do not transfer grease or contamination.
Replace filters that are damaged, saturated, or no longer clean effectively. Stop and arrange professional ventilation or duct cleaning if grease has accumulated inside ductwork, odors persist, extraction is poor, or a fire risk is suspected.
10. Backsplash and Wall Surface Deep Cleaning
Backsplashes show cooking residue quickly, but painted walls and decorative surfaces can be damaged just as quickly by over-cleaning. Identify whether the surface is ceramic tile, natural stone, stainless steel, glass, laminate, or painted drywall before choosing a product.
Work from the top down. Dust first, then pre-treat grease with an appropriate eco-friendly degreaser and allow it to dwell according to the label. Wipe with a soft cloth, rinse where the material allows it, and dry to prevent streaks. Tile grout may need a narrow brush, but don't use abrasive tools that remove grout or scratch glaze.
For painted walls, use minimal moisture and gentle detergent. Test behind an appliance because flat paint can burnish or lose color. Stainless steel needs a non-abrasive cleaner and grain-direction wiping, while natural stone needs a pH-neutral product. Glass may show streaks if the cloth is saturated with grease.
Pay particular attention to the area behind the range, the strip under upper cabinets, corners beside the sink, and the edge where the backsplash meets the counter. These areas receive repeated splashes but are easy to miss during routine cleaning.
Sanitize food-contact-adjacent surfaces only after removing soil, and follow the product's required contact time. Don't treat a wall stain as a cleaning failure if paint, grout, or sealant has permanently changed. Stop when the finish begins to dull, lift, or discolor, then consult a restoration or painting professional.
10-Point Deep Kitchen Cleaning Checklist Comparison
| Task | 🔄 Implementation complexity | ⚡ Resources & speed | ⭐ Expected outcomes | 💡 Ideal use cases | 📊 Key advantages |
|---|---|---|---|---|---|
| Degreasing and Cleaning Stovetop and Range | Medium, disassembly, material-specific care | Moderate tools + eco-degreaser; 30–120+ min | ⭐⭐⭐⭐, restores performance & safety | Rental turnover, heavy-use kitchens, pre-sale prep | Removes fire hazards, improves efficiency, restores finish |
| Oven Interior Deep Cleaning and Degreasing | High, labor‑intensive, ventilation & safety needs | Specialized solutions/equipment; 1–3+ hours | ⭐⭐⭐⭐⭐, removes baked-on residue & odors | Move-out cleans, short‑term rentals, neglected ovens | Improves heating distribution, food safety, reduces smoke |
| Refrigerator Interior and Exterior Deep Clean | Medium, includes coil and gasket care | Moderate tools; unplugging may be required; 60–180 min | ⭐⭐⭐⭐, odor elimination, efficiency gains | Move-in, families, health-conscious homes | Prevents contamination, improves efficiency, extends lifespan |
| Cabinet Interior and Hardware Cleaning | Medium, many units, item removal & detail work | Basic degreasers, polish; 60–240 min depending on count | ⭐⭐⭐⭐, improves hygiene & organization | Condo prep, turnover, post‑construction | Eliminates trapped grease, refreshes appearance, prolongs cabinets |
| Microwave Interior Sanitization and Degreasing | Low, confined space, careful electronics handling | Minimal tools; steam or degreaser; 10–30 min | ⭐⭐⭐⭐, removes pathogens & odors quickly | Quick wins for turnover, routine maintenance | Fast impact, eliminates odors, improves safety |
| Countertop Deep Cleaning and Sealing Assessment | Medium, material‑specific methods and testing | Material‑safe cleaners; sealing adds time/cost; 30–120+ min | ⭐⭐⭐⭐⭐, hygienic, stain‑reduced, protected surfaces | Luxury condos, move‑in/move‑out, stain-prone counters | Protects material, restores appearance, extends lifespan |
| Sink and Faucet Cleaning, Polishing, and Hardware Inspection | Medium, delicate hardware, drain work possible | Moderate supplies; may need plumbing tools; 30–90 min | ⭐⭐⭐⭐, better flow, odor removal, polished finish | Rental turnover, hygiene-focused homes, listings | Removes bacteria, improves function, enhances shine |
| Floor Mopping, Grout Cleaning, and Baseboard Detailing | High, physically demanding, grout restoration | Heavy‑duty cleaners, grout brushes; 1–4+ hours | ⭐⭐⭐⭐, cleaner, safer floors; brighter grout | Move‑out, guest-ready properties, humid climates | Eliminates grime/mold, reduces slip risk, improves appearance |
| Light Fixtures, Ceiling, and Ventilation Hood Cleaning | Medium–High, working at height, duct/hood service | Ladders, degreasers, filter service; 60–180 min | ⭐⭐⭐⭐, improved air quality & light output | Properties with heavy cooking, rentals, hotels | Reduces fire risk, improves ventilation and brightness |
| Backsplash and Wall Surface Deep Cleaning | Medium, vertical surfaces, material care | Surface‑specific cleaners, grout tools; 30–150 min | ⭐⭐⭐⭐, visible restoration, odor reduction | Showings, short‑term rentals, post-construction | Restores visual appeal, removes grease and mold |
Finish With a Repeatable Kitchen Reset
A deep clean works best when the final reset is deliberate. Don't return dishes, appliances, liners, or food containers while surfaces are still damp. Moisture trapped under a shelf liner, beneath a countertop appliance, or inside a cabinet can recreate the odor and residue you just removed.
Replace only what belongs in the space. Check that refrigerator shelves are dry and seated correctly, oven racks are stable, microwave parts are aligned, and range grates are fully dry before cooking. Return frequently used items where they won't block ventilation openings or create inaccessible grease lines.
The final inspection should focus on touchpoints and edges, not only the center of each surface. Wipe cabinet handles, appliance controls, refrigerator handles, faucet levers, drawer pulls, light switches, and the phone or other devices used while cooking. Safefood's 2026 survey found that only 29% of adults washed their hands both before and after using a phone while cooking, which reinforces why phones and hands belong in a kitchen hygiene routine rather than outside it. The Safefood findings also reported that 34% replaced dishcloths every two days, while only 28% knew bacteria could survive on surfaces for more than 24 hours. Those figures point to a practical lesson, change or sanitize absorbent tools regularly, and don't confuse a dry-looking surface with a hygienic one.
Use separate cloths for food-contact surfaces, greasy appliance areas, and floors. Wash reusable tools according to their care instructions and allow them to dry fully. Don't keep using a cloth that has picked up raw-food residue, and don't put a damp sponge back beside clean dishes.
The cleaning sequence also affects efficiency. A market report says American households use cleaning tools an average of six times per week, and kitchen and bathroom cleaning represent 57% of total tool usage. The household cleaning tools market report supports choosing versatile tools, effective degreasers, and fast-change cloths or pads for the repeated maintenance that prevents another heavy reset.
Use material-compatible, non-toxic products, ventilate the room, and never mix cleaning chemicals. In particular, don't combine bleach with vinegar, acids, ammonia, or other cleaners. Read labels for dwell time, dilution, food-contact directions, and surface restrictions. “Eco-friendly” doesn't mean every product is safe for every material, so the finish and manufacturer's instructions still control the method.
Keep a short record of issues that cleaning can't solve. Note cracked grout, loose tiles, swollen cabinets, leaking faucets, damaged seals, blocked vents, persistent mold, and appliance faults. This prevents a cleaner from escalating pressure or chemistry when the core need is plumbing, electrical, appliance, flooring, or remediation work.
For a routine reset, clean touchpoints and counters frequently, remove spills before they harden, and keep the sink and cleaning tools dry between uses. For extensive buildup, move-in or move-out deadlines, rental turnovers, or a kitchen that needs a defined scope, Canes Cleaners offers scheduled and on-demand service in Miami-Dade. Its 36-point Deep Clean and 48-point Move-In/Move-Out Clean packages provide structured coverage, with scopes that can be customized around rooms and priorities.
Canes Cleaners provides eco-friendly residential and commercial cleaning across Miami-Dade, including kitchens, apartments, condos, short-term rentals, offices, and move-in or move-out properties. Visit Canes Cleaners to review the available cleaning packages, customize your kitchen priorities, and book scheduled or on-demand service.