
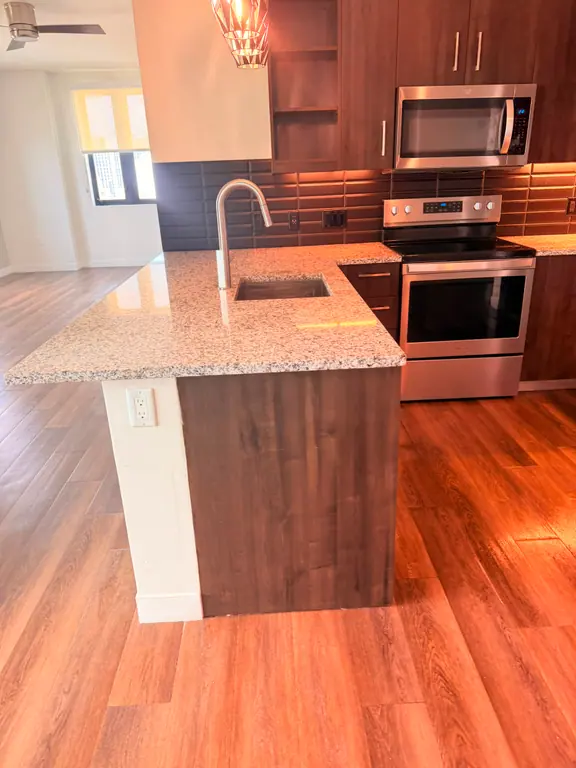
Your kitchen looks spotless until you reach above the refrigerator. The cabinet tops wear a film of grease-fuzzed dust, and the range hood filter feels tacky through your glove. You've wiped the counters, washed the dishes, and mopped, but the room still needs work.
That's the difference between upkeep cleaning and a true reset. Weekly upkeep handles the visible middle of a room. A deep cleaning checklist sends you to the edges, tops, tracks, filters, seals, and interiors that don't get attention during a quick pass. It also separates dirt you can remove from damage or moisture problems that need repair.
Keep these rules in mind before you fill a bucket:
- Work top to bottom. Finish ceilings, fans, and high ledges before furniture, baseboards, and floors.
- Remove loose dust and tackle grease before general wet cleaning. Capture dust rather than flicking it into the air, and use a compatible degreaser on sticky films before washing surrounding surfaces.
- Adjust for Miami conditions. Humidity makes drying harder, salt air leaves coastal windows coated, and hard-water deposits can make bathroom fixtures need attention sooner than a generic schedule suggests.
Gather microfiber cloths, a vacuum with brush and crevice attachments, gloves, a soft scrub brush, and cleaners matched to your surfaces. Pick three tasks for this weekend, not the entire house.
Table of Contents
- 1. Kitchen Degreasing and Range Hood Cleaning
- 2. Oven Interior Deep Cleaning
- 3. Bathroom Descaling, Grout, and Mildew Removal
- 4. Baseboards, Walls, and Door Frames Wash-Down
- 5. Upholstery and Carpet Extraction Cleaning
- 6. Window, Glass, and Sliding Door Track Deep Cleaning
- 7. Ceiling Fan, Vent, and Light Fixture Dusting
- 8. Refrigerator, Dishwasher, and Washing Machine Interior Cleaning
- Deep-Clean Tasks Compared by Sequence, Tools, and What Routine Cleaning Skips
- Turn the Checklist Into a Realistic Cleaning Schedule
1. Kitchen Degreasing and Range Hood Cleaning
A sticky hood needs more than another swipe with the countertop cloth. Remove the grease before washing the backsplash and counters, or you'll spread oily residue onto surfaces you've already cleaned.
Switch off the hood and let the stovetop cool. Capture loose dust from cabinet tops with a vacuum brush, then remove washable metal filters and stovetop grates. Don't soak charcoal filters or electrical components.
Loosen the Film Before You Scrub
- Test the finish. Apply degreaser to a hidden cabinet area first. Strong alkaline products can dull or discolor delicate finishes.
- Soak compatible parts. Use hot water and a kitchen degreaser approved for the filter material. Aluminum needs particular care because some products can darken it.
- Work downward. Clean the hood housing and cabinet tops, then cabinet fronts, backsplash, stovetop, and counters.
- Rinse and dry. Remove cleaner residue with a separate cloth and let filters dry fully before reinstalling them.
For a Miami Beach condo where cooking residue has become sticky, repeated light applications work better than grinding away with an abrasive pad. Miami humidity also makes thorough drying important, especially around cabinet edges and hood seams.
Our guide to cleaning stove grease explains the grease-removal step in more detail. A kitchen deep cleaning checklist can help keep surrounding tasks from being forgotten while parts soak.
Beyond weekly upkeep: wiping the outside of the hood doesn't clean its filter. This job also doesn't include opening the motor housing or cleaning concealed exhaust ductwork.
2. Oven Interior Deep Cleaning
Burned cheese on the oven floor won't come off with the same method as fresh sauce on the door. Start with a cool oven, the appliance manual, and a decision between manual cleaning and an approved self-clean cycle.
Remove loose crumbs with a brush or vacuum attachment before introducing moisture. Take out racks and any accessories the manufacturer says to remove, then clean those separately with a non-scratch pad and compatible detergent.
Don't combine methods just because residue looks stubborn. An oven cleaner followed by a self-clean cycle can expose the appliance to treatment its manufacturer hasn't approved.
For manual cleaning, protect the floor outside the oven and apply an oven-safe product only to permitted surfaces. Baking soda paste can help loosen some deposits, but it isn't a substitute for an approved cleaner on heavy carbon buildup. Keep paste and sprays away from fans, vents, heating elements, and door gaskets unless the manual specifically permits contact.
Choose the Method That Fits the Appliance
Say a rental turnover reveals a layer of burned food beneath the racks. Remove the loose debris first, then follow the appliance's cleaning procedure rather than starting a self-clean cycle over a pile of residue. Ventilate appropriately and remain available to monitor the appliance.
Miami humidity changes the drying step, not the chemistry needed to remove baked-on grease. Wipe away remaining moisture and cleaner residue before returning racks, and don't treat a musty smell as proof that the cavity needs stronger chemicals.
Beyond weekly upkeep: an exterior wipe doesn't address the cavity, rack supports, or inner door glass. Cleaning between sealed glass panels, repairing a damaged gasket, and handling electrical faults belong with an appliance technician.
3. Bathroom Descaling, Grout, and Mildew Removal
White crust around a faucet, greasy soap scum on glass, and darkened caulk are different problems. Don't attack them all with a single chemical.
Start overhead with the accessible exhaust cover, then remove hair and loose debris before wet cleaning. Wash away body oils and soap residue before applying a compatible descaler to mineral deposits. Acidic descalers aren't suitable for marble and other acid-sensitive surfaces.
Keep Descaling Separate From Disinfection
Use a soft grout brush rather than a wire brush, and rinse thoroughly between products. For an approved disinfectant, keep the surface wet for its specified contact time; the CDC household cleaning guidance identifies concentration, application method, and contact time as product-specific controls.
- Fixtures: Remove mineral buildup with a finish-compatible product, then rinse and dry.
- Grout and caulk: Clean gently and inspect for cracks, missing sealant, or staining beneath the material.
- Chemical safety: Never mix bleach with vinegar, ammonia, or other cleaners.
- Moisture control: Use effective exhaust ventilation and investigate recurring condensation or leaks.
In a Coral Gables bathroom with restricted shower spray, cleaning an accessible showerhead may help if mineral deposits are the cause. It won't fix a plumbing restriction elsewhere.
Miami humidity makes recurring mildew a moisture-management issue, not just a scrubbing job. The Florida humidity and mold overview distinguishes ordinary surface cleaning from problems requiring moisture correction or professional remediation.
Use our bathroom deep cleaning checklist alongside these safe shower mildew cleaning steps. Beyond weekly upkeep: descaling and detailed grout work go further than washing fixtures, but neither replaces damaged caulk or remediation.
4. Baseboards, Walls, and Door Frames Wash-Down
A wet cloth dragged through dusty baseboards creates gray streaks. Vacuum the loose material first, including the upper lip of the trim and the corners beside door casings.
Start at ceiling corners and door tops, then move down walls and frames. Save the baseboards for after the surfaces above them, and leave floor cleaning until the room's other work is finished.
Match the Cloth to the Finish
Use a barely damp microfiber cloth with mild detergent on washable paint. Test behind a door before tackling a visible wall, and avoid saturating drywall, unfinished wood, or swollen fiberboard trim. Melamine sponges can remove scuffs, but they can also alter paint sheen.
- Walls: Wash a manageable area, remove detergent residue, and dry without leaving drip lines.
- Door frames: Clean the top edge, recessed profiles, handles, and areas around the latch.
- Switch plates: Apply cleaner to the cloth, never directly into the switch.
- Baseboards: Use a soft detail brush for grooves, then wipe and dry.
For a move-out apartment, this work removes the dark hand marks and dusty perimeter that remain obvious after furniture leaves. It doesn't guarantee a deposit return, and it won't repair chipped paint.
Miami humidity makes restraint with water especially important around absorbent trim. If a baseboard stays swollen or the paint keeps bubbling, investigate moisture instead of repeatedly washing it.
Beyond weekly upkeep: spot-cleaning a fingerprint isn't a full wall or trim wash. After renovation, ordinary household dusting may also be inadequate; suspected hazardous dust needs a specialist plan. For workplaces, OSHA's sanitation standard reinforces the need to keep floors and work areas clean, manage refuse, and maintain sanitary conditions.
5. Upholstery and Carpet Extraction Cleaning
The mistake that costs the most time here is adding water before identifying the fabric. Find the care label, inspect seams and backing, and test the proposed cleaner in a hidden area before renting an extractor.
Vacuum cushions, seams, upholstery backs, carpet edges, and accessible areas beneath furniture first. Thorough vacuuming removes loose material that would otherwise become wet soil during extraction.
Treat Drying as Part of the Job
Water-compatible upholstery may suit controlled extraction, while solvent-only or vacuum-only fabrics need a different approach. Don't assume that a mattress, sofa, and carpet can all tolerate the same machine settings. Our fabric couch cleaning guide helps explain the choices before you wet the fabric.
For a pet-owning household preparing for guests, vacuum slowly, pretreat compatible stains, and extract with restrained solution application. Follow with recovery passes rather than repeatedly soaking the same patch. Deep urine contamination in padding or cushions may require specialist treatment or replacement.
Drying check: If you can't provide airflow and moisture control, postpone wet extraction rather than leaving thick cushions damp in a closed room.
Miami humidity makes drying capacity a deciding factor. Use air conditioning, suitable fans, or a dehumidifier, and keep fabrics out of service until fully dry.
Indoor-air care also involves controlling mold, pests, smoke, and allergens, rather than relying on surface appearance alone, as explained by Powers Health's indoor-air guidance. Heavy window treatments may need separate handling, such as a curtain takedown and rehang service.
Beyond weekly upkeep: extraction addresses embedded soil that vacuuming can leave behind. It doesn't guarantee stain removal or make unsuitable fabrics safe to wet-clean.
6. Window, Glass, and Sliding Door Track Deep Cleaning
If your sliding door grinds, don't start by pouring water into the track. Vacuum the sand first, or you'll turn it into gritty sludge and push debris into corners.
Coastal Miami windows need attention to salt residue as well as fingerprints. In a Bal Harbour condo, the exposed side of a sliding door may need cleaning sooner than sheltered interior glass, even when both were cleaned together.
Clean the Assembly, Not Just the Pane
- Start above the glass. Capture dust from the frame and accessible screen before cleaning the pane.
- Clear the tracks. Use a crevice attachment, then a soft brush to loosen packed debris. Vacuum again.
- Wash lightly. Wipe frames and tracks with mild detergent and controlled moisture. Keep drainage openings clear without forcing tools into them.
- Finish the glass. Apply glass cleaner or a compatible mild solution, squeegee from the top, and dry edges with clean microfiber.
Use separate cloths for salty exterior frames and interior glass. Otherwise, you can carry residue back onto the pane and spend the afternoon chasing streaks. Avoid abrasive pads on coated glass and don't scrape unknown window coatings with a razor.
A clean track won't repair worn rollers, a distorted frame, or a failing seal. If the door still drags after debris removal, stop forcing it.
Salt air is the local reason to inspect exposed frames more often, while windblown sand makes track cleaning more than a cosmetic task. Check the window manufacturer's care instructions before applying cleaners to metal finishes.
Beyond weekly upkeep: wiping handprints doesn't clean screens, sills, frame corners, or tracks. High-rise exterior windows and any work requiring you to lean beyond a balcony belong with appropriately equipped professionals.
7. Ceiling Fan, Vent, and Light Fixture Dusting
These high surfaces come before the other work in their room, even though they're easy to forget until the floor is finished. Turn off fans and lights, let fixtures cool, and use a stable platform rather than balancing on furniture.
Place a washable sheet below the work area. Capture loose dust with a vacuum brush or enclosing microfiber tool, then use a lightly damp cloth for remaining residue. Don't flick a feather duster across a loaded fan blade.
Separate Surface Dust From HVAC Trouble
For fan blades, support the blade gently while wiping its upper surface and edges. Clean accessible return grilles and removable vent covers according to their instructions, and keep water out of motors, sockets, and duct openings. Check HVAC filters and replace or clean them as the system manufacturer specifies.
A bedroom that stays closed and air-conditioned can still collect dust on fan tops and return grilles. In Miami's humid conditions, condensation, wet insulation, or persistent spotting around a vent deserves an HVAC inspection rather than another surface wipe.
- Light fixtures: Remove only parts designed for routine cleaning, and dry them fully before reassembly.
- High ledges: Use an extension tool from a safe position; don't overreach.
- After renovation: Capture settled dust methodically rather than blowing it through the room.
Cleaning products also need appropriate ventilation. The CDC's household cleaning and disinfection guidance recommends cleaning before disinfection and addresses safe product use and air circulation.
Beyond weekly upkeep: dusting a bedside table doesn't include fan tops, return grilles, or fixture interiors. Surface cleaning also doesn't cover internal duct cleaning, electrical repair, or removal of construction debris from HVAC equipment.
8. Refrigerator, Dishwasher, and Washing Machine Interior Cleaning
A clean appliance door can hide a refrigerator drawer full of dried spills, a dishwasher filter coated with food, or a washer gasket holding damp lint. Clean the removable parts and seals, not just the visible cavity.
Begin with accessible exterior tops and loose debris before opening the wet-cleaning supplies. Read each manual so you know which filters, drawers, and spray components are intended for homeowner removal.
Give Each Appliance Its Own Method
- Refrigerator: Move perishables to suitable cold storage. Let cold glass shelves warm before washing, clean removable drawers, then wipe the cavity from top to bottom and dry the seals.
- Dishwasher: Remove and clean the user-serviceable filter, inspect spray-arm openings, and wipe door edges. Use an approved dishwasher cleaner and cycle if needed.
- Washing machine: Remove trapped debris from accessible gasket folds, clean the detergent drawer, and run the manufacturer's maintenance cycle with its recommended cleaner.
For a rental turnover, complete these interiors before polishing appliance fronts and washing the floor. Don't hide an unresolved smell with fragrance; inspect for remaining food, standing water, or inaccessible contamination.
Miami humidity makes retained moisture particularly relevant around washer gaskets and detergent compartments. Where the manual permits it, allow the appliance to dry between uses while keeping children and pets away from open doors.
Beyond weekly upkeep: wiping handles and doors doesn't clean filters, drawers, or seals. This work won't repair drainage faults, refrigerant problems, or inaccessible mold, and vinegar isn't a universal substitute for an appliance-approved maintenance product.
Deep-Clean Tasks Compared by Sequence, Tools, and What Routine Cleaning Skips
| Deep-Clean Task | Order in the Room | Key Tools | Often-Missed Spot | Routine Clean Covers It? |
|---|---|---|---|---|
| Kitchen Degreasing and Range Hood Cleaning | Kitchen surfaces and cooking area | Degreaser, warm water, soft scrub pad, microfiber cloth | Hood filters and cabinet tops | Usually not |
| Oven Interior Deep Cleaning | Inside the oven; racks separately | Baking soda paste or oven cleaner, non-abrasive scrubber | Door glass and bottom element | Usually not |
| Bathroom Descaling, Grout, and Mildew Removal | Shower, tub, sink, and other bathroom fixtures | Descaler, grout brush, bathroom cleaner | Shower heads and exhaust fan | Usually not |
| Baseboards, Walls, and Door Frames Wash-Down | Top to bottom | Damp microfiber cloth or soft sponge, mild cleaner | Switch plates and door trim | Sometimes |
| Upholstery and Carpet Extraction Cleaning | Upholstery and floor coverings | Extraction cleaner or low-moisture equipment, vacuum | Mattresses and embedded allergens | Usually not |
| Window, Glass, and Sliding Door Track Deep Cleaning | Glass, frames, sills, then tracks | Squeegee, microfiber cloth, soft brush, vacuum | Sliding door tracks | Usually not |
| Ceiling Fan, Vent, and Light Fixture Dusting | High surfaces first | Extension duster, microfiber cloth, vacuum brush | Return grilles and fan blades | Usually not |
| Refrigerator, Dishwasher, and Washing Machine Interior Cleaning | Appliance interiors and removable parts | Mild cleaner, cloth, machine cleaner | Filters, spray arms, and door gaskets | Usually not |
Turn the Checklist Into a Realistic Cleaning Schedule
Prioritize by risk, surface condition, and access, not by which room is easiest to photograph afterward. Start with heavy range hood grease, oven residue that smokes, and bathroom mildew or persistent dampness. If you discover a leak, damaged wiring, or concealed contamination, arrange the appropriate repair or specialist assessment before continuing.
Next, protect the things that are expensive to replace: window frames and tracks, appliance interiors, carpets, and upholstery. Cosmetic wall marks can wait when a washer gasket remains wet or a sliding track is packed with grit. An American Cleaning Institute survey found that 56% of respondents selected cleaning toilets and showers as a health-oriented cleaning action, according to its 2025 spring-cleaning survey, but household priorities should still reflect the conditions you find.
Schedule Inspections, Then Adjust the Work
Use recurring seasonal reminders as a starting point, not permission to ignore visible buildup. Check kitchen grease, bathroom scale, and appliance interiors during each seasonal reset. Put fabric cleaning, windows, tracks, and high dusting on a broader rotation, moving them forward when salt residue, sand, pet soil, or dust becomes noticeable.
- After renovation: Arrange detailed dust removal once the dusty work has finished, before returning to normal upkeep.
- At move-out: Use the empty rooms to reach cabinet interiors, appliance cavities, vents, and floor edges.
- Between rental guests: Inspect interiors and hidden touchpoints rather than assuming an attractive room is fully reset.
- Between deep cleans: Keep removing fresh grease, shower moisture, spills, and loose grit so the next reset stays manageable.
When comparing quotes, compare named tasks, not just the phrase deep clean. Baseboards, fan blades, fixtures, touchpoints, appliance interiors, and extraction cleaning aren't interchangeable inclusions. Write down the rooms, surfaces, access limits, and specialist work you need before selecting a scope.
At Canes Cleaners, we publish our Express Clean, 36-Point Deep Clean, and 48-Point Moving Clean checklists so Miami-Dade customers can compare the work before booking. The Deep Clean starts at $199 and includes baseboards, fans, fixtures, and touchpoints; the Moving Clean adds empty-home details including appliance interiors. The exact price appears in the booking flow, where you can choose the scope that matches your priorities and schedule online.
Canes Cleaners offers residential and commercial cleaning across Miami-Dade, with published checklists that distinguish routine upkeep from a detailed reset. Visit Canes Cleaners to compare scopes, identify the rooms and often-missed spots you want addressed, and book your cleaning online.