
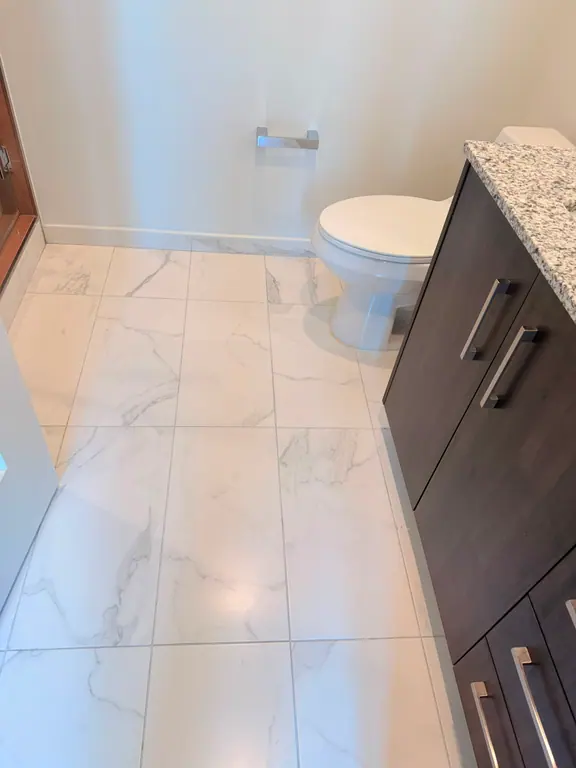
You wipe the sink, scrub the tub, and step back expecting a finished bathroom. Then you notice the ceiling stain, the cloudy shower glass, the dusty exhaust grille, or the slow drain that keeps producing an odor. The room looks clean from eye level, but the neglected details show that the work stopped too soon.
A bathroom deep clean works best from high surfaces to low surfaces. Dust, loosened mildew, mineral residue, and rinse water fall downward, so cleaning the floor first only creates more work. This deep cleaning bathroom checklist follows the order a professional crew can use, beginning with ventilation and ceiling-level surfaces, then moving through mold, fixtures, glass, grout, the toilet, and drains.
Treat each area as a separate work block. The time required will vary with the bathroom's size, condition, ventilation, and buildup. Every step below pairs practical tools with an effective sequence, dwell-time guidance, safety precautions, and the mistakes that commonly undermine an otherwise careful clean.
Table of Contents
- 1. Exhaust Fan Cleaning and Maintenance
- 2. Ceiling, Wall, Vent, and Light Fixture Dusting and Washing
- 3. Mold and Mildew Removal from Caulk, Ceilings, and Vents
- 4. Shower Head and Plumbing Fixture Descaling
- 5. Glass Shower Door and Enclosure Hard-Water Removal
- 6. Grout Cleaning and Restoration
- 7. Toilet Deep Sanitization Behind, Under, and Around the Base
- 8. Drain and P-Trap Clearing
- 8-Item Deep Bathroom Cleaning Checklist Comparison
- Turn the Checklist Into a Routine You Can Repeat
1. Exhaust Fan Cleaning and Maintenance
Start with the exhaust fan because ventilation affects everything else in the room. Dust and lint collect on the grille, housing, and blades, reducing airflow and allowing humid air to linger. A dirty fan can leave ceilings, caulk, and grout damp long after a shower ends.
Turn off the fan at the switch, then shut off the circuit breaker before removing the cover. If the cover is held by spring clips, support it with one hand while releasing the clips. Vacuum loose dust with a crevice attachment, then wash the cover in warm water with a mild detergent. Let it dry completely.
Clean the housing without damaging the motor
Use a dry vacuum nozzle around the housing and a slightly damp microfiber cloth on accessible blades. Don't spray cleaner into the motor or electrical components. A mild degreaser can help with sticky residue, but apply it to the cloth rather than directly to the fan.
Check whether the duct appears to vent outdoors. A fan that exhausts into an attic or another enclosed cavity can move moisture out of the bathroom but leave it trapped in the building, increasing the risk of moisture damage. If you can't confirm the duct route safely, flag it for a qualified inspection rather than dismantling ceiling components.
Practical rule: A fan that runs loudly but moves little air needs more than a wipe. Check the grille, blades, duct path, and exterior termination.
Reinstall the dry cover, restore power, and test the airflow. Run the fan during showers and continue running it for 15 to 20 minutes afterward. In humid environments, clean the fan cover at least every six months. Persistent ceiling mildew despite a clean fan may indicate poor ducting, a blocked exterior flap, leaks, or insufficient ventilation capacity.
2. Ceiling, Wall, Vent, and Light Fixture Dusting and Washing
Once ventilation is addressed, clean the surfaces above eye level. Use a telescoping microfiber duster or vacuum extension to remove dust from the ceiling, upper walls, vent covers, and light fixtures. Work around the room in one direction so you don't miss corners.
Dust first, then wash. Wetting dusty surfaces immediately turns loose particles into a paste and spreads them across paint, trim, and fixture edges. For painted walls, use a lightly damp microfiber cloth and a small amount of mild soap solution. Spot-test any cleaner in an inconspicuous area because some paints soften, streak, or lose sheen when exposed to strong products.
Handle electrical fixtures carefully
Turn off power at the switch and breaker before removing a diffuser or touching a fixture. Take off glass or plastic covers when possible, wash them in warm water with mild dish soap, and dry them fully before reinstalling. Never return a damp diffuser to a light fixture.
For detailed fixture technique, use this guide to clean light fixtures without leaving residue. It's especially useful for glass shades, seams, and small areas where dust remains visible after a quick wipe.
- Ceiling: Use a soft duster first, then spot-clean discoloration rather than saturating the surface.
- Vent covers: Vacuum both faces, wash removable covers, and dry them before replacement.
- Wall marks: Use a gentle damp cloth and stop if paint transfers to the cloth.
- Light diffusers: Keep water away from sockets, wiring, and switches.
Look closely at ceiling corners and the area around the fan. Brown or yellow staining may reflect old moisture damage rather than surface dirt. Cleaning can improve appearance, but it won't correct a leak or a ducting problem.
3. Mold and Mildew Removal from Caulk, Ceilings, and Vents
Mold returns where moisture remains. Check shower corners, ceiling edges, vents, and other poorly ventilated spots before reaching for a stronger cleaner. Cleveland Clinic guidance recommends keeping indoor humidity below 50%, running exhaust fans during and after bathing, and drying wet materials promptly in its mold guidance.
Put on product-appropriate gloves and eye protection before treatment. Run the fan or open a window when safe. Lift loose debris gently. Dry brushing can send contaminated dust through the room, so avoid it.
Know when caulk needs replacement
Dark caulk is not always active mold. Staining may remain after cleaning, but cracked, soft, separated, or repeatedly darkening caulk should be replaced. Cut it out with a scraper or utility knife, clean the joint, let it dry fully, then apply caulk rated for wet areas. Sealing a damp joint traps the problem underneath.
Clean visible soil before applying disinfectant. The CDC cleaning and disinfection guidance explains that dirt and other impurities can reduce disinfectant effectiveness. Follow the label for compatible surfaces, protective equipment, ventilation, and wet contact time. Never mix cleaning products.
Record the moisture source, not only the final appearance. Check caulk and grout, plumbing connections beneath sinks, the area behind the toilet, tub edges, and the exhaust route. Professional remediation is advisable when mold covers more than about 10 square feet or follows major flooding. If growth is extensive or keeps returning, address the leak or ventilation problem and bring in a qualified professional instead of repeatedly scrubbing.
Let the first treatment work for the label's stated contact time. Then clean the vent cover and nearby ceiling with a soft brush or microfiber cloth. Rinse or wipe away residue as the surface allows, and ventilate the room until it is dry.
For a visual demonstration of mold-cleaning technique, watch the video below once the area has been treated and ventilated.
4. Shower Head and Plumbing Fixture Descaling
Mineral residue affects both appearance and performance. Deposits can narrow shower-head nozzles, distort spray patterns, and collect around faucet aerators. The right approach is controlled soaking followed by gentle mechanical cleaning, not aggressive scraping that damages the finish.
Check the fixture manufacturer's instructions before using an acidic cleaner. White vinegar may be unsuitable for some finishes, plated surfaces, stone, or seals. When compatible, place vinegar in a plastic bag, secure it around the shower head with a rubber band, and let the fixture soak for one to several hours. Don't leave the bag unattended if it could fall or stress the pipe connection.
Clear the small openings
After soaking, remove the bag and rinse the fixture thoroughly. Use a soft toothbrush or an old toothpick to clear nozzle openings. Don't use a metal pick that can enlarge or scratch the openings. For a faucet aerator, remove it only if you can reinstall it correctly and protect the finish with a cloth-covered tool.
Run hot water through the fixture for about a minute after rinsing to flush loosened residue. Check for leaks at the connection and confirm that the spray pattern has improved. If the flow remains weak, the restriction may be inside the valve, supply line, or diverter rather than on the visible fixture.
A descaling schedule depends on water conditions and buildup. In areas where deposits appear quickly, inspect fixtures every few months and treat them as needed. Replacement is sometimes the better trade-off. A corroded aerator, damaged seal, or heavily obstructed shower head may take longer to restore than to replace, and repeated acid exposure can shorten the life of vulnerable finishes.
5. Glass Shower Door and Enclosure Hard-Water Removal
Cloudy shower glass usually has more than one layer of buildup. Soap scum binds to the surface, hard-water residue creates spots, and tracks collect hair, standing water, and sludge. Start with the least aggressive method that matches the soil.
Remove bottles and accessories first. Apply a soap-scum remover, allow the label-directed dwell time, and work with a non-abrasive pad. Rinse before moving to a mineral treatment so products don't interact. On delicate or coated glass, confirm compatibility before using an acidic cleaner or abrasive tool.
Treat the door, tracks, and edges
Use a small brush or old toothbrush in the lower channel and around hinges. A squeegee helps prevent new deposits after each shower, but it won't remove an established film. Dry the glass completely with a clean microfiber cloth, using overlapping strokes to catch residue that a squeegee leaves behind.
For more detailed soap-scum removal, follow this guide to remove years of soap scum from bathroom surfaces. A foaming product can help keep cleaner in contact with vertical glass, while a spray may be faster for light maintenance. The choice depends on soil, surface compatibility, and whether the product stays wet long enough to work. This comparison of why foaming cleaner beats spray explains the practical difference.
Don't use steel wool, harsh scouring powder, or a razor unless the glass manufacturer permits it. Scratches and etching can make the door look permanently cloudy. Hydrophobic or nano-coatings may reduce future spotting, but check the manufacturer's directions first and apply them only to properly cleaned, dry glass.
6. Grout Cleaning and Restoration
Grout traps soap residue, body oils, and moisture in a way that smooth tile doesn't. It needs chemical softening, agitation, and rinsing. Scrubbing dry grout often creates dust without removing the embedded soil.
Begin with a small test area, especially when grout is colored or installed next to natural stone. A paste made from baking soda and hydrogen peroxide can be applied to compatible grout, left for 10 to 15 minutes, scrubbed with a grout brush, and rinsed with clean water. Keep the room ventilated, and never combine peroxide-based products with vinegar or other acids.
Restore the joint, not only the color
Work in manageable sections. Apply the cleaner, let it dwell, agitate along the joint, and rinse before the product dries. Use a narrow brush for shower corners, floor-wall edges, niches, and the grout around fixtures. A toothbrush may work for small areas, but a dedicated grout brush gives better control over longer runs.
If grout remains dark after cleaning, determine whether the discoloration is staining, mold damage, or a failed joint. Cracks, missing material, and loose grout require repair rather than more cleaner. This guide to how to regrout bathroom tile can help with the repair decision.
Let grout dry fully, often 24 to 48 hours, before sealing. Use a penetrating sealer rather than a surface coating when appropriate, because grout needs to release moisture. Sealing won't make grout maintenance-free. It buys time, but leaks, standing water, and poor ventilation will still bring problems back.
7. Toilet Deep Sanitization Behind, Under, and Around the Base
The visible bowl is only one part of the toilet. Dust, urine residue, and contamination collect beneath the rim, around seat hinges, on the flush handle, behind the tank, and where the base meets the floor. Clean from the least contaminated areas toward the dirtiest, and change cloths when moving between zones.
Use a dedicated toilet brush, disposable wipes, or washable tools that are disinfected after use. Start with the tank and lid, then the seat hinges, seat, exterior rim, bowl, base, and surrounding floor. If the seat detaches, remove it so the hinges and mounting points can be cleaned instead of wiped around.
Respect disinfectant contact time
Clean visible soil before disinfecting. The EPA explanation of disinfectant contact time states that the treated surface must remain visibly wet for the product's stated period. Spraying and wiping immediately may make the toilet look better, but it doesn't follow the product's disinfection process.
Use ventilation and the protective equipment stated on the label. Never combine bleach with vinegar, ammonia, or another cleaner. If you need to reach behind the toilet, use a long-handled tool or carefully access the space without stressing the supply line. Don't pull a toilet from the wall unless you're prepared to manage the plumbing and resealing work.
For bowl stains caused by rust or mineral buildup, choose a product designed for toilet bowls and verify that it's compatible with the bowl finish and plumbing. This guide to removing rust from a toilet bowl covers the distinction between surface sanitization and stain treatment. Finish by disinfecting the flush handle, cabinet pulls, light switch, and door handle, since these are frequently touched after toilet use.
8. Drain and P-Trap Clearing
Finish with drains because debris and dirty rinse water move downward during the rest of the clean. Hair, soap residue, and toothpaste collect under drain covers and inside traps, causing slow flow and odors. Removing that material is more reliable than repeatedly pouring chemicals into a restricted drain.
Take off the shower or sink drain cover and extract visible hair with pliers or a drain snake. Place a bucket below the sink before loosening the P-trap, and keep a towel nearby for residual water. Clean the trap, inspect the washers, and reinstall it carefully. Run water and check every connection for leaks.
Choose maintenance over harsh chemicals
Flush a cleared drain with hot water to remove loose soap residue. For routine maintenance in homes connected to septic systems, an enzyme-based cleaner may be a better option than a harsh chemical product, provided the label supports that use. Never mix chemical drain cleaners with other products, and rinse thoroughly according to the label.
A simple hair-catcher insert can reduce the amount of debris entering a shower drain. It still needs regular emptying. If water backs up after visible debris has been removed, the blockage may be deeper in the branch line and should be assessed by a plumber rather than attacked with repeated chemical treatments.
8-Item Deep Bathroom Cleaning Checklist Comparison
| Task | Implementation Complexity 🔄 | Resource Requirements ⚡ | Expected Outcomes 📊 | Ideal Use Cases 💡 | Key Advantages ⭐ |
|---|---|---|---|---|---|
| Exhaust Fan Cleaning and Maintenance | Moderate, ladder work, power-off, occasional difficult access | Low, vacuum, microfiber, screwdriver; pro inspection if ducts damaged | Restored airflow; lower humidity; reduced mildew risk 📊 | Move-out checks; humid climates; periodic ventilation maintenance | Improves ventilation and noise/performance; quick value add ⭐ |
| Ceiling, Wall, Vent, and Light Fixture Dusting and Washing | Low–Moderate, ladder use and careful fixture handling | Low, microfiber, mild detergent, ladder, screwdriver | Brighter room; fewer airborne particles; improved lighting 📊 | Quarterly deep cleans; move-out prep; allergy-sensitive homes | Enhances brightness and appearance; complements mold prevention ⭐ |
| Mold and Mildew Removal from Caulk, Ceilings, and Vents | High, protective gear, potential re-caulking or remediation | Moderate, EPA-registered cleaners, PPE, scrapers; pro for heavy infestations | Improved indoor air quality; reduced respiratory triggers; surface protection 📊 | High-humidity areas, visible staining, post-water events | Removes health hazards and prevents material deterioration ⭐ |
| Shower Head and Plumbing Fixture Descaling | Low, soak/removal of parts, check finish compatibility | Low, white vinegar or citric acid, bag, toothbrush | Restored water flow and spray consistency; reduced bacterial harborage 📊 | Hard-water areas; reduced pressure or uneven spray | Low-cost DIY; quick restore of performance; prevents valve damage ⚡ |
| Glass Shower Door and Enclosure Hard-Water Removal | Moderate, chemical treatment plus mechanical polishing; risk of scratching | Moderate, mild acids/cleaners, non-abrasive pads, squeegee; pro polishing if etched | Clearer glass; visibly cleaner enclosure; prevents long-term etching 📊 | Stained or cloudy enclosures; staging for sale or rentals | Highest visual impact on perceived cleanliness; prevents etching ⭐ |
| Grout Cleaning and Restoration | High, labor-intensive scrubbing and proper drying/sealing | Moderate, grout brushes, peroxide/baking-soda or oxygen cleaners, sealer | Restored grout color; reduced staining; longer intervals between deep cleans 📊 | Humid homes, rental turnovers, heavily soiled grout | Visibly refreshes tile surfaces; sealing extends longevity ⭐ |
| Toilet Deep Sanitization (Behind, Under, and Around the Base) | Moderate, reach hidden zones; may require moving fixture | Moderate, EPA disinfectants, long-handled brushes, PPE, disposable wipes | Reduced germ spread and odors; higher hygiene standards 📊 | Guest turnovers, move-out cleans, healthcare-adjacent settings | Thorough pathogen reduction; improves tenant/guest satisfaction ⭐ |
| Drain and P-Trap Clearing | Moderate, drain cover removal, possible P‑trap disassembly with spills | Low–Moderate, drain snake/pliers, bucket, enzyme cleaners; avoid harsh chemicals | Faster drainage; fewer odors and backups; reduced standing water 📊 | Slow drains, recurring clogs, septic-connected homes | Prevents clogs and odors with inexpensive tools; enzyme options are pipe-safe ⚡ |
Turn the Checklist Into a Routine You Can Repeat
The complete workflow is simple to remember: ventilate and dust from the top, treat mold and mineral buildup, then finish with grout, the toilet, and drains. That order keeps falling dust and rinse water from undoing finished work. It also separates cleaning from disinfection, which is safer and more efficient than applying disinfectant to every surface automatically.
Print the checklist and keep it inside the bathroom cabinet or cleaning supply area. Mark each zone as it's completed, and record any follow-up issue, such as a weak fan, recurring mold, cracked caulk, a leaking P-trap, or grout that needs repair. The next clean will start with useful information instead of guesswork.
The fan, ceiling dusting, and drains belong on a repeat schedule because they collect dust, lint, hair, and moisture-related residue. Shower glass and high-touch fixtures need more frequent attention when several people use the bathroom. Grout sealing and fixture descaling should follow the drying and product-compatibility intervals described in their sections, not an arbitrary daily routine.
Disinfection also needs a decision point. CDC guidance says routine home disinfection is generally unnecessary unless someone is sick or has recently visited while sick in its cleaning and disinfection guidance. When disinfection is appropriate, clean the surface first, follow the label, keep it visibly wet for the stated contact time, ventilate the room, and wash hands with soap and water for 20 seconds afterward.
For illness-related work, CDC household guidance specifies a bleach solution of at least 1,000 ppm sodium hypochlorite when bleach is suitable for the surface, with at least 1 minute of contact time. Its household mixing reference is 5 tablespoons per gallon of room-temperature water or 4 teaspoons per quart, unless the product label says otherwise in its household cleaning guidance. Confirm that bleach is unexpired, label a prepared solution with its preparation time, provide ventilation, and don't treat diluted bleach as indefinitely stable. Never mix bleach with ammonia or other cleaners.
If you're preparing a rental, move-out, short-term-rental turnover, or shared bathroom, add a final quality-control pass. Check the underside of the toilet rim, faucet aerators, shower niches, grout corners, floor-wall edges, fan cover, drain cover, switches, handles, and cabinet pulls. A surface that looks wiped isn't necessarily a surface that was cleaned, rinsed, dried, or disinfected correctly.
Canes Cleaners offers a 36-point Deep Clean with detailed bathroom attention, and its 48-point Move-In/Move-Out Clean is designed for turnover work across Miami-Dade County. Customers can book online and tailor the scope around bathrooms, fixtures, high-touch points, baseboards, fans, and other priorities. For households, landlords, and rental hosts that prefer a professional team, a defined checklist makes it easier to confirm what was included and what needs separate attention.
Canes Cleaners provides 36-point deep cleaning and 48-point move-in/move-out cleaning for homes, apartments, rentals, offices, and other properties across Miami-Dade County. Visit Canes Cleaners to review the available cleaning options, customize bathroom priorities, and book online.