
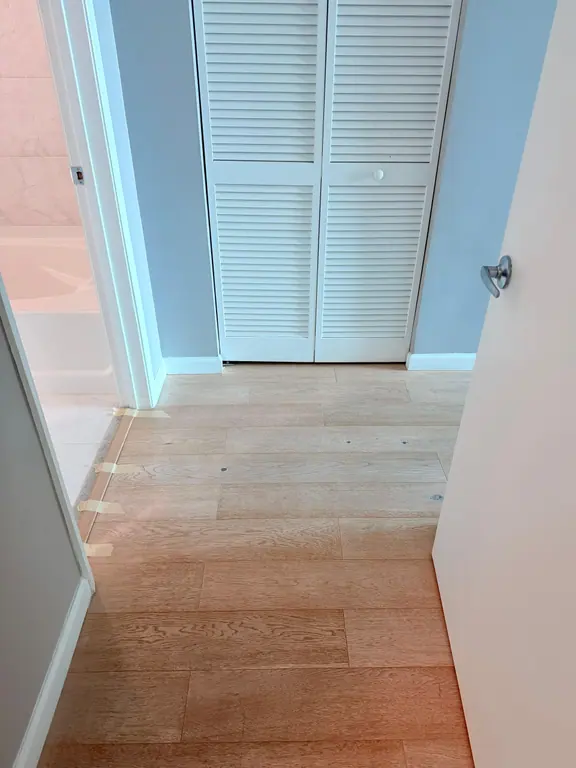
A Miami condo can look clean after a quick mop and still have grit scratching the finish or moisture sitting in the seams. The safest approach is less water, not more: remove dry soil first, then use a small amount of a cleaner approved for the floor's finish.
That matters in South Florida, where humidity can slow drying and seasonal moisture can affect wood. The best way to clean wood floors is to match the method to the finish, control moisture carefully, and treat disinfection as a separate decision from routine cleaning.
Table of Contents
- The Dry-First Routine for Most Wood Floors
- Matching the Method to Finished, Engineered and Unfinished Floors
- How to Adjust the Routine Room by Room
- Humidity Rules for Miami-Dade Wood Floors
- How Often to Clean Each Floor
- Mistakes That Damage Wood Floors
- Decide Between DIY Care and a Professional Clean
The Dry-First Routine for Most Wood Floors
For most finished wood floors, the best routine is dry soil removal first, followed by a short, controlled damp clean. Don't flood or soak the boards. Grit tracked under shoes works like an abrasive, gradually dulling the finish and leaving fine scratches; a wet pass over that grit can spread it rather than lift it.
The U.S. Department of Housing and Urban Development's cleaning guidance describes vacuuming and wet cleaning as useful methods: vacuuming removes loose particles, while damp cleaning captures residue stuck to the surface. Using both gives you a more complete clean than relying on either alone.
Follow this cleaning sequence
- Clear the floor. Pick up loose items and move or roll up rugs so you can reach the full surface and won't trap moisture underneath.
- Remove dry debris. Sweep with a soft-bristle broom or dry microfiber dust mop, or vacuum on the bare-floor setting with the beater bar disabled. This keeps grit from being dragged across the finish during the damp pass.
- Prepare the mop. Wring a microfiber mop until it's barely damp, not wet enough to leave a trail of liquid.
- Apply the right cleaner. Use a cleaner approved for your floor's finish, following its label, and apply it through a controlled spray mop. Work one board run at a time so you can see and manage the amount of solution.
- Pick up residue promptly. Use a super-absorbent pad to remove leftover soil and liquid, especially along seams and board edges where moisture can enter.
- Let the floor dry fully. Keep foot traffic off until it's dry. If the room feels humid, run a fan to help the surface dry evenly.
A finished floor should dry without a film, dull streaks, or standing water at the edges. If it looks cloudy after cleaning, stop and review the product, dilution, and amount of moisture before repeating the process. For another practical guide to routine care, see hardwood care advice from Flacks Flooring.
Practical rule: Wood floors aren't tile. Any liquid left standing can work into joints and contribute to swelling, cupping, or finish damage.
Matching the Method to Finished, Engineered and Unfinished Floors
Start with a cautious water-drop check in a hidden spot. If a drop beads on the surface, the floor is likely sealed; if it soaks in quickly, the wood may be unfinished or have an exposed, worn, or oil-treated surface. Don't treat this as a definitive test: check the board edges for visible layers, and look for installation or finish paperwork from the seller, landlord, or property manager.
| Floor type | How to identify it | Recommended cleaner | Damp-clean limit | Dry tool |
|---|---|---|---|---|
| Factory-finished solid wood | Water beads on the surface; sheen looks even | Manufacturer-approved wood-floor cleaner, diluted per label | Use a spray mop; dry within minutes | Soft broom or dry microfiber dust mop |
| Engineered wood | Thin wood top layer; plywood or layered edges may be visible | Finish-approved cleaner with minimal liquid | Use a spray mop only; wipe edges dry at once | Bare-floor vacuum or microfiber |
| Unfinished or site-finished wood | Water soaks in quickly; surface looks dull or raw | pH-neutral product only if the finish maker approves it | Use a damp cloth only; don't wet-mop until sealed | Soft brush or dry microfiber |
| Waxed or hardwax-oiled wood | Soft or dull sheen; may feel slightly tacky | Cleaner approved for that wax or oil finish | Barely damp cloth and spot treatment only | Dust mop or soft cloth |
The table is a starting point, not permission to use the same amount of liquid on every board. Engineered wood needs particular care at the edges, where moisture can reach the layered core. Unfinished or oiled boards also need a gentler touch; use a damp cloth rather than a wet mop until you know the finish can safely handle more.
Waxed floors need a cleaner compatible with the wax. A product that leaves a coating on a factory finish can create a different problem, including a sticky or slippery surface. Choose by the floor or finish maker's product guidance, not by a bottle that merely says “wood.”
If you can't identify the floor, test an inconspicuous spot, use the least moisture that lifts the soil, and inspect the area after it dries. A cloudy appearance usually means the cleaner, dilution, or moisture level was wrong; it doesn't automatically mean the floor is ruined. Keep water and steam out of your routine unless the finish maker explicitly approves them. Bruce's hardwood guidance advises against mopping with water or using steam on hardwood floors.
How to Adjust the Routine Room by Room
Wood floors don't get equally dirty throughout a home. Focus extra dry cleaning where shoes, sand, food, and pet traffic collect, and keep damp cleaning limited to the areas that need it.
Entry and hallways: Put mats outside and inside the door, then remove grit frequently with a soft broom or vacuum. These spots take the brunt of shoe traffic, so preventing debris from traveling farther into the home is more useful than repeatedly mopping the whole floor.
Kitchen: Blot spills promptly, especially near the sink, dishwasher, and toe-kick where water can collect out of sight. If cooking splashes grease, remove it with a finish-approved product and a small amount of controlled moisture rather than spreading residue with a wet mop.
Living and dining areas: Lift furniture enough to clean beneath it, and use felt pads to help prevent scratches when chairs or tables move. Vacuum under dining chairs where crumbs can accumulate.
Bedrooms: Lighter traffic often means dry cleaning is enough between periodic damp cleans. Keep dust and hair from building up under beds and around furniture legs.
Bathroom thresholds and pet or kid zones: Wipe standing water at thresholds immediately. Blot pet accidents and food spills quickly, and increase dry soil removal where children or animals spend time. For households choosing products around pets, this guide to floor cleaner safe for dogs offers another useful consideration.
A Miami condo with a sliding glass door can bring balcony sand straight into the living area. In that home, the entry zone needs daily dry removal, while a bedroom away from the door may need much less frequent attention. The clean should follow the traffic pattern, not an assumption that every room needs the same treatment.
For a visual demonstration of wood-floor cleaning, watch this short video:
Humidity Rules for Miami-Dade Wood Floors
A closed condo in August stays damp long after the mop passes. That slow drying is what ruins wood here, because moisture sits in seams while the AC cycles off and humidity climbs back up. The EPA's indoor-air-quality guidance generally recommends keeping residential relative humidity between 30% and 50%. It also advises drying water-damaged materials within 24 hours when possible. The EPA indoor-air-quality guidance frames the right standard for wood: use only enough solution to lift soil, leave no wet areas behind, and deal with spills promptly.
Holding that range takes work in South Florida. The National Wood Flooring Association recommends using a dehumidifier during humid summer conditions to limit wood movement. Put an inexpensive hygrometer in the room you clean most often. When readings stay high, run air conditioning or a dehumidifier before any damp cleaning, not after the floor already looks hazy.
Time cleaning for drying
Skip damp cleaning when the room feels sticky and you cannot get the surface dry within minutes. Late-evening mopping is a common mistake, because the film stays damp overnight and softens the finish at the edges. If water reaches a seam, board edge, or adjacent material, dry it right away.
For ordinary water exposure, use the EPA's 24-hour drying target when possible. Its remodeling guidance allows 24 to 48 hours for damaged areas to dry to help prevent mold growth, but liquid should never sit on a wood floor that long. After renovation work that generates dust, let particles settle, then vacuum before any wet cleaning so grit does not scratch the finish.
Watch the floor tell you when humidity is winning. Edge swelling, gaps that open after humid months, dark lines along boards, or a musty smell near baseboards all point to moisture load, not dirt. Cut back on wet methods, improve airflow and dehumidification, and get the floor and nearby materials assessed if those symptoms persist.
How Often to Clean Each Floor
| Task | Frequency | Method |
|---|---|---|
| Dry soil removal | Daily in all rooms | Soft broom or dry microfiber dust mop |
| Spill response | Immediately | Blot with a dry or barely damp cloth, then dry |
| Bare-floor vacuum | Weekly | HEPA vacuum on bare-floor setting with beater bar disabled |
| Approved damp clean | Monthly, or every two weeks with heavy traffic or pets | Spray mop with approved cleaner, then finish with an absorbent pad |
| Seam and edge check | Quarterly | Look for gaps, lifting, cupping, or dark lines |
| Professional assessment | Every 1 to 3 years or when the finish looks worn | Ask a qualified flooring professional to assess the finish |
The National Wood Flooring Association's installation guidance recommends frequent dry soil removal, including daily removal of particles, weekly bare-floor vacuuming, and approximately monthly use of an approved wood-floor cleaner. Adjust that schedule to the traffic and finish condition, rather than adding water whenever the floor looks dull.
A home with pets or frequent rental turnovers may need an approved damp clean every two weeks. A lightly used guest room can often stay on a monthly schedule, provided spills are blotted immediately and dry debris doesn't build up. In both cases, more frequent dry cleaning is safer than making every cleaning session wetter.
Keep a simple floor log: Record the floor type, cleaner and dilution, application method, and whether the room was fully dry afterward. If the finish changes, those notes help pinpoint what changed.
If grit lines keep appearing near the entry, increase dry removal there. If the floor turns cloudy after cleaning, don't respond with more product or water; reconsider the cleaner and dilution first.
Mistakes That Damage Wood Floors
The costliest routine mistake is flooding the floor or leaving it wet. Water can enter joints and edges, swell the wood, contribute to cupping, and damage the finish. A mop that looks merely wet in a bucket can still leave too much liquid behind.
Avoid these common missteps:
- Using a steam mop. Heat and moisture can harm the finish or reach the wood beneath it; some manufacturers specifically prohibit steam.
- Reaching for vinegar, bleach, ammonia, or oil soap. These products can be incompatible with the finish and may dull it or leave a film.
- Using tile or multi-surface cleaner. A cleaner designed for another material may leave residue or alter the floor's appearance.
- Adding wax or polish over a factory finish. The wrong coating can create buildup and complicate future maintenance.
- Skipping a hidden-spot test. Test an unfamiliar cleaner before using it across a visible room.
- Reusing a dry brush from tile. Grit caught in its bristles can scratch the wood.
Disinfection is the tricky exception. Manufacturers commonly caution against water and harsh chemicals, while disinfectant directions may require a surface to stay visibly wet for a contact period. The Clorox hardwood-floor disinfection guidance highlights why a universal recipe is risky: confirm that the product is labeled for wood and approved by the floor or finish maker, test a hidden spot, apply the minimum controlled amount, and remove residual moisture as soon as the required directions allow.
Routine cleaning and disinfection aren't interchangeable, and stronger disinfecting isn't automatically safer for a low-touch floor. Stop if the finish turns cloudy, boards swell or cup, bare wood is exposed, or you can't identify the floor construction. For water marks that remain after drying, use a suitable repair approach rather than scrubbing harder; this guide explains how to remove water stains from hardwood floors.
Decide Between DIY Care and a Professional Clean
Keep up the DIY routine if the floor is finished, in good condition, and doesn't have residue or visible damage. Arrange a professional assessment when buildup persists, the floor looks cloudy after routine cleaning, the finish appears worn, or boards are swollen, cupped, or exposed.
A deep clean is generally the strongest starting point when a home hasn't been professionally cleaned recently or needs more than routine upkeep. Canes Cleaners' 36-Point Deep Clean starts at $199 and includes detail work such as baseboards, fans, fixtures, and touchpoints. You can review the deep-cleaning floor service and call 786-882-6923 for help choosing a clean.
- Identify the floor using the lookup table and, if needed, a cautious test in a hidden spot.
- Set a cleaning schedule and log the product and method you use.
- If buildup or damage remains, book a professional assessment before trying a stronger cleaner.
Canes Cleaners provides home and rental cleaning in Miami-Dade, including deep cleaning and post-construction cleanup where controlled floor care matters. Visit Canes Cleaners to explore cleaning options and choose a service that fits your home and its floors.