
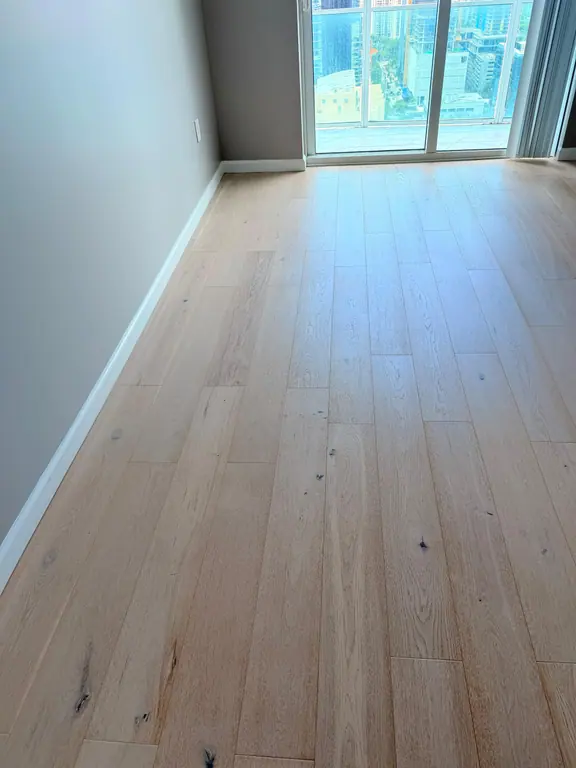
You've got the keys, the moving truck is on its way, and the property looks clean at first glance. Then you open the refrigerator and find residue on the shelves, run a finger along a window track, or discover dust inside a cabinet. A tidy room isn't the same as a ready home.
A reliable move in cleaning checklist starts before boxes arrive. It combines supply planning, condition photos, top-to-bottom sequencing, room priorities, safety observations, and a final handoff inspection. The best time to clean is while the property is empty, before furniture blocks baseboards, closets, appliances, and floors.
Use a standard clean for routine upkeep. Choose a deep clean when grime has built up in kitchens, bathrooms, floors, or high-touch areas. A move-in or move-out service makes more sense when responsibility is changing between occupants. If the property has renovation dust, protective film, caulk residue, or job-site debris, a complete post-renovation cleaning is the better scope.
For Miami-Dade homes, rentals, student apartments, furnished units, and short-term turnovers, Canes Cleaners offers customizable scopes and defined checklists, including a 48-point move-in and move-out service. Whether you're cleaning independently or comparing professional options, work in the order occupants notice, touch, use, and inspect first.
Table of Contents
- 1. Kitchen Appliance Interior Deep Clean
- 2. Bathroom Grout and Tile Deep Sanitization
- 3. Ceiling, Wall, and Baseboards Dust and Cobweb Removal
- 4. Bedroom Carpet Vacuuming and Spot Treatment
- 5. Living Room and Dining Area Floor Preparation
- 6. Laundry Room and Utility Space Deep Clean
- 7. Interior Door, Frame, and Hardware Sanitization
- 8. Window Interior Sills and Tracks Deep Cleaning
- 9. Closet, Cabinet, and Shelf Interior Organization and Cleaning
- 10. Entry and Transition Area Threshold Cleaning
- Move-In Cleaning: 10-Point Task Comparison
- Run the Final Walkthrough Before Anyone Moves In
1. Kitchen Appliance Interior Deep Clean
Appliance interiors often reveal whether a property received a real turnover clean or only a quick surface wipe. Start with the refrigerator, oven, dishwasher, range hood, and microwave while the kitchen is still empty. In a Coral Gables condo with an older rental appliance, for example, the shelves may look acceptable until you remove them and inspect the corners, seals, and underside of each rack.
Take condition photos before scrubbing. Property managers can use the images alongside the original move-in record to compare conditions later, and one property-management turnover checklist recommends keeping 50 to 100 photos of rooms, surfaces, and systems for that purpose. The property-turnover checklist shows why cleaning documentation now functions as part of a broader evidence and accountability process.
Clean appliances in the right order
Remove only parts allowed by the manufacturer's instructions. Wash refrigerator shelves and drawers separately, wipe the gasket folds, and clean the interior ceiling before the floor. Degrease the oven interior and racks, clean the microwave cavity, and inspect the dishwasher filter and spray arms for trapped food or construction residue.
- Test first: Apply an eco-friendly degreaser to an inconspicuous area before using it on painted, coated, or stainless surfaces.
- Clean high to low: Wash the range hood and upper surfaces before counters, cabinet fronts, and floors.
- Record defects: Photograph cracked shelves, damaged seals, missing racks, protective film, or mechanical concerns rather than treating them as cleaning problems.
The dishwasher filter and spray arms deserve attention because a clean exterior says little about the parts that circulate water. Once appliance interiors are finished, clean counters and cabinet work so dust and grease don't settle back onto surfaces.
Watch the appliance-cleaning sequence in practice, then compare the scope with Canes Cleaners' move-in and move-out cleaning service, which is designed for detailed turnover work.
2. Bathroom Grout and Tile Deep Sanitization
A bathroom can smell fresh while grout, caulk lines, shower tracks, and tile edges still hold soap residue or moisture-related buildup. Start with dry debris, then apply the appropriate cleaner and give it time to work. Porous grout needs dwell time, and rushing from application to wiping usually leaves the deepest soil untouched.
In a Miami Beach oceanfront condo, salt-laden air and persistent humidity can make shower residue more noticeable. In a University of Miami student apartment, repeated showers and limited ventilation may leave the bathroom damp between occupants. Cleaning can improve the surface, but it can't repair a leaking valve, failed caulk joint, or damaged grout bed.
Separate cleaning from condition reporting
Use steam carefully on compatible grout and tile, especially where aggressive chemicals could damage finishes. An eco-friendly enzymatic cleaner can help with organic residue, while a microfiber cloth is better than a rough towel for glass shower enclosures. Let the selected product sit for its label-recommended dwell time, then agitate grout lines with a suitable brush.
- Work from dry to wet: Vacuum or dust loose debris before applying liquid cleaner.
- Protect the finish: Test natural stone, colored grout, and specialty tile in a hidden area.
- Inspect while cleaning: Note leaks, cracked grout, soft caulk, loose tiles, or persistent discoloration.
- Ventilate afterward: Open windows where safe and run the exhaust fan to help the room dry.
A bathroom is ready when the tile is clean, the enclosure is streak-free, the fixtures are free of residue, and the room has no unexplained moisture source. Don't label active mold caused by a leak as a cleaning failure. Document it and send it to the owner, manager, or maintenance contact.
3. Ceiling, Wall, and Baseboards Dust and Cobweb Removal
Dust travels downward. If you wash floors before cleaning ceiling fans, corners, walls, and baseboards, you'll often have to repeat the floor work. Start at the highest accessible point and move around the room in a consistent direction so every vertical surface receives the same inspection.
A vacant rental in Miami may collect webs in corners and dust on trim even when no one has occupied it recently. A Doral new-build condo can present a different problem, with fine drywall dust settling on walls, fixtures, and floor edges. That dust may be difficult to see until light crosses the surface at an angle.
Protect delicate finishes
Use a dry microfiber duster or vacuum attachment first. Wet cleaning can smear fine dust across painted walls, while textured ceilings can shed or deform if scrubbed aggressively. Test any wall cleaner behind a door or in another hidden spot, especially on matte paint, wallpaper, or specialty finishes.
- Start overhead: Clean ceiling corners, fans, light fixtures, and air-vent covers first.
- Follow the edges: Work along wall corners, trim, baseboards, and behind doors where dust settles.
- Check safety devices: Remove loose dust from smoke detectors without spraying liquid into the unit.
- Separate damage from dirt: Photograph water stains, cracks, peeling paint, and impact marks for the property record.
Practical rule: If debris can fall onto a lower surface, clean the higher surface first.
Baseboards need more than a quick pass along the top edge. Vacuum the floor line, wipe the front face, and inspect corners where hair, grit, and cobwebs collect. For a detailed method, use this guide to clean baseboards efficiently.
4. Bedroom Carpet Vacuuming and Spot Treatment
Bedroom floors affect comfort before most residents have unpacked. Carpet can hold pet hair, food particles, dust, and old spots that aren't obvious under ordinary lighting. Begin with a slow vacuum pass around the perimeter, then make additional passes across the main walking paths and beneath accessible furniture.
A pet-friendly Miami apartment may need targeted treatment rather than a general deodorizer. In student housing, spilled drinks and food debris often concentrate near desks and beds. A vacant unit may have less visible soil but still carry dust from open windows, maintenance work, or long periods without routine cleaning.
Treat spots without adding moisture problems
Use a vacuum with a HEPA filter when allergen control matters. Work in different directions to lift embedded debris, and test any spot treatment inside a closet before applying it in the center of the room. Enzymatic products can be useful for organic stains, but follow the label and give the product enough contact time to work.
- Inspect methodically: Check corners, closet thresholds, under bed frames, and around floor vents.
- Treat selectively: Apply cleaner to the stain rather than wetting the entire carpet.
- Look beyond appearance: A blacklight inspection can help identify areas that need pet-odor treatment.
- Dry conservatively: Avoid saturating carpet, particularly in humid Florida interiors where trapped moisture can create further problems.
Carpet cleaning is complete when the pile is free of loose debris, treated spots no longer transfer soil, and the carpet has dried before handoff. Persistent odor, discoloration, or suspected contamination may require a specialist rather than repeated spot spraying. Property managers should also record carpet condition before the next occupant arrives.
5. Living Room and Dining Area Floor Preparation
Living and dining floors create an immediate impression because occupants walk across them as soon as they enter. Clean them according to the material, not according to a universal mop routine. Marble, ceramic tile, hardwood, laminate, and vinyl each respond differently to water, abrasion, and cleaning chemistry.
In a Doral townhouse after construction, vacuuming must remove fine dust before wet work begins. In a Coral Gables home with older hardwood, excess moisture can cause more harm than the dirt itself. A Miami Beach condo with tile or stone may require attention to grout, edge buildup, and residue left by previous maintenance products.
Match the method to the surface
Identify the flooring before opening a bottle. Use a lightly damp microfiber mop on hardwood, a low-moisture method on laminate, and a compatible cleaner on vinyl. Tile may tolerate more agitation, but grout lines and natural stone still need product-specific care.
- Vacuum edges first: Use a crevice tool along baseboards, under cabinets, and at floor transitions.
- Control water: Hardwood and laminate need limited moisture and prompt drying.
- Test products: Check an inconspicuous area before applying an unfamiliar eco-friendly solution.
- Inspect the substrate: Record warping, stains, cracked tiles, loose boards, or water damage that cleaning won't correct.
Microfiber pads generally collect soil more effectively than a heavily soaked traditional mop, and they're easier to replace between rooms. Clean the edges before the center so loosened dirt moves toward the area you'll remove last. Let the floor dry fully before occupants, movers, or pets cross it.
A floor is ready when it feels clean underfoot, shows no cloudy residue, and presents no slip hazard. Don't promise restoration when the issue is worn finish, permanent staining, or damaged material.
6. Laundry Room and Utility Space Deep Clean
Laundry rooms combine lint, detergent residue, enclosed moisture, plumbing connections, and electrical equipment. Clean the space with safety first. Turn off or unplug appliances before accessing removable components, and never spray directly into controls, outlets, motors, or ventilation openings.
Start with the dryer lint screen and accessible lint around the appliance. Clean the washer drum, door gasket, detergent drawer, exterior panels, drain area, and floor behind or beside the machines where access allows. Inspect the drain pan for standing water, because a recurring puddle points to a plumbing or appliance issue rather than a dirty floor.
Check function while you clean
A rental turnover in a Miami condo may reveal lint buildup that the previous occupant never removed. In a post-construction property, fine dust can collect behind machines and on utility shelving. A short-term rental needs the same attention because guests often judge the laundry area by whether the washer, dryer, and supplies look ready to use.
- Inspect seals: Look for cracked rubber gaskets, hardened residue, or signs of leakage.
- Brush accessible vents: Use a flexible dryer-vent brush only where the section is designed to be accessed safely.
- Ventilate the room: Open suitable windows or run ventilation while treating enclosed areas.
- Document defects: Record damaged hoses, standing water, unusual corrosion, or appliance-control problems.
Cleaning can expose a maintenance issue, but it can't replace an appliance technician or a proper dryer-vent service.
Wipe walls, shelves, utility sinks, and floors after appliance work. Confirm that the lint filter is clean, the floor is dry, and no chemical residue remains on surfaces that occupants may touch. For ongoing maintenance, property managers should arrange professional dryer-vent cleaning according to the appliance and property's maintenance requirements.
7. Interior Door, Frame, and Hardware Sanitization
Doors are among the most frequently touched surfaces in a home, yet standard cleaning often gives them only a quick visual wipe. Clean the door face, top edge, frame, hinges, handle, lock area, and nearby wall. Closet doors and utility-room doors deserve the same treatment as bedroom and bathroom doors.
Start at the top of the frame and work downward. Use a microfiber cloth with a compatible cleaner, then apply disinfectant to appropriate high-touch surfaces according to the product label. The surface must stay wet for the required contact period. A quick spray followed by immediate drying may remove fingerprints without delivering the disinfecting result the label specifies.
Test every handle after cleaning
Construction workers can leave handprints on new hardware, while previous occupants leave skin oils and smudges around handles and lock plates. A furnished short-term rental needs especially consistent touchpoint work because many guests use the same controls between turnovers.
- Clean touchpoints: Include handles, lock plates, light switches, drawer pulls, and nearby railings.
- Protect finishes: Test disinfectant on an unseen area before treating lacquered, painted, or specialty hardware.
- Check movement: Open and close each door, test the latch, and confirm the lock turns smoothly.
- Inspect seals: Note gaps around the frame that could allow drafts, pests, or moisture intrusion.
Don't soak hinges or electronic locks. Apply product to the cloth where appropriate, keep liquid away from electrical components, and wipe residue from glossy surfaces. If a door sticks after cleaning, check whether the problem is dirt, swelling, loose hardware, or a frame defect.
The final check is simple. Every door should look even in natural light, every handle should feel clean rather than tacky, and every reported mechanical issue should have a photo or written note.
8. Window Interior Sills and Tracks Deep Cleaning
Windows can look clean from across the room while tracks hold dust, insects, moisture residue, and construction debris. Open each accessible window, inspect the sill and channel, and begin with dry removal. A vacuum with a soft brush attachment lifts loose material without forcing it deeper into narrow tracks.
A vacant Aventura property may have accumulated debris during an extended closure. A Miami Beach condo may show salt residue or moisture marks around frames. Post-construction units can contain caulk fragments, protective-film adhesive, and installation dust that require more than ordinary glass cleaner.
Treat tracks as drainage areas
Use a small brush for corners and a microfiber cloth for the sill and frame. Apply an appropriate cleaner to mold-prone residue, allow the product to work according to its label, and remove it without flooding the track. Compressed air can dislodge stubborn particles, but protect nearby surfaces and avoid blowing contaminated debris through the room.
- Inspect water marks: Stains, swelling, or repeated moisture may indicate water intrusion.
- Check weatherstripping: Gaps and deterioration can affect comfort and allow pests or moisture entry.
- Protect the glass: Use a lint-free cloth and avoid abrasive tools near coated or tinted glass.
- Coordinate height work: Multi-story exterior windows need an appropriately qualified service, not unsafe interior improvisation.
For a detailed approach to narrow channels and ledges, use this guide to clean window sills like a professional. Finish by checking that glass is streak-free, tracks are free of loose debris, and the sill is dry.
9. Closet, Cabinet, and Shelf Interior Organization and Cleaning
Storage interiors should be cleaned before clothing, dishes, toiletries, or linens arrive. Open every cabinet, drawer, closet, pantry, and built-in shelf. Previous occupants may leave crumbs, packaging, hair, labels, or forgotten items in places that are invisible once the new resident fills the space.
Begin with an inventory pass. Remove abandoned items according to the owner's or property manager's instructions, then vacuum corners and shelf joints before wiping. In a renovated kitchen, installation dust often settles on cabinet tops, drawer interiors, hinges, and undersides even when the visible fronts look new.
Clean storage without leaving residue
Use a lightly damp microfiber cloth and a compatible cleaner. Food-storage surfaces need special care because strong fragrance or chemical residue can transfer to dishes and pantry items. Wipe corners, shelf undersides, drawer tracks, and cabinet faces, then leave doors open long enough for enclosed areas to dry.
- Check moisture: Look for swollen particleboard, staining, musty odor, or dampness inside closed storage.
- Inspect stability: Test shelves, rods, brackets, and drawer movement before the resident loads them.
- Look for pests: Record droppings, insect evidence, damaged packaging, or gaps that need pest-control attention.
- Document defects: Photograph broken hinges, chipped laminate, damaged liners, and missing hardware.
A closet in shared University of Miami student housing may need a more explicit handoff because several people use the same storage area. A furnished rental needs linen shelves and supply cabinets arranged consistently so the next guest can find essentials quickly. Organization should support the handoff, but cleaners shouldn't discard property without authorization.
The area passes inspection when interiors are empty or correctly staged, dry, odor-free, and free of loose debris. Leave a written note for anything that requires replacement, repair, or owner approval.
10. Entry and Transition Area Threshold Cleaning
The entry is the first area occupants see and the first area that collects outside soil. Sand, salt residue, tracked grit, construction dust, and moisture gather at thresholds, under doors, and along floor transitions. Clean this zone last among the high-dust tasks, but before the final walkthrough.
Begin with a thorough vacuum using a crevice tool around the threshold, frame corners, floor transitions, and baseboard edges. Mopping before removing grit can spread abrasive particles across the floor. Use the correct product for the threshold material, then wipe the entry door, lock, handle, frame, nearby switches, and visible wall marks.
Inspect the boundary between inside and outside
Coastal properties in Bal Harbour or Miami Beach may need attention to mineral residue on hardware and flooring. A post-construction entry may contain fine debris trapped under door sweeps or in caulk joints. In a student apartment, the entry may need a careful reset after high traffic, but the inspection still matters.
- Clean the floor transition: Match the method to tile, hardwood, laminate, vinyl, or stone.
- Check seals: Inspect weatherstripping, door sweeps, and threshold caulk for gaps.
- Look for intrusion: Note staining, dampness, pest evidence, or damaged exterior material.
- Finish touchpoints: Disinfect the entry handle and lock area without flooding the hardware.
Open and close the door to confirm that cleaning hasn't left grit in the latch or caused a slip hazard. Wipe the final section of floor only after surrounding walls, frames, and hardware are complete. The entry should look even from the doorway, feel dry underfoot, and provide a clear record of any condition outside the cleaning scope.
A practical turnover plan must also account for labor and consistency. One apartment turnover guide divides the work into five phases and describes a 150-point make-ready process, while another estimates roughly 3 to 6 hours per unit turnover, depending on unit size. Those benchmarks illustrate why a move-in checklist works best as an operational tool, not a casual list of chores. The apartment turnover guide supports using phases, room modules, and sign-offs when several people share the work.
Move-In Cleaning: 10-Point Task Comparison
| Service | Complexity 🔄 | Resources & Time ⚡ | Expected Outcomes 📊 | Ideal Use Cases 💡 | Key Advantages ⭐ |
|---|---|---|---|---|---|
| Kitchen Appliance Interior Deep Clean | High 🔄🔄🔄 | 45–60 min/kitchen; eco degreasers, brushes, disassembly tools | Restores appliance function; removes mold, odors, allergens 📊 | Post-renovation, short-term rental turnover, older rental move-ins | Extends appliance life; move-in confidence; health protection ⭐ |
| Bathroom Grout and Tile Deep Sanitization | Medium-High 🔄🔄 | 30–45 min/bath; grout brushes, steam/pressure tools, enzymatic cleaners | Eliminates mold/mildew and soap scum; improved hygiene & appearance 📊 | Coastal condos, Airbnb turnovers, post-construction bathrooms | Dramatic visual improvement; mold-related health risk reduction ⭐ |
| Ceiling, Wall, and Baseboards Dust and Cobweb Removal | Medium 🔄🔄 | 15–20 min/room; extension poles, ladders, microfiber mops | Visible freshness; allergen reduction; prevents resettling of dust 📊 | Post-construction, vacant rentals, high-rise condos | High-impact visual change with relatively quick effort ⭐ |
| Bedroom Carpet Vacuuming and Spot Treatment | Medium 🔄🔄 | 20–30 min/bedroom; HEPA vacuums, spot cleaners, blacklight | Improved indoor air quality; stain reduction and deodorization 📊 | Pet-friendly units, student housing, short-term rentals | Removes allergens; cost-effective vs replacement; fast turnaround ⭐ |
| Living Room and Dining Area Floor Preparation | Medium-High 🔄🔄🔄 | 30–40 min/area; surface-specific mops, polishers, grout care | Strong first impression; floor protection; quick-dry finish 📊 | Open-concept condos, post-renovation, guest-facing rentals | Preserves flooring investment; visible presentation boost ⭐ |
| Laundry Room and Utility Space Deep Clean | Medium-High 🔄🔄🔄 | 25–35 min; lint brushes, vent tools, enzymatic mold cleaners | Reduced fire risk; better appliance efficiency; mold control 📊 | In-unit laundry homes, post-installation checks, rental inspections | Safety-focused; prevents water/fire hazards; extends appliance life ⭐ |
| Interior Door, Frame, and Hardware Sanitization | Low-Medium 🔄🔄 | ~2–3 min/door (20–30 min typical home); microfiber, eco disinfectant | Sanitized high-touch surfaces; improved hygiene perception 📊 | High-turnover rentals, multi-room properties, post-construction | High impact for low time; pathogen reduction; mechanical check ⭐ |
| Window Interior Sills and Tracks Deep Cleaning | Medium 🔄🔄 | Varies (time-intensive for tracks); vacuum, small brushes, enzymatic cleaners | Clearer light; improved airflow; mold/mildew removal in tracks 📊 | Coastal properties, multi-story condos, post-construction units | Enhances natural light; addresses moisture intrusion risks ⭐ |
| Closet, Cabinet, and Shelf Interior Organization and Cleaning | Low-Medium 🔄🔄 | 3–5 min/closet or cabinet; microfiber, disposal bags, organizers | Clean, organized storage; allergen removal; issue detection 📊 | Apartments, condos, short-term rentals, post-renovation | Immediate resident satisfaction; uncovers hidden damage ⭐ |
| Entry and Transition Area Threshold Cleaning | Medium 🔄🔄 | 15–30 min; vacuum, floor-type cleaners, salt/mineral residue solutions | Strong first impression; limits tracked-in debris; salt residue removal 📊 | Coastal condos, luxury homes, post-construction entries | High-visibility impact; prevents interior re-soiling; protects thresholds ⭐ |
Run the Final Walkthrough Before Anyone Moves In
The final walkthrough should happen after cleaning, drying, and equipment removal, not while the team is still moving from room to room. Start at the entry and follow the path a resident, guest, or property manager will naturally take. This makes missed transition areas easier to spot and tests the handoff as an occupant experiences it.
Use daylight where possible, then add a portable light for dark corners, cabinet interiors, window tracks, and appliance seals. Touch surfaces as well as viewing them. A counter can look clean but feel greasy, and a floor can appear polished while leaving sticky residue on socks or shoes.
Inspect the property in a fixed order
Use the same route every time so the process doesn't depend on memory. A consistent route is especially important for property managers, student housing teams, and short-term rental operators who need repeatable results between occupants.
- Entry and transitions: Confirm the threshold, door hardware, nearby walls, and floor edges are clean and dry.
- Kitchen: Open the refrigerator, oven, dishwasher, microwave, cabinets, drawers, pantry, and range hood.
- Bathrooms: Check grout, shower glass, fixtures, toilet bases, vanity interiors, ventilation, and floor corners.
- Living and dining areas: Inspect floors, baseboards, fans, windows, tracks, switches, and visible wall surfaces.
- Bedrooms and storage: Check carpet edges, closets, shelves, doors, sills, and any areas hidden behind movable items.
- Laundry and utility spaces: Verify lint removal, appliance surfaces, drain areas, seals, shelves, and floor condition.
Pay particular attention to touchpoints. Handles, locks, switches, appliance pulls, faucet levers, cabinet knobs, and remote controls should feel clean and dry. Don't leave disinfectant haze, degreaser film, soap residue, or fragrance buildup behind. If a product requires contact time, follow the label during the cleaning process and wipe or rinse as directed afterward.
Record what cleaning cannot fix
A move-in clean often exposes issues that deserve maintenance attention. Photograph leaking valves, cracked glass, damaged flooring, failed caulk, warped cabinets, water stains, broken locks, pest evidence, and appliance faults. Send the record to the responsible owner or manager before the resident unpacks, especially when the original condition report will be used for a later comparison.
The inspection should also confirm that windows, floors, counters, shower walls, and appliances are dry. Moisture left behind in a humid property can create odor and comfort problems even when the surfaces look spotless. Ventilation belongs in the handoff plan. Guidance for a broader move-in reset includes opening windows where appropriate, cleaning vents and ceiling fans, checking HVAC filters, and cleaning floors after high surfaces so settled debris doesn't recontaminate the finished floor. This move-in cleaning checklist PDF reflects that wider approach.
Choose the right scope before scheduling
A standard clean is suitable for a maintained home that needs routine surface care. A deep clean makes sense when baseboards, fixtures, appliance interiors, grout, windows, or storage areas have been neglected. A move-in or move-out service is the better fit when one occupant is leaving and another is taking responsibility.
Post-construction cleaning deserves separate consideration. Renovation dust, fine debris, adhesive residue, grout haze, and protective film can spread through rooms and require specialized equipment and sequencing. A property that has been vacant, renovated, previously short-term rented, or heavily occupied may technically be assigned a “move-in clean” while requiring the workload of a deep clean. Move-in checklists increasingly include refrigerator interiors, dishwasher cleaning, cabinet interiors, grout, baseboards, window tracks, and hidden areas behind appliances, which is why scope assessment matters before anyone gives a quick estimate. This detailed move-in checklist illustrates how broad a ready-to-occupy standard can become.
Schedule backward from key handoff, not from the moment the moving truck arrives. Leave room for post-construction dust, multiple bathrooms, carpet treatment, appliance interiors, and moisture-related discoveries. One industry benchmark reports annual turnover above 50% at 41% of contract-cleaning firms, while 20% of firms keep turnover below 10%. The cleaning-industry turnover benchmark helps explain why a scalable operation needs room-level modules, supervisor quality checks, training repetition, and post-service sign-off rather than relying on individual memory.
Cost control also depends on scope control. An Australian small-business benchmark places total expenses for building and industrial cleaning businesses between 30% and 85% of turnover, varying by revenue band. The Australian cleaning-services benchmark is not a Miami pricing guide, but it reinforces a practical point. Checklist depth affects labor minutes, supplies, travel, setup, and rework. Separate high-effort add-ons such as appliance interiors, detailed descaling, carpet treatment, and post-construction residue so everyone understands what the quoted scope includes.
You can use this move in cleaning checklist yourself, assign each room to a trained person, and sign off every checkpoint. You can also compare the checklist with a defined professional service, such as Canes Cleaners' 48-point move-in and move-out clean for Miami-Dade homes, apartments, condos, student housing, and short-term rentals. The right choice depends on access, condition, deadline, equipment, and how much documentation the handoff requires.
Before anyone moves in, open the doors, pull the drawers, touch the handles, inspect the tracks, walk the floors, and photograph the exceptions. That final discipline turns a property that merely looks tidy into a cleaner, safer, better-documented handoff. For planning the rest of the transition, use this post-move planner alongside the cleaning record.
Canes Cleaners provides customizable standard, deep, move-in and move-out, and post-construction cleaning for homes, apartments, student housing, short-term rentals, and other Miami-Dade properties. Visit Canes Cleaners to compare defined checklist scopes, schedule online, and request a cleaning plan built around your rooms and handoff deadline.