
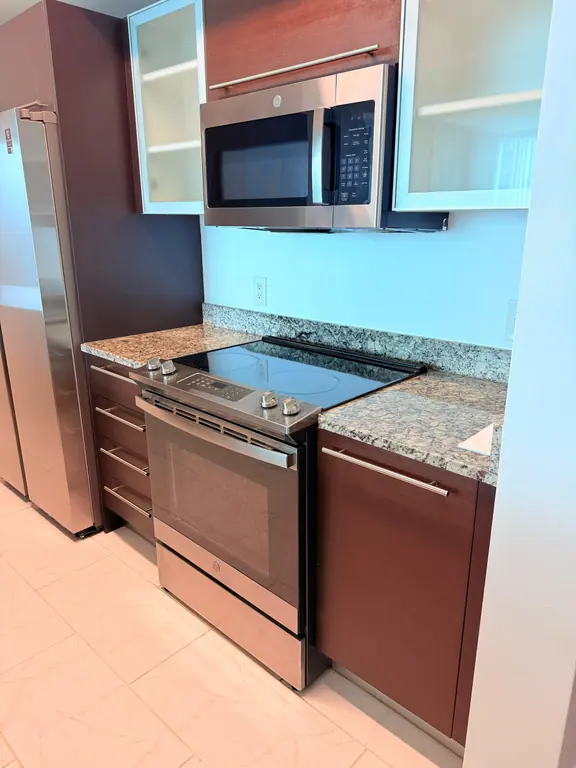
The cabinet above the range is the first one to look tired. It gets the soft gray film, the sticky fingerprint ring around the pull, and that faint tacky feel that shows up long before the doors in the back hallway look dirty. In Miami-Dade kitchens, humidity makes that film hang on longer, so how to clean kitchen cabinets is really about keeping grease from hardening into a finish problem you can't wipe away in one pass.
A good routine is small and repeatable. A bad routine is waiting until the fronts feel gummy, then scrubbing harder and hoping the coating survives.
Table of Contents
- Why Kitchen Cabinets Get Dirty Faster Than You Think
- Prep the Kitchen and Stage Your Supplies
- Match Your Cleaner to the Cabinet Finish
- Wipe Down Exteriors Section by Section
- Clean Cabinet Interiors Without Damaging Shelves
- Handle Hardware, Stains, and Stubborn Spots Safely
- Maintenance Schedule and When to Call Canes Cleaners
Why Kitchen Cabinets Get Dirty Faster Than You Think
The cabinet fronts near the stove never stay neutral for long. Cooking throws tiny oil particles into the air, and they settle first on the panels closest to the heat, then on handles, pulls, and the upper edges people touch all day. That thin layer doesn't always look dramatic at first, but it gives dust something to cling to, and once that happens the surface starts feeling sticky instead of merely dusty.
White and light-painted cabinets make the problem easier to see, but darker finishes collect the same residue. The difference is visibility, not innocence. In humid South Florida kitchens, the residue can feel like it bonds faster, which is why a weekly wipe does more than an occasional deep scrub. Southern Living advises wiping cabinet surfaces every week, especially the undersides near the stove, with a soft microfiber cloth and warm, soapy water, and also recommends a deeper clean every few months, which fits the way buildup behaves in a busy kitchen Southern Living.
Practical rule: the closer a cabinet sits to the cooktop, the more often it needs attention.
Where the grime lands first
The first places to check are almost always the same. The underside of upper cabinets, the doors beside the range hood, and the pull hardware catch aerosolized grease before the rest of the kitchen does. Cabinet tops collect dust and cooking residue too, but they usually show it later because nobody touches them as often.
Why frequency protects the finish
A light wipe removes the film before it hardens. That matters because harder buildup usually leads people to use stronger pressure, harsher products, or more water than the finish can handle. A recurring habit keeps the work gentle, which is exactly what painted, laminate, and wood cabinets need if you want them to keep their look instead of going dull at the edges.
Prep the Kitchen and Stage Your Supplies
Start by clearing the work zone, not by spraying the first panel you see. Move small appliances off the counters, take down anything sitting on top of the cabinets, and open a window if the kitchen gets stuffy. That little bit of airflow helps the surfaces dry faster, and in a humid place that matters more than people think.
Lay out what you'll use. Microfiber cloths, a vacuum with a brush attachment, two buckets if you like the rinse-and-clean method, mild dish soap, a little baking soda, and a soft-bristle brush cover most cabinet jobs. For a quick Florida-style reset, that's enough. Heavy products usually create more residue than they remove.
Dry first, wet second
Vacuum crumbs and dry-dust before any water touches the surface. Loose grit acts like sandpaper once it gets trapped under a damp cloth, and that's how faint scratches show up on painted or glossy finishes. I'll usually run the brush attachment along shelf corners, toe-kick edges, and the cabinet tops before I even mix soap.
Cleaner habit that saves finishes: never spray directly onto the cabinet door if the finish is delicate or aging. Put the solution on the cloth instead.
Build the solution the safe way
A spray bottle works for very light soil, but a bucket is often better when you're cleaning several cabinets in one room because it lets you control how damp the cloth is. The cloth should feel barely wet, not drippy. If water is beading on the panel, it's too much, and excess moisture is one of the fastest ways to create swelling, streaking, or cloudy residue.
If you want a practical walkthrough that matches the order a cleaner would use on site, the Canes Cleaners kitchen cleaning guide shows the same basic prep logic: clear first, dust first, wet clean second.
Match Your Cleaner to the Cabinet Finish
The safest cabinet cleaner is the one that fits the finish in front of you. That sounds obvious, but a lot of damage starts with a product that works fine on one material and dulls another. The Spruce notes that mild dish soap is a common general option, while other guides are less consistent about finish-specific care, which is exactly why the material matters before the first wipe The Spruce.
Safe vs. Avoid Cleaners by Cabinet Finish
| Cabinet Finish | Safe Cleaners | Avoid |
|---|---|---|
| Painted cabinets, matte or satin | Mild dish soap, warm water, microfiber cloth, baking-soda paste on isolated spots | Bleach, ammonia, abrasive powders, aggressive scrubbing pads |
| Thermofoil or laminate | Barely damp microfiber cloth, mild soap solution, gentle spot cleaning | Over-wetting, bleach, abrasive sponges, harsh degreasers |
| Sealed wood | Mild soap solution, dry-buffing, lightly applied baking-soda paste for stubborn grease | Soaking the surface, ammonia, abrasive pads, repeated heavy scrubbing |
| Stainless or metal hardware | Mild soap, microfiber cloth, careful rinsing and drying | Steel wool, abrasive powders, bleach-heavy mixes |
Painted cabinets are usually the most sensitive because the finish can go dull or patchy if you attack it too hard. Laminate and thermofoil tolerate routine wiping, but their edges and seams hate water left sitting there. Sealed wood handles gentle cleaning well, yet in Miami-Dade humidity, slow drying can still cause trouble around joints and end caps.
What works as the default
A non-toxic, plant-based dish soap in warm water is the safest starting point for most homes. A small baking-soda paste is a good backup for greasy spots that don't move with the first pass. If a product promises fast cutting power, check whether it also asks your finish to take the hit.
Keep humidity in mind
South Florida moisture changes the risk profile. A cabinet that might dry quickly in a dry climate can hold dampness at the seams longer here, especially if the doors stay closed right after cleaning. That's why the finishing step, not just the cleaner, decides whether the result looks clean or cloudy.
For homeowners who want an eco-conscious service option instead of mixing products themselves, Canes Cleaners' eco-friendly cleaning approach aligns with the same low-residue idea.
Wipe Down Exteriors Section by Section
The cleanest cabinet jobs follow gravity. Start high, move down, and keep each section separate so you're not dragging grease back onto a fresh door. That order matters most above and beside the cooktop, where the surface usually carries the heaviest film.
The sequence that actually works
Begin with the upper cabinet tops and undersides, especially near the range. Then move to the door fronts and side panels. Finish with the toe-kicks, base panels, and hardware. By saving pulls and knobs for last, you keep the dirt from your hands off the cleaner surfaces you just finished.
A microfiber cloth folded into quarters gives you eight clean faces to rotate through, which helps a lot on greasy jobs. Lightly dampen one section of the cloth, wipe in the direction of the grain if you're on wood, and switch to a fresh side as soon as the cloth starts feeling loaded. A second pass with plain water clears soap film, and a final dry-buff keeps humid air from leaving spots behind.
Where grease needs a little more help
The cabinet panels closest to the cooktop sometimes need a baking-soda paste. Use it only on the stubborn patch, not across the whole front. Let it sit briefly, then move it with light pressure. If the finish starts to look hazy, stop and go back to mild soap.
Grease that's been sitting for weeks doesn't need force first, it needs patience first.
What not to do
Skip abrasive sponges on aging or peeling finishes. They can scratch the coating or lift weak edges, and once that happens the cabinet starts to look tired even if the grime is gone. Strong degreasers are also a gamble on delicate paint and thermofoil, so I use them sparingly and only when the label clearly fits the material.
Clean Cabinet Interiors Without Damaging Shelves
Interior cabinet cleaning feels different from exterior wiping because the surfaces are drier, more enclosed, and easier to overwork. Empty one cabinet at a time so you can see what fell into the corners, then vacuum the crumbs before you bring in any moisture. That keeps loose grit out of the wet cloth and gives you a clearer look at sticky spills, dust, and pest-prone corners.
A barely damp microfiber cloth and a mild soap solution are usually enough for shelves and interior walls. Don't flood the surface. Excess water has nowhere to go inside a cabinet, and in a humid kitchen the doors trap that moisture long enough to create odor, swelling, or a tacky feel when you reload the dishes too soon.
Drying matters more indoors
Many expert guides recommend leaving cabinet interiors to air-dry for 1 to 2 hours before refilling, and that waiting period makes sense in South Florida kitchens where the air already slows evaporation Homes & Gardens. If you're doing more than a quick wipe, leave the doors open while the shelves dry.
What usually needs interior attention
- Crumbs and flour dust: These collect in shelf corners and under stored items faster than people expect.
- Sticky spill rings: A jar leak or syrup drip needs a mild soap pass, then a rinse with clean water.
- Stacked dish dust: Plates and bowls can trap fine debris if cabinets haven't been opened in a while.
- Old shelf liners: Washable mats save time later if you cook often or store lots of packaged food.
Best interior rule: empty less, clean more often, and dry longer than feels necessary.
If you're cleaning after pests, a move, or a renovation, a full interior reset makes sense. Otherwise, the inside of each cabinet can stay on a slower schedule than the greasy front faces.
Handle Hardware, Stains, and Stubborn Spots Safely
The knobs and pulls tell the truth about a kitchen. If they feel slick, the surrounding paint usually has a film too. Removing hardware makes cleanup easier, but only if you keep track of the screws in a labeled cup or small bag so nothing disappears into a drawer or floor vent.
When the finish around a pull is dirty, clean behind it before polishing the metal. A microfiber cloth and mild soap work on most hardware, and a dry buff prevents water spots from sitting in seams. For stainless hardware, use the same careful routine you'd use on appliances, because the finish can show streaking fast if you leave residue behind. This stainless-steel care guide is a useful match for that approach.
Stains need the right response
Some marks need a paste, not more detergent. Grease splatter and brown haze on painted cabinets often respond to a baking-soda paste applied only where needed. Water marks near the sink or dishwasher usually improve when the surface is dried fully after a gentle wipe. Kids' crayon or marker marks can sometimes soften with a very light melamine sponge pass, but I use that cautiously because it can take the sheen off a delicate finish.
When the finish itself is the issue
Bleach and ammonia are common shortcuts people reach for when a stain won't move. On aging paint or coated wood, those products can dull, yellow, or strip the finish instead of cleaning it. If a spot stays hazy after a gentle pass, the cabinet may already have coating damage, and stronger scrubbing won't fix that.
If the stain disappears but the sheen changes, the cleaner solved the soil and damaged the surface.
That's the point where restraint wins. A finishing touch should make the cabinet look cleaner, not more tired than before.
Maintenance Schedule and When to Call Canes Cleaners
A workable cabinet schedule is simple enough to remember without a chart on the fridge. Weekly, wipe high-touch exteriors, handles, and the cabinet faces nearest the stove. Monthly, degrease the cooktop zone and the panels beside the range hood, because that's where cooking oils land first. Quarterly, refresh one or two interiors each week so the job stays small instead of becoming a full Saturday wipeout.
A practical schedule for busy kitchens
- Weekly quick wipe: Handles, pulls, and front panels that collect fingerprints.
- Monthly grease reset: Upper fronts, undersides near the cooktop, and the hood-adjacent cabinets.
- Quarterly interior refresh: One cabinet section at a time, emptied, vacuumed, wiped, and dried.
- Event-based deep clean: After renovation dust, pest activity, tenant turnover, or a long gap in upkeep.
That schedule works because it matches the way dirt accumulates. High-touch and high-grease zones deserve the most frequent attention, while low-use interiors can wait. For rental properties, short-term stays, or move-outs, the cadence changes again, and that's when professional help becomes practical instead of optional.
Canes Cleaners handles recurring home cleaning, 36-point Deep Clean, and 48-point Move-In/Move-Out Clean service across Miami-Dade, with eco-friendly products and online booking built into the process. That makes sense for cabinets after renovations, during turnover weeks, or when a kitchen needs a reset that goes beyond a weekend wipe. The same logic applies when humidity, time pressure, or a full property handoff makes it hard to dry, detail, and recheck every surface yourself.
If your cabinets need more than a light wipe and a bottle of dish soap, book a cleaning that fits the job instead of forcing a shortcut. Canes Cleaners offers scheduled and on-demand service in Miami-Dade, including deep cleans and move-in or move-out resets that cover cabinet surfaces as part of a broader kitchen clean.