
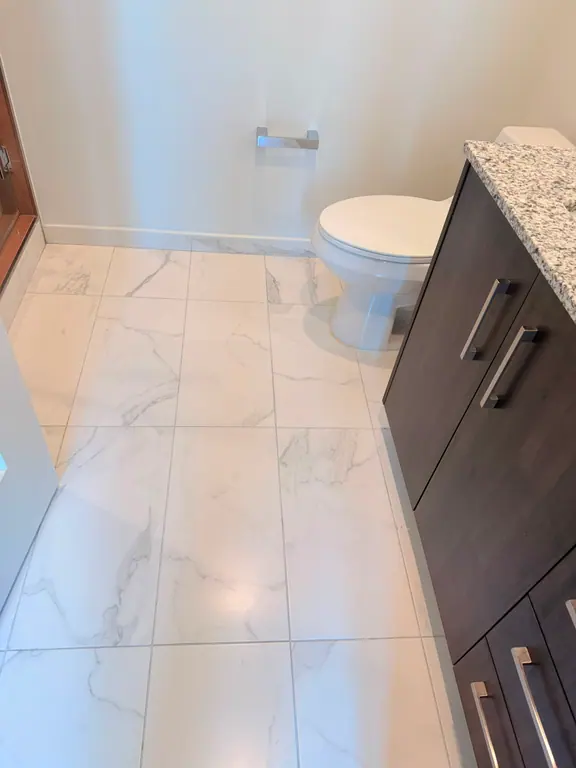
Keep cleaner chemistry near pH 7 and squeegee the marble after every shower. For routine cleaning, mix 1 ounce, or 2 tablespoons, of all-purpose cleaner with 10 ounces of water, then rinse and dry the stone. Simple Green's marble shower guidance recommends this preservation-first approach.
In Miami-Dade, heat and humidity keep showers damp longer, while hard-water minerals dry into deposits between cleanings. Check the lower walls and floor first: roughness, pale rings, or a dull patch beside the drain signal residue that needs controlled removal. Salty coastal air and soap can add to the film on stone, glass, and fixtures.
Use soft tools, measured cleaner, and prompt water removal. Aggressive scrubbing can spread residue and wear the finish, while ventilation helps the marble dry before deposits harden.
Table of Contents
- Why Marble Showers Need a Different Cleaning Approach
- The Everyday Routine That Protects the Finish
- Safe Products and Tools for Marble Showers
- Removing Soap Scum, Hard Water, and Mildew Stains
- Sealing Your Marble Shower on the Right Schedule
- Common Marble Shower Mistakes That Cause Permanent Damage
- When to Call a Professional Cleaner in Miami-Dade
Why Marble Showers Need a Different Cleaning Approach
A polished marble shower can develop a dull patch after one wrong product. Marble is calcium carbonate, so acid reacts with the stone rather than merely lifting surface dirt. Vinegar, lemon or citrus cleaners, bleach, ammonia, and acid-based limescale removers may etch the finish or affect the sealer. The result is a cloudy area that scrubbing cannot remove. Ferguson Home identifies pH-neutral cleaning, close to pH 7, as the safe baseline for polished marble.
Ceramic tile and porcelain tolerate more product errors. Marble reacts at the surface level, so an acid cleaner that works on ceramic can dull polished marble quickly. Use a cleaner formulated for stone and keep its chemistry near pH 7. A diagram illustrating why acidic cleaners damage marble showers, causing etching, and recommending neutral cleaners instead.

Why Miami conditions make buildup persistent
In Miami, heat and humidity can leave the shower damp long after use. Hard-water minerals dry into deposits, and coastal residue or soap film can collect on glass and fixtures before running back onto the marble. The warmer, wetter conditions give buildup more time to form between cleanings.
Mineral and soap deposits make the surface look dirty, while acid exposure can etch the stone beneath or beside that residue. Check the lower walls, curb, and floor first, especially where water or cleaner collects. A shower can look acceptable around the grout while the foot-level marble has already lost its clarity.
Practical rule: Treat marble as a reactive stone, not as a tougher version of ceramic tile.
If the finish looks cloudy, cleaning may remove residue without restoring the polish. Etching usually requires professional polishing rather than a stronger household product. For related stone-finishing work, see this guide to polishing granite countertops, while remembering that marble needs its own product selection and polishing method.
The Everyday Routine That Protects the Finish
The simplest way to learn how to clean a marble shower is to separate water removal after every use from cleaning once a week. Daily drying prevents mineral residue from becoming a thicker film, so the weekly task stays gentle.
After every shower
Keep a 10-inch silicone squeegee, two microfiber waffle-weave towels, and a soft-bristle grout brush near the shower. A replaceable squeegee blade is useful because a worn edge leaves water behind.
- Squeegee the walls from top to bottom. Overlap each pass slightly, and direct water toward the drain instead of allowing it to dry on the marble.
- Wipe the floor dry. Use a microfiber towel around the drain, corners, curb, and any area where water pools.
- Dry the fixtures and ledges. Shampoo bottles, metal containers, and standing droplets all create avoidable residue.
- Run the bath fan for 20 minutes. The fan helps remove moisture after the glass and stone have been dried.
Rose Restoration's marble shower workflow also recommends a top-down process with a neutral cleaner, soft cloth or brush, thorough rinsing, and drying.
Weekly cleaning
Use a pH-neutral stone cleaner. A practical starting formula is a capful per 16 ounces of water, but concentrates vary, so check the product label. Some concentrates call for a 1:32 to 1:64 dilution, and that label instruction takes priority over any general recipe.
Spray or apply the diluted cleaner to a manageable area. Let it sit for 60 seconds, then work the grout lines with a soft nylon brush. Don't let the product dry on the marble. Rinse completely with warm water, squeegee the walls, and finish with a dry microfiber towel.
Mark one spray bottle “marble only.” Never refill it with vinegar or a general bathroom product later. Color-coded towels also reduce the chance that residue from a kitchen degreaser or glass cleaner reaches the stone.
This video provides a visual example of the kind of gentle, ordered maintenance that works better than forceful scrubbing:
Safe Products and Tools for Marble Showers
Product choice determines whether a cleaning session removes residue or creates a dull patch. Read the ingredient list, not just the front label. A bottle marketed for bathrooms may still contain acids or solvents that aren't appropriate for calcite stone.
| Product / Tool | Safe on Marble | What It Does or Why It Fails |
|---|---|---|
| pH-neutral stone cleaner | Yes | Lifts routine soil without relying on acid |
| Mild liquid dish soap | Yes, when heavily diluted | Useful for a small body-oil spot or quick cleanup |
| Isopropyl alcohol | Limited use | Can treat a mildew spot on grout, but shouldn't replace routine stone cleaning |
| Penetrating sealer rated for calcite stone | Yes | Slows absorption when applied according to the label |
| Vinegar or lemon juice | No | Acid reacts with calcium carbonate and etches the finish |
| CLR or acid limescale remover | No | Designed to dissolve mineral scale, but can also attack marble |
| Acidic bathroom spray | No | Hydrochloric, citric, or similar acids can dull polished stone |
| Abrasive powder | No | Scratches the polish through gritty mechanical action |
| Magic Eraser pad | No | Its abrasive texture can wear the finish |
| Straight bleach | No | Can affect the surface and sealer, especially with repeated exposure |
For a quick job, a mild dish-soap solution can be appropriate when it's diluted to 1 teaspoon per gallon of water. Use it sparingly, rinse thoroughly, and don't leave a soapy film behind. A neutral stone cleaner remains the better choice for the weekly full wipe-down because it's formulated for natural stone rather than general household grease.
Use isopropyl alcohol only as a targeted option on grout or a small mildew spot, and test an inconspicuous area first. A penetrating sealer should be rated for calcite stone and wet environments. It won't make marble acid-proof, but it can reduce absorption.
Microfiber is the safe default. Skip gritty pads, steel wool, hard brushes, and unmarked sponges. Keep a dedicated set of stone-care towels away from kitchen cleaners, bleach, and abrasive products.
Removing Soap Scum, Hard Water, and Mildew Stains
Identify the deposit before choosing a method. A white, chalky ring usually points to mineral residue. A gray film often combines soap with body oils. Black or green specks in grout may be mildew, while tan or rust-colored marks can come from organic material or metal contact.
| Stain Type | Cause | Treatment | Dwell Time | Tool |
|---|---|---|---|---|
| Soap scum | Soap bonded with oils | pH-neutral stone cleaner, then rinse | 3 to 5 minutes, if the label permits | White nylon pad |
| Hard-water deposit | Mineral residue from drying water | Baking-soda and distilled-water poultice | 24 hours under plastic wrap | Soft plastic applicator |
| Mildew in grout | Moisture and organic growth | Diluted hydrogen peroxide on grout only | Short, controlled contact | Soft grout brush |
| Organic or metal stain | Product residue or metal contact | Neutral cleaner first, then professional assessment if it remains | Follow product label | Microfiber cloth |
For soap scum, apply a neutral stone cleaner and let it dwell for 3 to 5 minutes, provided the product label allows that contact time. Agitate with a white nylon scrub pad using light circular motions. Rinse until no cleaner remains, then dry the surface.
Hard-water deposits require patience, not acid. A baking-soda and distilled-water poultice at roughly a 3:1 paste ratio can be applied to the affected area, covered with plastic wrap, and left for 24 hours before removal. Test first, keep the paste off adjacent sensitive materials, and understand that an etched mineral ring won't be reversed by a poultice.
For homeowners looking for a broader non-acid approach, this resource on how to remove calcium deposits naturally offers useful background on mineral buildup. Don't transfer every method from a general hard-water guide to marble without checking the chemistry.
Mildew treatment belongs on the grout, not the polished marble face. A dilute solution of 1 part 3% hydrogen peroxide to 4 parts water can be sprayed carefully on grout, followed by gentle agitation and rinsing. Avoid flooding the stone, and never combine peroxide with other cleaners.
Acidic descalers, including diluted vinegar, are the wrong shortcut. This explanation of acid damage to stone and tile notes that polished marble can show visible etching within seconds, while repeated exposure creates cumulative microscopic pits. For recurring mold issues, use a targeted guide to clean shower mold and mildew, while keeping acidic products away from the marble.
Sealing Your Marble Shower on the Right Schedule
A fixed resealing calendar is less useful than a water-bead test. Shower frequency, stone porosity, ventilation, and Miami-Dade humidity all affect how long a sealer remains effective. Test the actual surface instead of assuming a generic annual reminder applies to every installation.
An impregnating sealer doesn't create an invisible plastic shield over the marble. It fills some microscopic pores with a hydrophobic polymer, slowing absorption without making the stone permanently impermeable.
How to perform the test
Clean and dry the wall first. Sprinkle a few tablespoons of water across three separate areas, avoiding grout if you're evaluating the marble itself. Watch whether the droplets remain beaded or whether the stone darkens as it absorbs water.
If the water beads for more than 5 minutes, the seal is still providing useful resistance. If the marble darkens within 1 to 3 minutes, plan to reseal after the surface has been properly cleaned and dried.
Resealing without trapping moisture
Deep-clean the shower 24 hours beforehand. Remove soap film, rinse away cleaner residue, and allow the stone and grout to dry fully. Choose a penetrating fluoropolymer or silane-siloxane sealer specifically rated for marble, calcite stone, and wet environments.
Apply thin coats with a clean microfiber cloth. Follow the manufacturer's instructions for coverage, excess removal, and reapplication. Don't leave puddles of sealer on the surface, and don't expose the shower to water for 48 hours after application.
High humidity can shorten the useful life of a sealer, especially when the shower stays damp between uses. Test more often if the stone absorbs water quickly, even if the calendar says resealing shouldn't be necessary yet.
Common Marble Shower Mistakes That Cause Permanent Damage
Marble isn't too fragile for a busy home. It's unforgiving when someone treats a chemical surface reaction as ordinary dirt. The worst mistakes usually happen because a product works well on another bathroom material.
| Action or Product | Safe or Damaging | Why It Matters |
|---|---|---|
| Squeegee after use | Safe | Removes droplets before minerals dry onto the stone |
| Neutral stone cleaner | Safe | Cleans without deliberately attacking calcium carbonate |
| Vinegar or lemon juice | Damaging | Acid can etch polished marble |
| CLR or acid descaler | Damaging | Dissolves scale by chemistry that can also damage marble |
| Abrasive powder | Damaging | Scratches the polished finish |
| Magic Eraser pad | Damaging | Wears the surface through abrasive contact |
| Felt pads under bottles | Safe | Reduces trapped moisture and metal contact |
| Wet metal razor on a ledge | Damaging | Can leave a rust-colored mark or ghost stain |
| Ventilation after showering | Safe | Helps the area dry instead of holding moisture |
Vinegar, lemon juice, and CLR are particularly bad choices because they attack the same mineral structure that makes marble vulnerable. A dull spot may appear quickly, and more scrubbing won't restore the lost polish. Tub-and-tile sprays, bleach-heavy mold products, and bathroom cleaners containing hydrochloric or sulfamic acid can create the same problem more gradually.
Mechanical abrasion is another common failure. Comet, Ajax, gritty Soft Scrub, hard bristles, and rough pads can scratch the finish even when the product's chemistry is neutral. A magic eraser may feel gentle in your hand, but its abrasive action can wear through polish with repeated passes.
What preserves the finish: Remove water after use, choose neutral chemistry, keep bottles on felt or non-abrasive supports, and ventilate the shower.
A wet shampoo bottle left on a ledge can trap residue underneath. A metal razor can transfer rust. These are small habits, but marble records them as stains, rings, or dull contact marks.
When to Call a Professional Cleaner in Miami-Dade
DIY care works when the problem is surface residue and the finish remains intact. It stops being efficient when etching covers more than a few square feet, hard-water deposits remain after a neutral cleaner and nylon pad, mildew returns within a week, or yellowing suggests sealer failure.
Those symptoms point to a problem below ordinary maintenance. A homeowner can remove residue, but a trained marble technician may need to use diamond polishing to reduce etching, a poultice for subsurface staining, mechanical honing for affected grout lines, and controlled reapplication of penetrating sealer.
The Miami-Dade threshold
Local water conditions make mineral management a recurring concern. Water associated with the Biscayne aquifer can leave calcium and magnesium deposits, and those deposits become more difficult to remove when droplets repeatedly dry on the stone. Humidity adds another complication by slowing the drying cycle.
Short-term rentals create a separate maintenance pressure. A missed squeegee during turnovers in Miami Beach, Brickell, or Key Biscayne can leave residue for the next guest, and several missed cleanups can turn a simple maintenance task into restoration work. Hosts and property managers can use a defined shower cleaning frequency to set expectations between deeper service visits.
Call a professional when you see any of the following:
- Widespread dullness: The surface looks cloudy after cleaning and drying.
- Persistent mineral crust: Neutral products no longer loosen the deposit.
- Recurring mildew: Grout darkens again within a week despite careful treatment.
- Absorption or yellowing: Water darkens the marble quickly, or the sealer appears uneven.
- Subsurface staining: The mark remains after surface cleaning and gentle rinsing.
For a Miami-Dade service, ask what products and pads the crew will use before work begins. A suitable stone-care scope should specify pH-neutral products, non-abrasive pads, careful rinsing, drying, and a clear plan for sealing or polishing when cleaning alone can't solve the issue.
Canes Cleaners provides scheduled and on-demand bathroom cleaning, including shower work, for homes, condos, short-term rentals, and other Miami-Dade properties. Visit Canes Cleaners to book online and request a recurring or deep-clean scope that keeps acidic products and abrasive pads away from your marble.