How to Dry a Mattress?
Alright, picture this: it’s raining outside, and oops! Your cup of tea drops onto your mattress, creating a small lake right where you sleep. Or, in the middle of the night, your little one has a surprise accident. We’ve all been there, and let’s face it, mattresses and moisture don’t mix well.
But fret not! In this handy guide, we’re tackling the soggy mattress problem head-on. Whether it’s a spill from a moment of clumsiness or an unexpected nighttime mishap, handling mattress moisture is vital for a comfy and healthy sleep spot. We’re not just talking about a quick fix; we’re diving deep into the steps you need to take to dry your mattress from its damp dilemma.
So, roll up your sleeves and let’s get that mattress back to its cozy, dry, and fresh state. No more soggy nights – let’s do this!
The Vital Importance of a Dry and Clean Mattress
Your mattress isn’t merely a combination of foam and springs; it serves as your refuge for rest. Maintaining its dryness and cleanliness is paramount, as it establishes a hygienic sleep environment that significantly contributes to your overall health. From unexpected spills to nighttime mishaps, understanding the reasons behind a wet mattress is the first step towards tackling the issue effectively. In this comprehensive guide, we’ll walk you through the essential steps to ensure your mattress remains a fresh, dry, and welcoming space for a good night’s sleep.
Determining the Extent of Damage: Your First Step to Victory
Picture this: a spilled glass of wine, a coffee mishap, or a water leak – accidents are part of life, especially if you have little ones running around. Before you jump into action, let’s figure out the battlefield. Knowing the level of liquid damage is crucial to winning this war against dampness.
If it’s your everyday liquids – like coffee, wine, or water – there’s hope! You’ve got a 24-hour window to tackle the mess. So, don’t hit the panic button just yet. Act swiftly, and these messes are entirely conquerable. It’s like a race against time, and you can totally win if you act within this timeframe.
For parents dealing with kiddie accidents, take a breath. Yes, it’s frustrating, but remember, you got this! Kids will be kids, and accidents are par for the course. But here’s the deal: if you dive in quickly, these little messes are absolutely cleanable. So, don’t let those spills ruin your day – take charge!
Danger Zones: When to Call it Quits
Now, here’s the harsh truth: some messes are just too stubborn to clean. Floods, sewage leaks, or liquids deeply soaked into the mattress – these are the troublemakers. After 24 hours, even seemingly harmless liquids can become mattress infiltrators, causing the dreaded mold to rear its ugly head. Certain substances are so sneaky that they penetrate way beyond our reach, making cleanup nearly impossible. Act pronto, or you might find yourself facing a losing battle against mold and other nasties.
Remember, time is your ally here. The faster you act, the better your chances of turning the tide in your favor. So, roll up your sleeves, grab your cleaning gear, and let’s salvage that mattress together! You’ve got this!
How to Dry a Mattress: Your Ultimate Guide
Alright, let’s dive right in and talk about what you need and what steps you should follow to dry a mattress properly. Imagine this as your mattress rescue mission – we’re here to save the day and make your mattress comfy and dry again!
Step 1: Collect your Supplies
Drying a mattress might sound like a hassle, but with the right materials and a bit of know-how, you can transform your soggy mattress into a cozy, dry haven. Read below about the stuff you needed to dry your mattress.
• Towels:
Clean, absorbent towels are your first line of defense. They soak up moisture effectively and prepare the mattress for further treatment.
• Baking Soda or Cornstarch:
Natural absorbents like baking soda or cornstarch are excellent at drawing out remaining moisture and eliminating odors.
• Mild Soap or Enzyme Cleaner:
These cleaning agents are essential for tackling stubborn stains without causing damage to the mattress fabric.
• Soft Brush or Cloth:
A soft-bristled brush or a gentle cloth helps you clean the mattress without being too harsh, ensuring effective stain removal.
• Fresh Air and Sunlight:
Good ventilation and sunlight aid in the natural drying process, eliminating moisture and leaving your mattress smelling fresh.
• Fans or Dehumidifiers:
Fans or dehumidifiers enhance airflow, expediting the drying process, especially in humid conditions.
Step 2: Act Swiftly - Remove the Bedding!
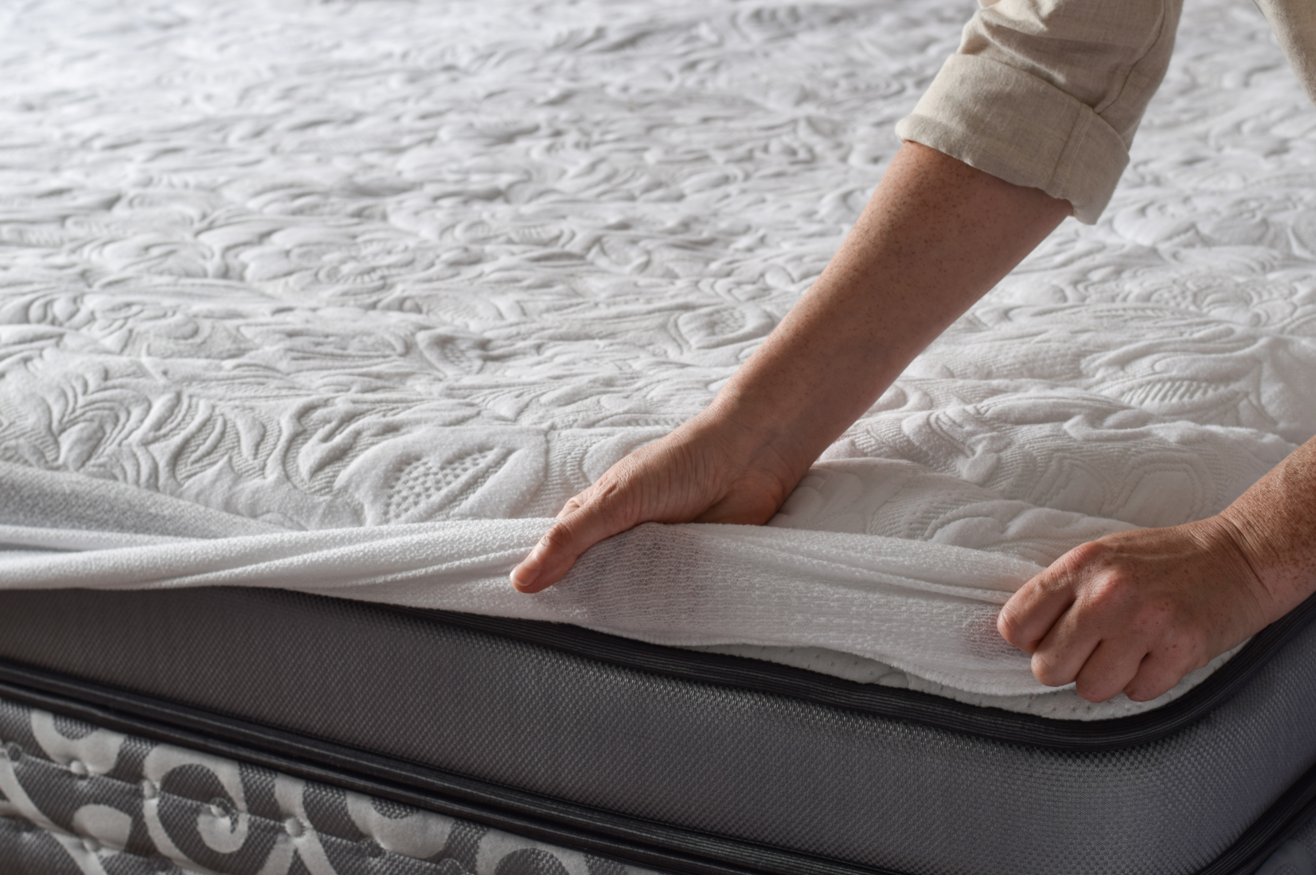
The key to rescuing a wet mattress is speed. As soon as you notice the moisture, swiftly strip off all bedding and mattress coverings. This immediate action is crucial as it allows the mattress to breathe. When exposed to air, the mattress can start the drying process more effectively. Think of it as giving your mattress a chance to exhale the dampness and inhale fresh, dry air, setting the stage for a quicker and more efficient drying journey.
Step 3: Blot, Don’t Rub!
After removing the bedding and exposing the damp areas, it’s crucial to handle the moisture properly. Grab clean towels and resist the temptation to rub the wet spots vigorously. Rubbing can spread the moisture over a larger surface, making it harder to dry. Instead, opt for a blotting technique.
To blot effectively, gently press the towels onto the wet areas. Apply firm, even pressure to absorb the liquid without spreading it around. By blotting, you’re containing the moisture, allowing the towels to soak it up efficiently. This method helps in the initial stages of drying, laying the foundation for the subsequent steps in the mattress rescue process. Remember, patience and a gentle touch are key to successfully tackling wet spots on your mattress.
Overview: In this step, we’re unleashing the power of natural absorbents – baking soda and cornstarch – to tackle persistent moisture and odors on your mattress. These simple yet effective solutions work wonders in drawing out the remaining dampness, leaving your mattress fresh and dry. Let’s dive into the details!
Step 4: Bring The Best Weapons - Baking Soda or Cornstarch!
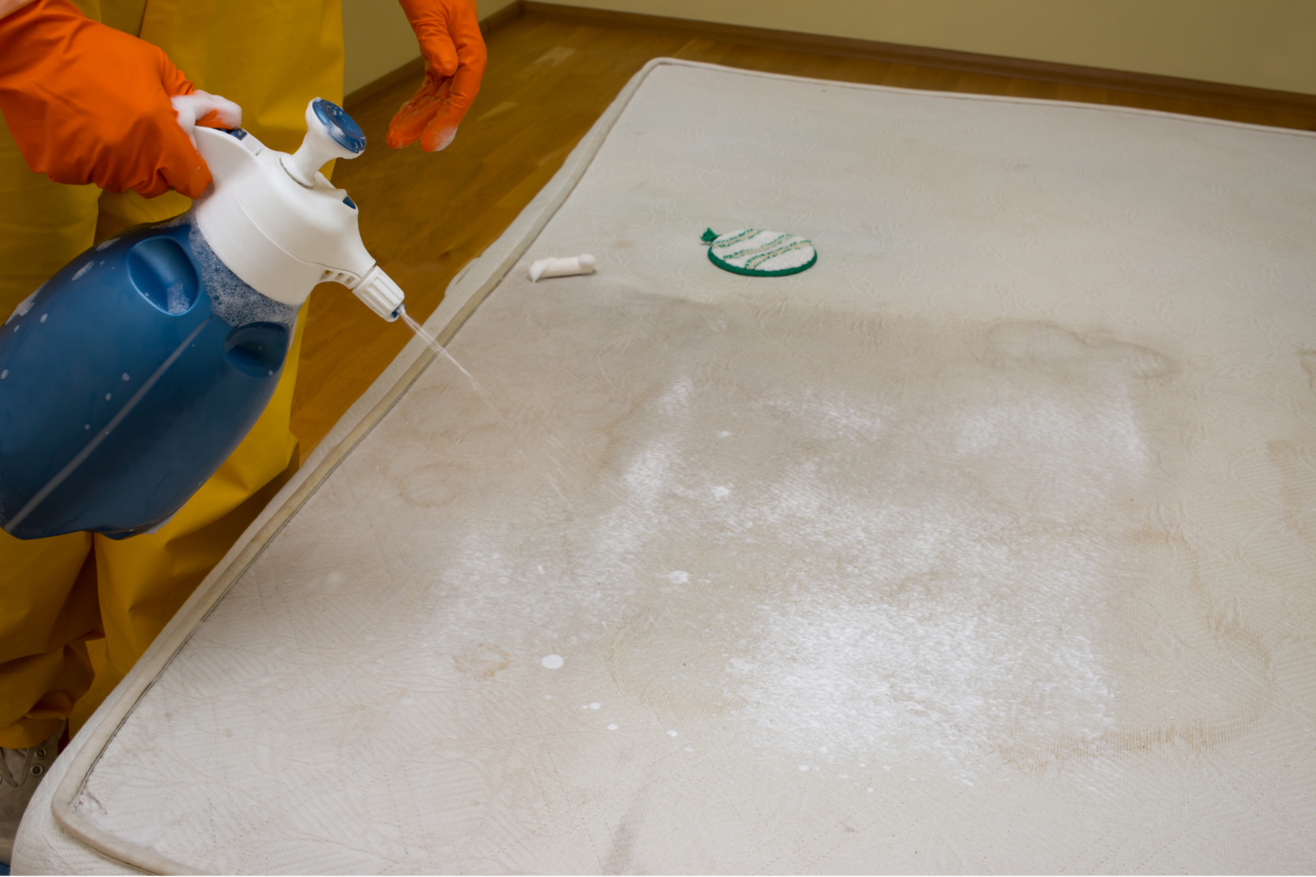
Sometimes, even after the initial blotting, your mattress might still hold onto some moisture. This is where baking soda and cornstarch come to the rescue. Generously sprinkle either of these natural powders over the damp spots on your mattress. Think of them as little moisture-absorbing warriors on a mission.
How They Work:
• Absorbing Moisture: Baking soda and cornstarch act like tiny sponges, soaking up the remaining moisture in the mattress. They create a dry environment, preventing any mold or mildew growth.
• Eliminating Odors: Not only do these powders absorb moisture, but they also neutralize odors. So, if your mattress smells a bit musty due to the dampness, these powders will leave it smelling fresh and clean.
Application Tips:
• Generosity is Key: Don’t be shy with the amount. Generously sprinkle baking soda or cornstarch over the damp areas. It’s better to have too much than too little, as these powders work by absorbing the moisture.
• Patience is a Virtue: Let the powders sit for several hours, or if possible, overnight. The longer they stay on the mattress, the better they work at absorbing moisture and eliminating odors.
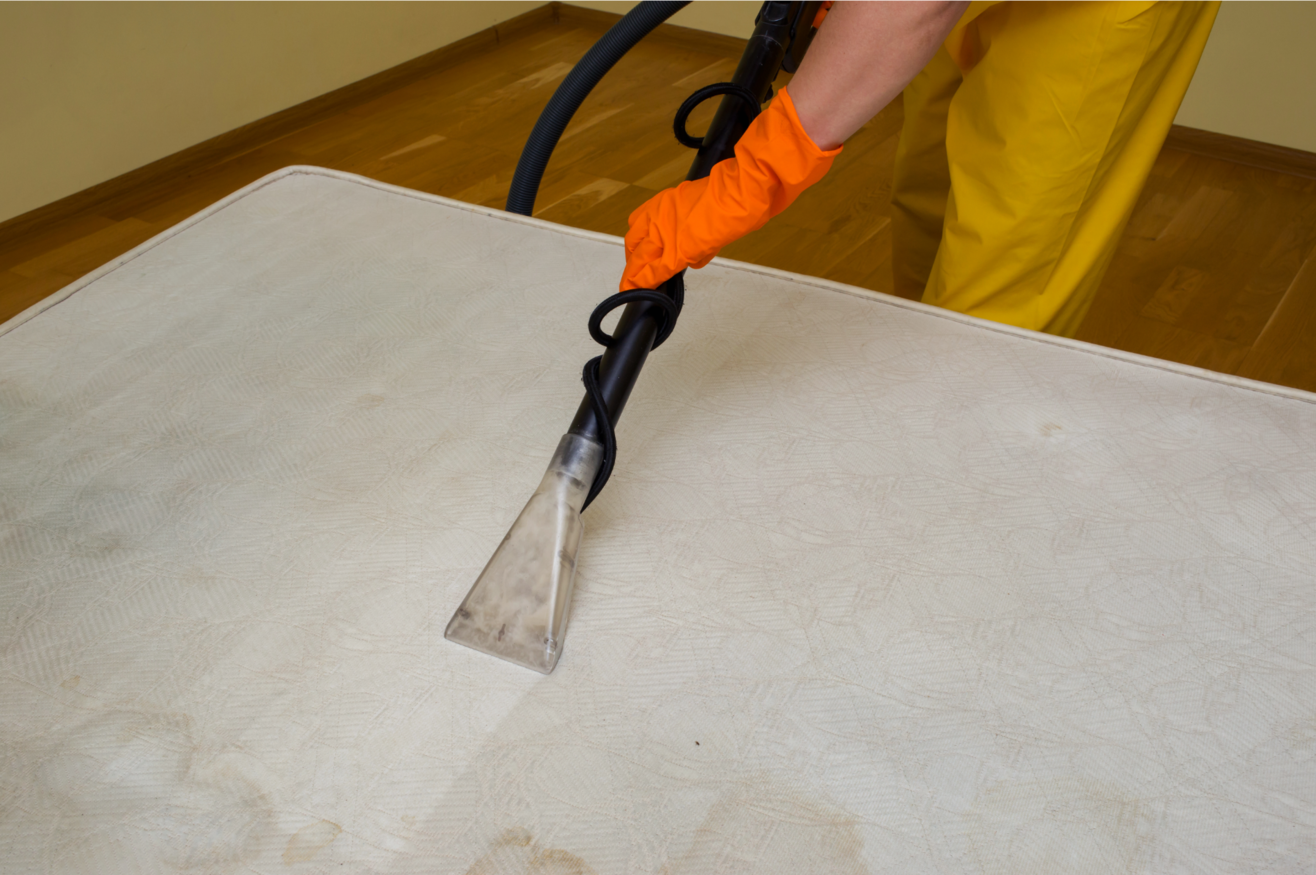
• Thorough Removal: After allowing the powders to work their magic, use a vacuum cleaner with an upholstery attachment to remove them entirely. This ensures that any absorbed moisture and odors are sucked away, leaving your mattress dry and refreshed.
By using baking soda or cornstarch, you’re not only ensuring your mattress is free from dampness but also giving it a clean, pleasant scent. It’s a small but essential step toward reviving your mattress and creating a comfortable, fresh sleeping environment.
Step 5: Tackle Stains Gently!
Our mattress-drying mission involves addressing stubborn stains with care and precision. We’ll gently tackle these spots using mild soap or an enzyme cleaner, applying it thoughtfully to avoid oversaturation and potential damage to the mattress fabric. Let’s get those stubborn stains out without causing any harm!
Here’s how you do it:
• Choose the Right Cleaner: Pick a mild soap or enzyme cleaner known for its stain-removing abilities. Ensure it’s safe for fabrics and doesn’t contain harsh chemicals.
• Apply Gently: Take a soft brush or cloth, and dampen it slightly with the cleaner. You don’t need a lot; a little goes a long way. The key is to avoid oversaturating the mattress. Too much liquid can seep deeper, making the drying process longer.
• Focus on Stained Areas: Identify the stained spots on your mattress. With gentle, circular motions, work the soap or enzyme cleaner into the fabric. Focus on the stained areas, but be careful not to spread the stain further.
• Blot, Don’t Rub: After letting the cleaner sit, take a clean, dry cloth and blot the area. Don’t rub vigorously; blotting helps absorb the excess cleaner and the loosened stain particles.
• Repeat if Necessary: For particularly stubborn stains, you might need to repeat the process. It’s better to tackle the stain gently a few times than risk damaging your mattress by being too aggressive.
Remember, the key is to be gentle yet persistent. By following these steps, you can effectively remove stubborn stains from your mattress without compromising its integrity.
Overview:
In the quest to dry your mattress efficiently, these final steps harness the power of nature to ensure your mattress is not only dry but also fresh and clean. Let’s take a closer look at these steps:
Step 6: Let Nature Work Its Magic - Air It Out!
When it comes to drying a mattress, nothing beats the freshness that natural air can bring. By opening your windows wide, turning on fans, or utilizing a dehumidifier, you enhance the airflow around your mattress. This increased circulation not only accelerates the drying process but also ensures that your mattress stays fresh. Adequate ventilation prevents the growth of mold and mildew, making your mattress a healthier place to sleep.
Step 7: Embrace the Sun - Let Your Mattress Sunbathe!
If the weather is sunny, take advantage of nature’s most potent disinfectant and deodorizer – sunlight. Move your mattress to a sunny spot where it can bask in the natural light. Sunlight works wonders, killing germs and removing odors effectively. Moreover, it significantly speeds up the drying process. The sun’s rays penetrate deep, ensuring that your mattress not only dries quickly but also emerges smelling fresh and feeling revitalized.
By incorporating these natural elements into the drying process, you’re not just drying your mattress; you’re giving it a breath of fresh, natural air and sunlight, creating a clean and inviting environment for your next night’s sleep. So, let your mattress enjoy some time in the sun and relish the natural breeze – it’s the perfect recipe for a thoroughly rejuvenated sleeping experience!
Prevention for the Future: Safeguarding Your Sleep
Ensuring your mattress remains dry and clean isn’t just about dealing with spills and accidents when they happen. It’s also about preventing future issues, preserving your mattress’s lifespan, and maintaining a healthy sleep environment. In this section, we’ll explore proactive measures to safeguard your sleep sanctuary and keep your mattress fresh and comfortable for years to come.
Invest in Waterproof Protectors:
Why? Prevention truly is the best cure. Waterproof mattress protectors act as a shield, guarding your mattress against spills and accidents.
How? Invest in high-quality, waterproof protectors designed to fit your mattress size. They create an impermeable barrier, ensuring liquids never reach the mattress surface, thereby keeping it pristine and dry.
Regular Maintenance:
Why? Regular maintenance is key to preventing moisture buildup, which can lead to odors and mold growth.
How? Make it a routine to rotate and clean your mattress. Regularly rotating the mattress helps distribute wear evenly, and cleaning prevents the buildup of dust mites, dirt, and moisture. Vacuum your mattress periodically and spot clean any stains promptly. This maintenance routine ensures your mattress stays fresh, comfortable, and free from dampness.
Educate the Family:
Why? Educating your family members, especially the little ones, instills a sense of responsibility and care for the mattress.
How? Teach your family about the importance of mattress care. Explain why spills should be cleaned immediately, why jumping on the bed is a bad idea, and how regular cleaning and rotation maintain the mattress’s quality. Simple awareness and mindfulness among family members go a long way in preserving the integrity of your bed.
By investing in protective measures, incorporating regular maintenance into your routine, and educating your family about mattress care, you not only prevent future issues but also create a healthier and more comfortable sleep environment. These proactive steps ensure that your mattress remains a cozy sanctuary for restful nights, enhancing both its longevity and your overall well-being.
Conclusion
In conclusion, drying a mattress is more than just a chore; it’s a way of ensuring the longevity and freshness of your sleep haven. By acting swiftly, employing the right techniques, and embracing preventive measures, you can bid farewell to damp dilemmas and say hello to nights of restful, dry sleep. So, the next time a spill happens, don’t panic – arm yourself with these tips, and let your mattress reclaim its rightful place as your oasis of comfort.