Clear Streams: Your Ultimate Tutorial on How to Clean a Showerhead
Picture this: after a long, tiring day, you step into your shower, eagerly anticipating a soothing cascade of water to wash away your cares. But instead, you’re greeted by a feeble trickle that resembles a half-hearted drizzle more than the invigorating shower you crave. If this scenario sounds all too familiar, it might be time to address the unsung hero of your daily routine – your shower head.
People usually focus on cleaning the toilet because of the hygiene perspective and ignore the importance of cleaning a bathtub, shower curtains, and showerheads.
Over time, mineral deposits and grime can clog shower head nozzles, hampering water flow and compromising your shower experience. So, if you’re tired of subpar showers, you’re in the right place. In this guide, we’ll take you through the steps on how to clean your shower head, restoring it to its former glory and ensuring that each shower leaves you feeling refreshed and rejuvenated
Inspecting the Shower Head Before Cleaning: Unveiling the Hidden Buildup
Alright, so you’ve decided it’s time to tackle that grumpy shower head of yours. But before you jump into the cleaning process, it’s essential to inspect your shower head thoroughly. Let’s put on our detective hats and uncover the hidden buildup that might be sabotaging your shower flow.
1. Signs of Mineral Deposits
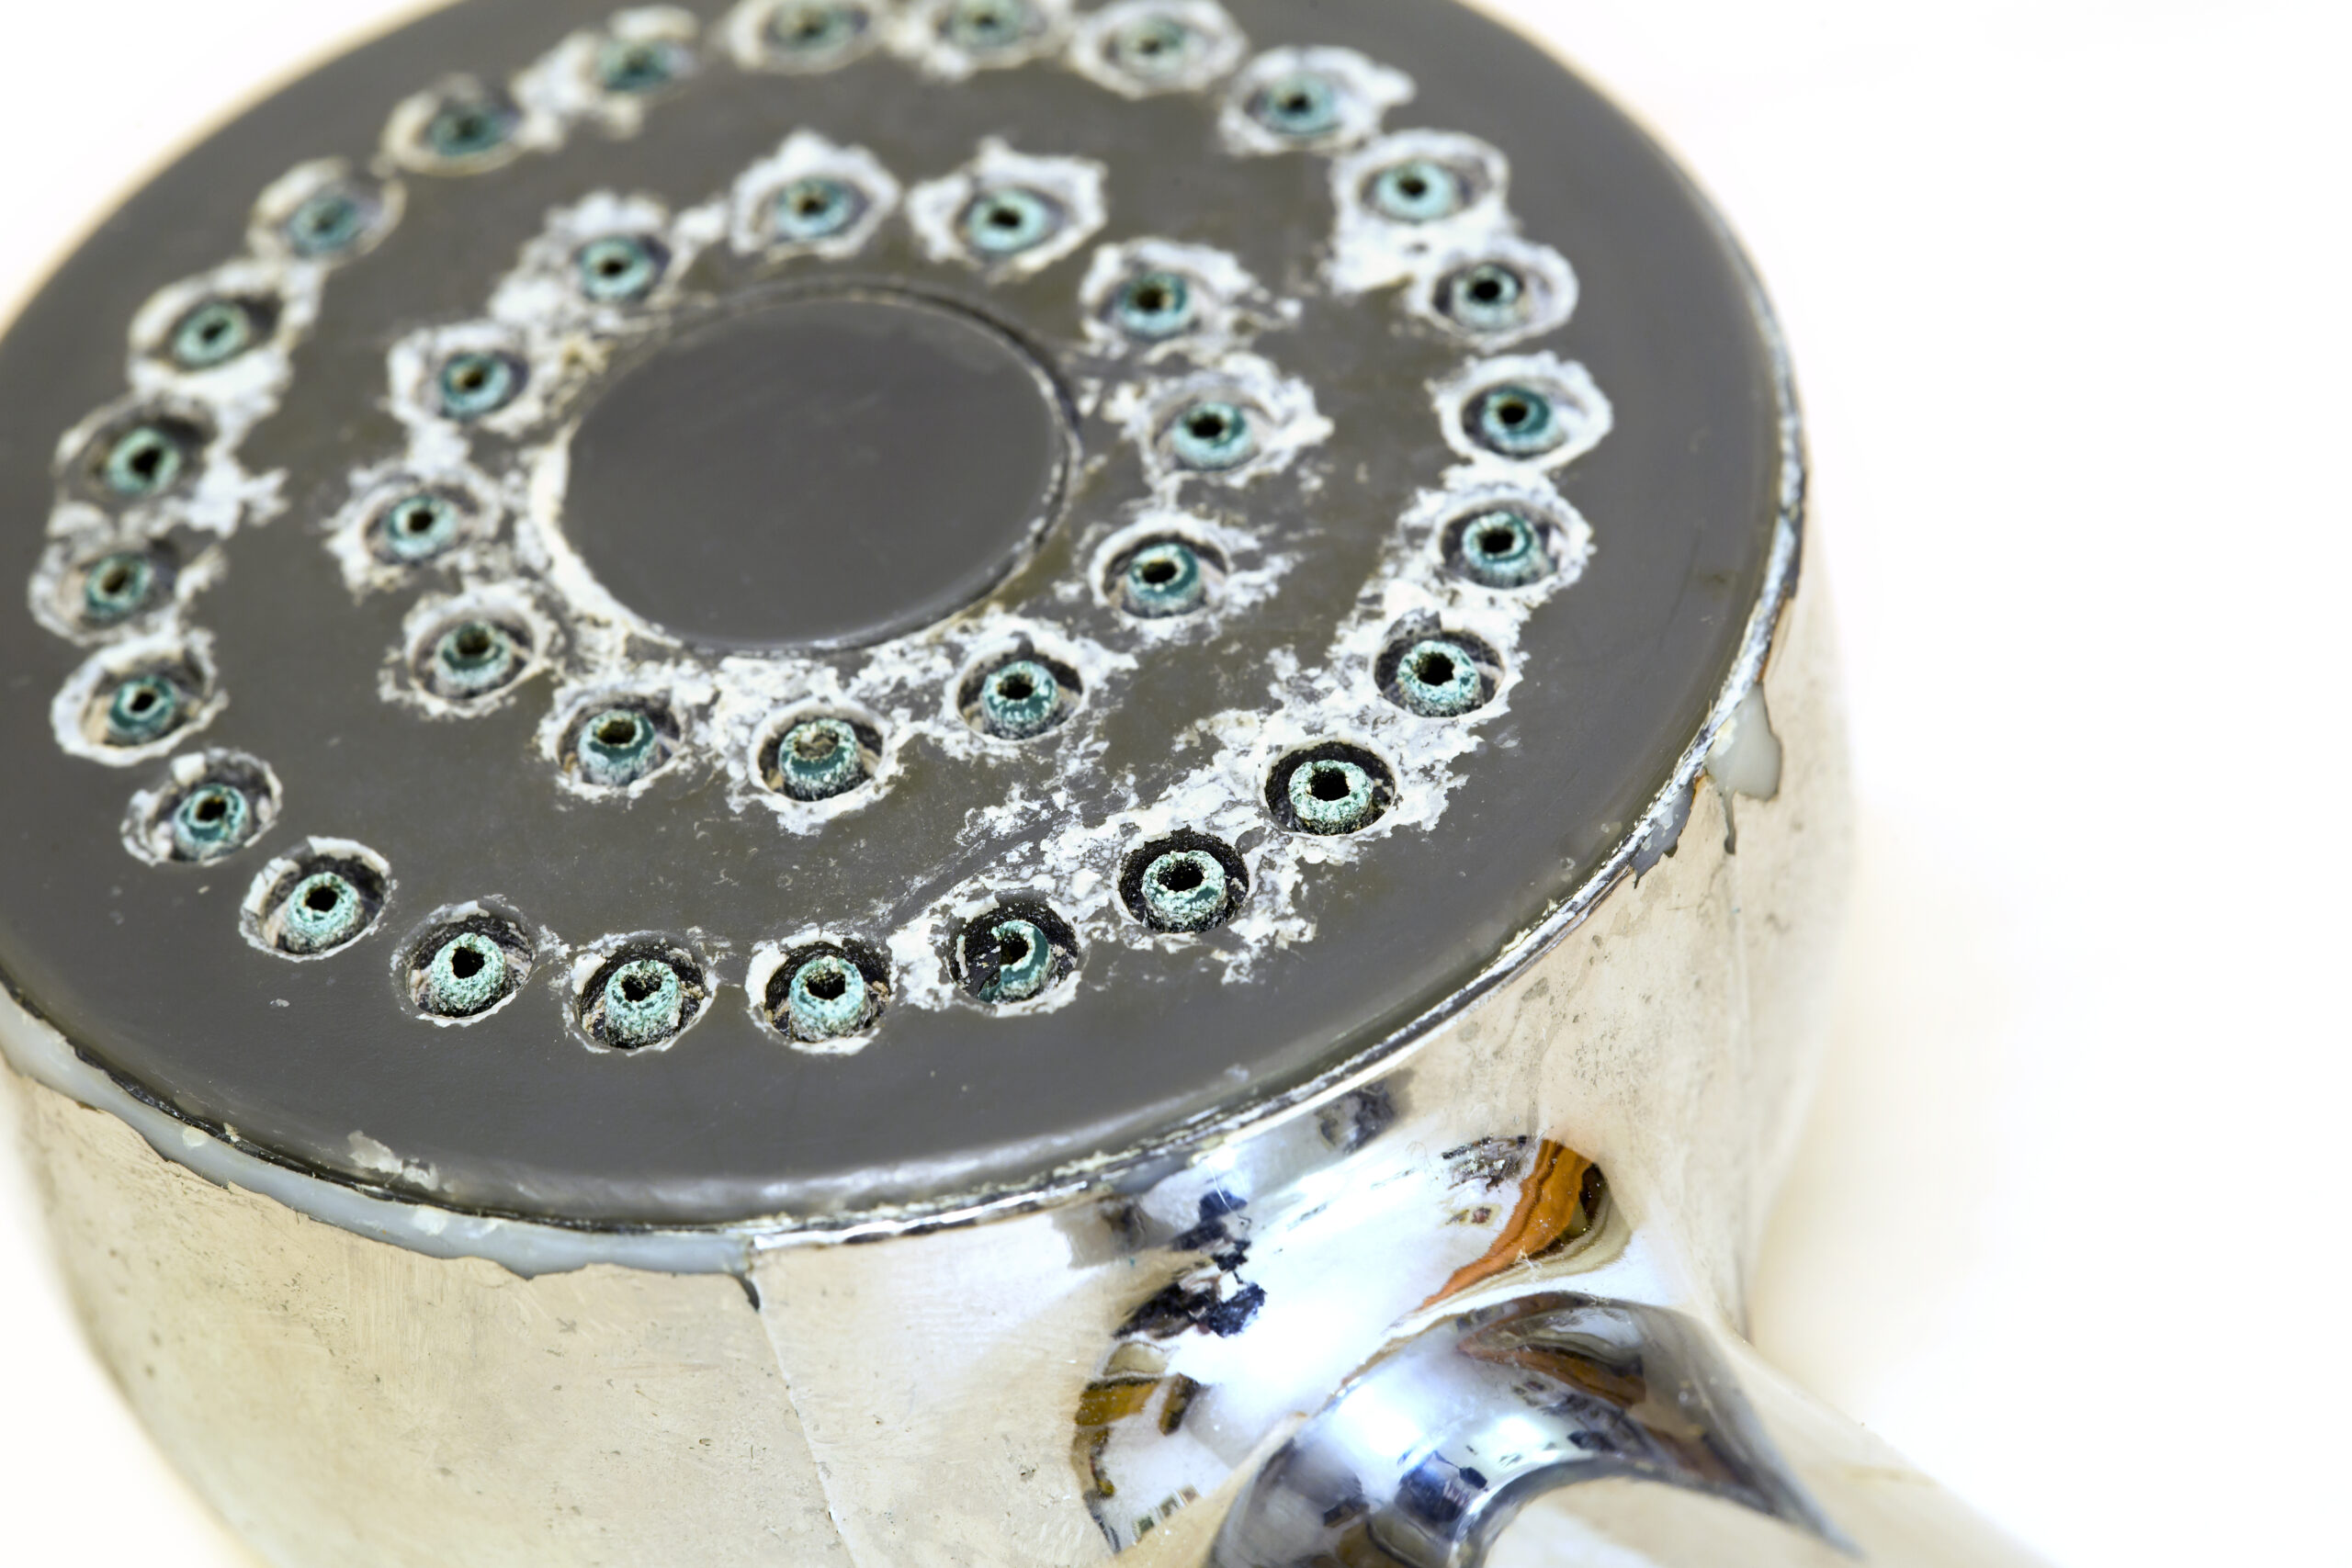
One of the most common issues lurking within your shower head is mineral deposits, especially if you live in an area with hard water. These deposits appear as crusty, off-white or grayish build ups around the nozzles. If your once powerful shower stream has dwindled into a mere trickle, mineral deposits are likely the cause.
2. Clogs: The Silent Shower Killers
Clogs can be trickier to detect. If your water flow is uneven, sporadic, or even nonexistent in certain areas, clogs might be the culprits. These clogs can form inside the nozzles due to mineral deposits or debris, disrupting the smooth flow of water.
3. Grime: The Uninvited Shower Guest
Grime, often a result of soap scum mixing with mineral deposits, can disguise itself as a thin, sticky film. It not only affects the aesthetics but can also harbor bacteria, making your shower an unwelcome breeding ground for unwanted microorganisms.
Understanding Your Shower Head Type Before Cleaning
Fixed vs. Handheld: Why It Matters
Understanding the type of shower head you have is crucial. Fixed shower heads, attached directly to the wall, often have smaller nozzles and a more compact design. Handheld shower heads, on the other hand, usually have larger nozzles and more intricate parts due to their flexibility. Knowing your shower head type helps tailor your cleaning approach for maximum efficiency.

Removing the Shower Head (If Applicable)
For detachable shower heads, follow these steps to safely remove it:
1. Turn off the water supply to the shower.
2. Unscrew the shower head from the shower arm. Use a wrench if needed. Protect the fixture’s surface with a cloth to avoid scratching.
Step 1: Gather Necessary Materials
Before we dive into the cleaning process, let’s gather the materials you’ll need. Here’s a handy list:
- Baking soda
Vinegar
Soft brush (an old toothbrush works well)
Plastic bag or Ziploc bag
Safety gear (gloves and goggles, especially if using cleaning agents)
Clean cloth or sponge
Safety first! Don’t forget to wear your gloves and goggles to protect your skin and eyes when working with cleaning agents
Step 2: Cleaning Your Shower Head: The Tried and True Methods:
Certainly! Let’s dive into the details of cleaning your showerhead using different methods like white vinegar, baking soda and market available solutions.
I. How to Clean a Showerhead with Baking Soda:
So, you want to freshen up your showerhead using everyone’s favorite kitchen staple, baking soda? Great choice! Here’s how you do it:
- Create a Baking Soda Paste: Start by mixing baking soda with a bit of water to form a paste. Aim for a consistency similar to toothpaste. Baking soda has mild abrasive properties that work wonders on mineral deposits.
- Application Time: Take that baking soda paste and generously apply it all over your showerhead. Make sure you cover all the nooks and crannies where mineral buildup likes to hide.
- Scrub-A-Dub: Grab a soft brush, like an old toothbrush, and start scrubbing away. Focus on areas where you see the most buildup. The baking soda paste acts as a gentle abrasive, helping to remove those stubborn deposits.
That’s it! You’ve just given your showerhead a good baking soda scrub. Now, let’s move on to the next method.
II. How to Clean a Showerhead with Vinegar:
If you prefer a more acidic approach, vinegar is your go-to cleaning buddy. Here’s the step-by-step:
- Make a Vinegar Solution: Fill a plastic bag or a bowl with white vinegar. It’s vinegar’s acidic properties that will work their magic in dissolving mineral deposits.
- Submerge and Soak: Submerge your showerhead in the vinegar, ensuring all the nozzles are covered. Let it soak for several hours, or if you’re really patient, overnight. This gives the vinegar ample time to do its thing.
- Rinse Away the Grime: After the soak, rinse your showerhead thoroughly with warm water. This removes any remaining vinegar residue and those loosened deposits.
That’s how you can get your showerhead gleaming with the power of vinegar. But wait, we’re not done yet! Let’s explore another method.
III. Clean a Showerhead Using Commercial Cleaners (Optional)
Sometimes, you might need some heavy artillery, and that’s where commercial cleaners like CLR come into play. Here’s how to use them safely and effectively:
- Read the Instructions: First things first, always read the product’s instructions and follow them to the letter. Each cleaner can have specific usage guidelines.
- Safety First: Don’t forget about safety! Wear your gloves and goggles to protect your skin and eyes. Cleaning agents can be potent, so it’s better to be safe.
- Proper Usage: Apply the commercial cleaner as directed in the instructions. Usually, this involves spraying or applying the cleaner to the showerhead.
- Wait and Rinse: Allow the cleaner to sit for the recommended time. Typically, this is just a few minutes. Then, rinse the showerhead thoroughly with warm water to remove the cleaner and the dissolved deposits.
Using a commercial cleaner can be effective for those stubborn mineral deposits, but always use caution and follow the instructions to the tee.
Now you know three different ways to clean your showerhead, from mild to more intense methods. Choose the one that suits your needs and get ready to enjoy a revitalizing shower once again!
Cleaning a Shower Head Without Removing It
If removing the shower head isn’t an option or you prefer to clean it in place, here’s how:
- Create the baking soda paste as mentioned earlier.
- Apply the paste to the shower head, ensuring that all nozzles are covered.
- Use a soft brush to scrub the shower head while it remains in place.
Step 3: Rinsing and Final Checks
After scrubbing or soaking, rinse the shower head thoroughly with warm water to remove any residue. You can use a wet cloth to wipe away any remaining paste or deposits.
Reattaching the Shower Head (If Removed)
If you removed the shower head, carefully screw it back onto the shower arm. Use a wrench if necessary, but remember to be gentle to avoid over-tightening.
Testing Water Flow
Turn on the shower to check for improved water flow. You should notice a significant difference, with water flowing freely from all nozzles.
Regular Maintenance Tips
- Prevention is key! Here are some tips to maintain your shower head’s performance:
- Clean your shower head regularly, especially if you live in an area with hard water. A monthly cleaning is a good rule of thumb.
- Consider using a water softener to reduce mineral buildup.
- Install a shower head filter to trap impurities and prolong the time between cleanings.
FAQs on How to Clean Shower Head
A1: According to Martha Stewart, it's a good practice to clean your shower head monthly, especially if you live in an area with hard water. Regular cleaning helps prevent mineral buildup.
A2: Yes, you can use commercial cleaners, but be sure to follow the product's usage guidelines and safety precautions. Always read the instructions provided.
A3: While it's not mandatory, removing the shower head can provide a more thorough cleaning. If it's detachable, consider removing it for a better clean.
A4: If the water flow doesn't improve, you may need to repeat the cleaning process or consider more intensive methods, like using a pipe cleaner to clear any blockages in the shower head.
Why Hiring a Professional Shower Head Cleaning Service is Worth It
Maintaining a clean and hygienic bathroom is essential for our well-being, but the task of cleaning showerheads and bathroom fixtures can be tedious and time-consuming. That’s where professional bathroom and shower head cleaning services come in. By entrusting the job to experts, you not only save valuable time and effort but also ensure a thorough and meticulous cleaning process. Professionals have the knowledge, experience, and specialized tools to tackle stubborn stains, mineral deposits, and grime effectively.
Moreover, their expertise guarantees that every nook and cranny is cleaned, leaving your bathroom spotless and rejuvenated. Hiring a professional service not only provides you with peace of mind but also ensures a sparkling clean bathroom that promotes a healthy living environment. So why stress over cleaning when you can relax and enjoy a pristine bathroom? For top-notch bathroom cleaning services, trust Canes Cleaners to transform your space into a gleaming sanctuary.
Similar Post: How to Clean a Shower Curtain and Liner