How to Clean Dryer Lint Trap?
In the realm of household appliances, your trusty dryer plays a pivotal role in keeping your clothes fresh and clean. However, for it to function effectively and safely, it’s crucial to pay attention to its often overlooked component: the lint trap.
This seemingly small device holds immense importance, serving as a barrier between your dryer’s interior and the outside world. In this article, we’ll delve into the significance of regularly cleaning the dryer lint trap.
A clogged lint trap not only hampers the efficiency of your dryer but also poses significant safety risks. Clothes dryers are among the leading causes of house fires, and many of these incidents can be traced back to lint buildup.
Understanding the potential hazards, we’re here to guide you through a step by step process, ensuring your lint trap remains clear and your dryer operates at its optimal level. Let’s unravel the mysteries of lint maintenance, making your laundry routine not only efficient but safe too.
Step 1: Gather the Necessary Supplies
Let’s make sure you’ve got all the necessary supplies. Trust me, it’ll save you some running around later on.
Absolutely, let’s break down the checklist:
1. Vacuum Cleaner:
Your vacuum cleaner is your best friend in this lint busting adventure. It’s perfect for sucking up all those loose lint particles from the trap.
2. Brush:
Picture a long, flexible brush – it’s your secret weapon for reaching those tricky corners and crannies inside your lint trap. It’s like a lint detective, finding hidden lint where you least expect it.
3. Mild Detergent:
After the lint trap is clean, a mild detergent comes into play. Think of it as your lint trap shampoo. It helps to give the trap a thorough scrub down, ensuring it’s not only lint free but also squeaky clean and fresh smelling.
4. Gloves:
Lint might seem harmless, but it’s surprisingly dusty. Wearing gloves isn’t just about keeping your hands clean; it’s a shield against the lint invasion. Plus, it’s more hygienic, too!
5. Soft Cloth:
The soft cloth is your lint trap’s best friend after the detergent scrub. It’s like the lint trap’s towel – it helps to wipe away any detergent residue, leaving the trap spotless and ready for action.
6. Screwdriver :
Sometimes, lint traps are tricky to access and might be held in place by screws. If your dryer’s lint trap has screws, a screwdriver might be necessary to remove them, allowing you to reach the lint filled treasure trove. It’s the key to unlocking a lint free future for your dryer!
Armed with these tools, you’re not just cleaning a lint trap; you’re embarking on a lint cleaning adventure, ensuring your dryer runs efficiently and your clothes come out fresh and lint free.
Step 2: Clean the Dryer Lint Screen
Alright, let’s get our hands dirty and dive into the nitty gritty of cleaning that pesky lint trap! Here’s a step by step breakdown of how to do it right.
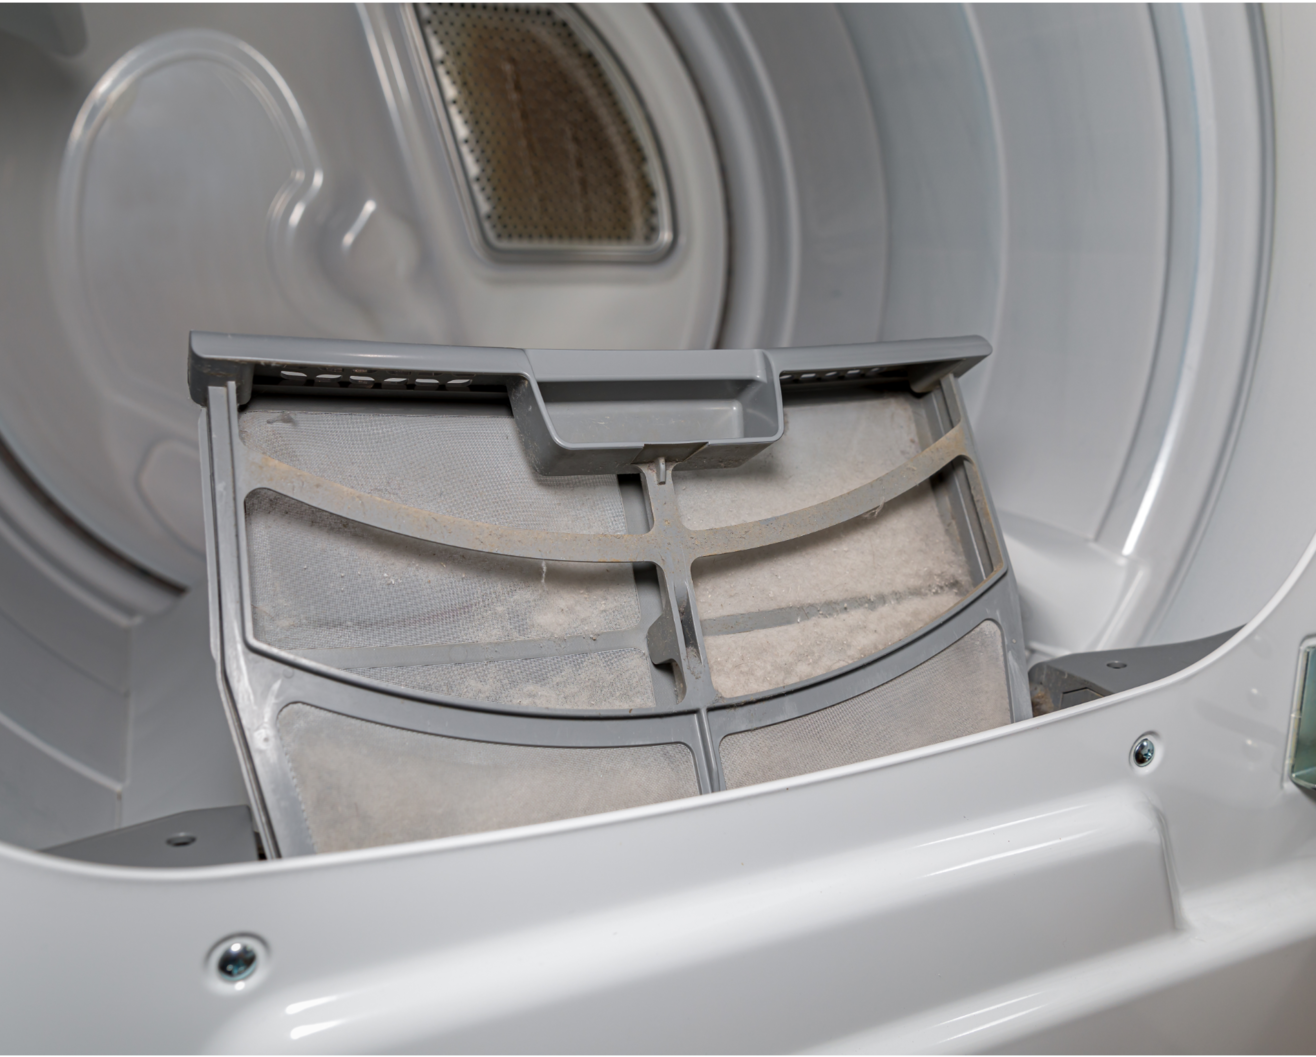
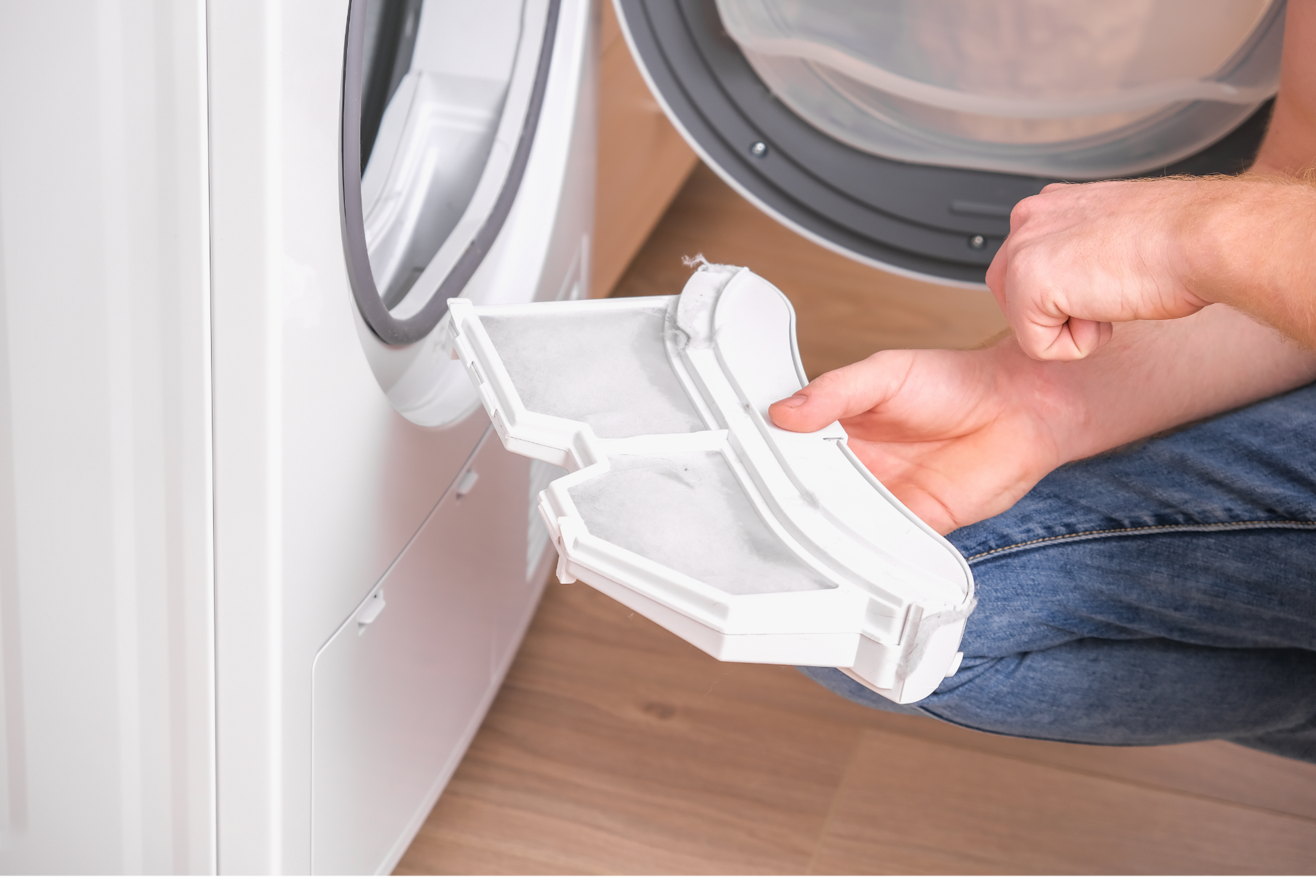
• Removing the Lint Screen
Start off with confidence! Gently, but firmly, grab the lint screen. Most lint screens are designed to slide or lift out easily. Give it a little wiggle if it’s stuck, but please, no Hulk moves! Jerking it out might damage the screen or the surrounding frame. Slow and steady wins the lint trap race.
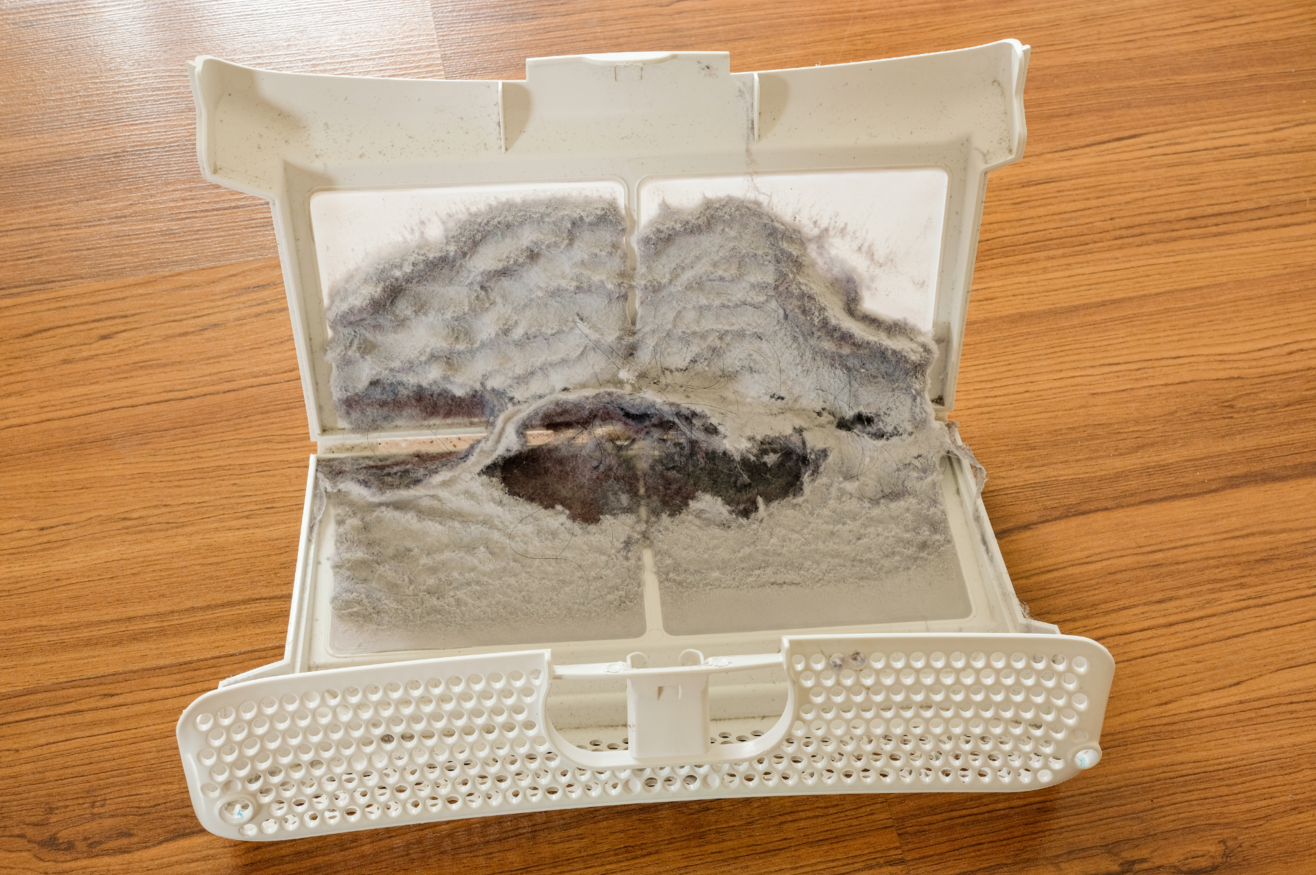
• Inspecting the Lint Screen for Damage and Cleaning Off Visible Lint
Time to play detective! Check the screen for any visible damage like tears or holes. If you find any, it might be time for a replacement. Now, take a closer look at the lint. Is it resembling a miniature sweater? Clear it off! You can use your fingers or an old toothbrush; just make sure the screen is free from lint fuzzies.
Step3: Clean the Lint Trap Housing
Alright, now that we’ve got the lint screen out, it’s time to tackle the heart of the matter – cleaning the lint trap housing. This step is crucial because it ensures your dryer breathes easy and performs at its best. Grab your cleaning gear and let’s get started!
• Vacuuming Like a Pro:
Get that vacuum cleaner roaring! Hold the nozzle close to the trap housing and let it suck away all the accumulated lint. Feel the power as it cleans, ensuring there’s no lint left stranded in the corners. Imagine your vacuum as a superhero, saving your dryer from potential disasters!
• Battling Stubborn Lint with a Brush:
Now, for those stubborn lint bits that just won’t budge – enter the trusty brush! With determined strokes, dislodge the lint that has dared to cling on. Picture yourself in a cleaning battle, victorious with every flick of the brush. You’re not just cleaning; you’re conquering!
• Wiping Away Residue with Detergent Magic:
Time to bring out the secret weapon – a mild detergent solution. Dip a cloth in it and wipe down the trap housing. See how the residue surrenders to the soapy goodness, leaving the surface gleaming! Channel your inner cleaning wizard, casting away dirt and grime with every swipe.
Sure, let’s break down the section on cleaning the dryer vent in a conversational and action oriented manner:
Step 4: Clean the Dryer Vent
Cleaning the dryer vent is a crucial step in ensuring your dryer operates efficiently and safely. When lint accumulates in the vent, it can restrict airflow, causing your dryer to work harder and potentially overheat. Worst of all, it’s a fire hazard waiting to happen. So, keeping that vent clean is non negotiable.
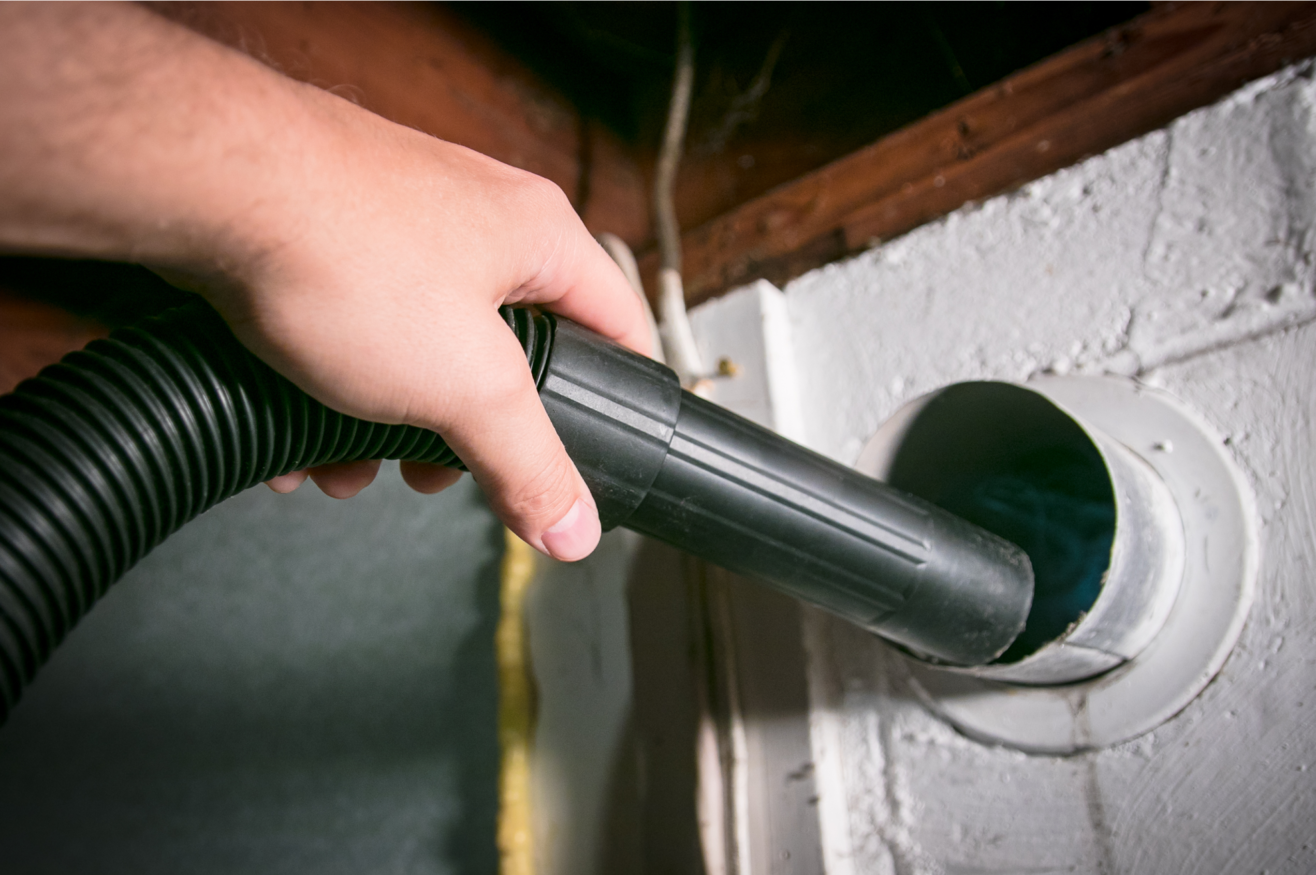
• Use a vent cleaning brush to remove lint from the vent duct
To tackle this task, you’ll need a vent cleaning brush. It’s like a magic wand for banishing lint clogs. Start by disconnecting the vent duct from the back of your dryer. Then, insert the brush into the vent opening inside the dryer, and start snaking it through. You’ll feel it grabbing lint and debris as you go. Be thorough, and if it feels a bit like a workout, that’s a good sign – it means you’re getting the job done!
• Check the vent opening outside the house and ensuring it is clear of debris
Now, let’s head outside. Locate the vent opening on the exterior of your house – it’s usually a little flap. Make sure it’s clear of obstructions like leaves, bird nests, or critters seeking shelter. You want that flap to open and close freely. A clogged exterior vent can be just as problematic as an interior one. So, give it a good check and a gentle shake if needed.
Remember, cleaning the dryer vent isn’t just about convenience; it’s about safety. A clean vent ensures your dryer works efficiently, saving you money on energy bills, and, most importantly, it reduces the risk of a potentially devastating dryer fire. So, roll up your sleeves, get that vent cleaning brush, and keep your home safe and your clothes dry – just the way you want them!
Tips for Maintaining a Clean Lint Trap
Alright, let’s dive into some nifty tips to keep that lint trap squeaky clean and your dryer working like a champ!
• How Often Should the Lint Trap Be Cleaned?
Picture this: You’ve just finished a load of laundry, and the clothes are all warm and fuzzy, straight out of the dryer. But wait! Before you bask in the glory of your freshly dried garments, make it a habit to clean the lint trap. It’s like giving your dryer a highfive. But how often should you do it? Ideally, aim for every single time you use the dryer. Yup, every single time. Think of it as a mini ritual before you start your laundry adventure. Regular cleaning prevents lint from building up and causing trouble down the road.
• Importance of Checking the Lint Trap Before Each Use of the Dryer
Here’s a golden rule: Always, always check the lint trap before you hit that start button. It takes mere seconds, but it can save you from a world of hassle. Imagine this: a clogged lint trap not only slows down your dryer but also poses a fire hazard. Nobody wants that, right? By making it a habit to check the trap, you ensure your dryer runs efficiently and safely every single time. Plus, it’s a super easy step to incorporate into your laundry routine.
• Educating Family Members About the Significance of Maintaining a Clean Lint Trap
Teamwork makes the dream work, and this applies to keeping your lint trap clean too! Take a moment to educate your family members about the lint trap’s importance. Have a little family meeting, if you will. Explain how a clean lint trap not only makes the dryer work better but also keeps the entire household safe. It’s a responsibility we can all share. Encourage everyone to chip in and make it a habit. Maybe turn it into a friendly competition—who can clean the lint trap the fastest? Get creative! The more everyone is on board, the easier it becomes to maintain a clean lint trap effortlessly.
And there you have it—simple yet effective tips to maintain a clean lint trap and ensure your dryer stays in tip top shape.
When to Call in Professional Cleaners for Your Dryer Lint Trap
Sometimes, despite our best efforts, tackling the lint monster in your dryer can be a daunting task. That’s when it’s time to call in the pros! Picture this: skilled experts armed with powerful tools, swiftly and efficiently clearing out every last bit of lint from your dryer’s nooks and crannies.
By bringing in professional cleaners, you’re not just ensuring a lint free haven for your clothes but also guaranteeing the safety of your home. These experts know the ins and outs of lint traps, armed with specialized equipment designed to do the job thoroughly.
So, if you find yourself overwhelmed or if your dryer seems to be rebelling against your DIY attempts, don’t hesitate to make that call. It’s an action that ensures your dryer works efficiently, your energy bills stay manageable, and most importantly, your home remains safe from potential fire hazards. Let the professionals handle the lint, so you can get back to the hassle free joy of fresh, dry laundry!
Wrapping It Up
In wrapping up our journey through the ins and outs of cleaning your dryer lint trap, it’s crucial to underscore just how vital this seemingly small task is for your safety and the efficiency of your trusty dryer.
By regularly cleaning your lint trap, you’re not just preventing fire hazards but also ensuring that your dryer works at its best, saving you time and energy. So, my fellow readers, don’t underestimate the power of these simple steps we’ve discussed.
Remember, these little chores might seem mundane, but they play a significant role in the overall safety and longevity of your household appliances. By staying vigilant and proactive, you’re not just maintaining your appliances; you’re safeguarding your home and the people you care about. So, here’s to clean lint traps, efficient dryers, and a safer, cozier home!