
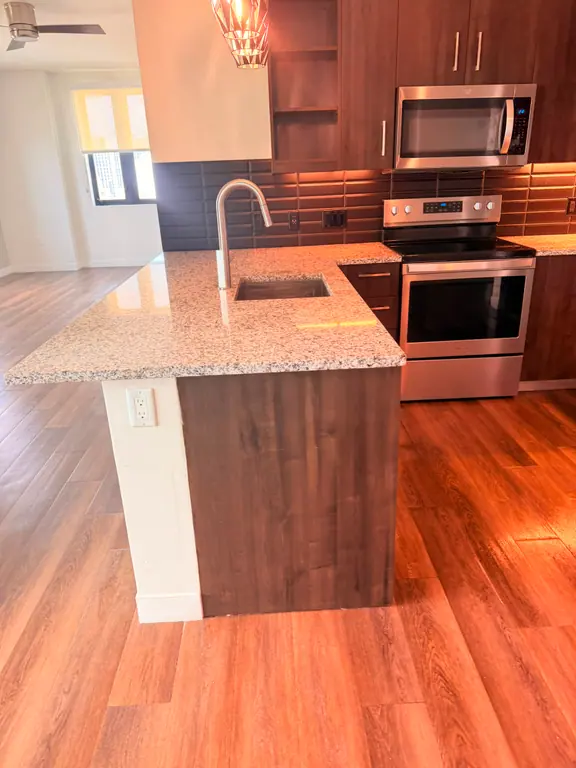
Search for how to clean construction dust from walls and you'll find the same recipe on every page: warm water, a splash of vinegar, wipe top to bottom, repeat until the cloth looks clean. It's half right, and the half it gets wrong is the part that matters. Vinegar on fresh paint and a soaked rag on gypsum board both create new problems while leaving the finest dust exactly where it was.
Construction dust isn't household dust in a bigger quantity. Sanding joint compound, cutting tile, grinding mortar, and sawing wood each produce a different powder with a different particle size and a different hazard. The finish on the wall and the source of the dust decide the method, and the order of work decides whether the dust leaves the room or just moves around inside it.
Clean it in the right order with the right tool and one room takes an afternoon. Skip a step and you'll be back on the same wall next week.
Table of Contents
- Match the Cleaning Method to Your Wall Finish
- Decide Whether to Clean It Yourself or Hire a Pro
- Prepare the Room Before You Clean
- How to Clean Walls in the Right Order
- Common Problems and How to Fix Them
- Clearance Checks Before You Move Back In
Match the Cleaning Method to Your Wall Finish
Two mistakes account for most failed attempts. The first is the dry pass, a cloth, a duster, or a broom dragged across dusty walls, which lifts fine powder into the air and drops it back on the same surface minutes later. The second is the overcorrection, a soaked rag and a heavy hand, which drives water into porous material and leaves streaks, swelling, and a haze that only shows up once the wall dries.
Fine particles settle slowly and move on the smallest current of air. Guidance collected in HUD's lead-hazard control document sets the sequence for federally funded work, and it applies just as well to a condo in Brickell: wait at least one hour after dust-generating work stops so particles can settle, then vacuum ceilings, walls, trim, window sills, floors, and other surfaces from high to low with HEPA equipment. The same document discourages dry sweeping because it drives high airborne dust levels, particularly where silica or wood dust is present.
Replace guesswork with a decision tree. HEPA vacuuming suits settled dust on every finish. Damp cleaning is for surfaces that tolerate water. Saturation is never correct, and it is actively harmful on gypsum board, unsealed plaster, porous block, and paint that hasn't fully cured.
| Wall finish | First pass | Damp wipe | Avoid |
|---|---|---|---|
| Painted drywall | HEPA vacuum, ceiling down | Damp cloth wrung nearly dry, mild detergent | Soaking the board, wet vacuums |
| Unpainted drywall or joint compound | HEPA vacuum only | Light dampening at most, after a test patch | Any saturation of porous board |
| Painted plaster | HEPA vacuum, slow passes | Damp wipe after a test patch | Heavy water, scrubbing pads |
| Concrete or block walls | HEPA vacuum with containment | Damp wipe only after loose dust is gone | Dry sweeping, which raises silica dust |
| Freshly painted walls | HEPA vacuum only | Light wipe once paint has fully cured | Wet cloths, abrasive pads |
| Tile or glass | HEPA vacuum | Damp wipe, then dry with a clean cloth | Abrasive scrubbers that scratch the surface |
Run a Test Patch Before the First Wipe
Pick a spot near a baseboard in a corner a sofa will cover. Wipe it with the detergent you intend to use, let it dry completely, then look for darkening, bubbling, or a chalky ring at the edges. A wall that fails the patch test gets vacuumed and nothing more.
Microfiber does more of the work than any bottle. A dry microfiber cloth holds particles in the fibers instead of dragging them along the surface, and a damp one releases them into the rinse water rather than back onto the paint.
A wall you can't identify, especially in a building older than 1978, stays in the higher-risk category until someone confirms what's on it. That changes who does the cleaning, not how hard you scrub.
Decide Whether to Clean It Yourself or Hire a Pro
Three questions settle the decision before anyone picks up a cloth.
What is the wall finish? Sealed paint, tile, and glass are forgiving. Unpainted drywall, unsealed plaster, and anything with a chalky or powdery surface are not.
What made the dust? Sanded joint compound and cut wood are ordinary renovation dust. Dust from cutting concrete, mortar, stone, or tile carries silica, and sanding old paint can carry lead.
Was any painted surface from before 1978 disturbed? In U.S. housing, that single fact changes the rules.
If the second or third answer points to silica or lead, stop. Seal the doorway, keep people and pets out, and bring in a qualified firm or arrange dust-wipe testing before the room is used again. Lead clearance is decided by measurement, not by how the wall looks.
EPA's small entity guide to lead-safe renovation sets clearance action levels of 5 micrograms per square foot for floors, 40 for interior window sills, and 100 for window troughs. Those numbers exist because invisible residue survives a wall that looks clean. The same guide describes the Renovate Right framework, which covers renovation, repair, and painting that disturbs more than 6 square feet of painted surface in a pre-1978 home or child-occupied facility and requires certified firms using lead-safe practices.
| Surface | Action level | What it means for cleaning |
|---|---|---|
| Floors | 5 micrograms per square foot | Clean again and verify by dust-wipe testing |
| Interior window sills | 40 micrograms per square foot | Re-clean and test before reoccupying |
| Window troughs | 100 micrograms per square foot | Re-clean and test before reoccupying |
For a room with ordinary gypsum dust and no suspected lead, the job is yours if you want it. The test is a raking light held flat against the wall after the final pass. If the beam shows a settled film, the wall isn't done.
Bring in a crew when any of these is true.
- Multiple units or shared corridors. Dust migrates through door gaps, elevator lobbies, and return air, and a single-unit clean leaves the neighbor's dust arriving next week.
- A fixed move-in date. A tenant, guest, or buyer arriving in days turns a two-day job into a deadline, and corners get cut first at the ceiling.
- Sanding, cutting, or demolition touched old paint, concrete, or stone. This is a different job with different equipment.
- Someone in the household has asthma, COPD, or a compromised immune system. The margin for a hazy room is much smaller.
Our post-construction cleaning covers what a wipe-down misses: dust and residue on reachable surfaces, including doors, ledges, touchpoints, cabinet and fixture exteriors, floors, and accessible baseboards. We schedule it after active construction is finished and the space is ready for a final clean. Hazardous-material removal, mold remediation, and work that needs unsafe access sit outside a standard scope unless a written proposal says otherwise.
Coordinating several units at once is its own problem. Replace spreadsheets with cleaning scheduling so unit numbers, dates, and crew assignments live in one place instead of three tabs.
Next step: write down the wall finish, the dust source, and the room count, then ask for a quote against that list.
Prepare the Room Before You Clean
Setup decides whether the dust stays in one room or travels the building. Treat construction dust as potentially hazardous until you know what created it, especially after work on old painted surfaces, concrete, mortar, tile, or joint compound. Get the room empty of people before anything else happens.
- Clear the room. Occupants and pets leave before dust goes airborne, and they stay out until the last pass. Every extra person moving through the space stirs the floor layer back up.
- Close the openings. Doors shut, HVAC registers in the work area closed where practical, and the gap under the door taped. A return vent left open pulls fine dust into the ductwork and redistributes it to rooms nobody worked in.
- Mask what you're not cleaning. Plastic sheeting over floors and furniture, edges sealed with tape. Sheeting that comes loose turns the whole containment into decoration.
- Mist before you move anything. Lightly spray protective sheeting and loose debris before bagging it. A light mist keeps fine dust from rising into the air while you work. Keep the water on the debris and off the walls, because a wet pass over a finished surface pushes dust into it instead of lifting it off.
- Dress for the dust. A fitted P100 or N95 respirator, safety glasses, and disposable gloves. A loose surgical mask doesn't seal, and the particles you're worried about are the ones that find the gap.
- Wait until the air goes still. Start only when no haze hangs at eye level. If you can see a cloud, the room is still working against you.
Dry handling does most of the prep work here. Water belongs on debris heading into a bag, not on the wall itself.
Wet vacuums have a narrow job. EPA's safe renovation and repair guidance notes that OSHA rules out wet vacuums on porous materials such as gypsum board and allows them only where enough liquid is present, because otherwise contaminants get exhausted straight back into the room.
Go or no-go: the room is sealed, the registers are closed, the sheeting is taped, and you have a HEPA vacuum, two buckets, microfiber, pH-neutral detergent, heavy-duty bags, and a raking light. If something on that list is missing, stop and get it before the first pass.
How to Clean Walls in the Right Order
The order is most of the method. EPA's lead-safe renovation guidance lays out the core sequence: HEPA vacuum or damp-cloth the walls working from the ceiling downward, vacuum the remaining surfaces and objects, then wet-wipe until disposable cloths come away clean. Containment should extend at least 6 feet beyond the surfaces being renovated, farther where dust can travel, and dust should never be pushed toward floors, vents, adjacent rooms, or furnishings.
Here's the whole sequence in one view.
- Confirm the room is still. Doorway sealed, registers closed, no trade still cutting or sanding next door. Disturbing settled dust puts it straight back into the air, and you'll clean the same wall twice for no gain.
- Start at the ceiling and work down the upper wall. Overlapping HEPA passes, wand flat against the surface. The classic slip is starting at the baseboard and dragging a loaded wand up and down a clean wall, which is how a wall gets dirty in a pattern.
- Take the high horizontals next. Door heads, window sills, trim, ledges, cabinet tops, ceiling fan blades, light fixtures. Dust falls, so everything above the wall gets finished before the wall.
- Damp-wipe the wall with a cloth wrung nearly dry. Mild detergent, steady downward strokes, a fresh face or a fresh cloth for each pass. Reusing a loaded cloth smears a gray film you'll chase for the rest of the day.
If you want to see the top-down pass and the HEPA technique in motion before you start, this walkthrough is worth four minutes.
- Rinse and repeat. Clean water, clean cloth, and repeat the vacuum-and-wipe cycle until the cloths stay clean when they come off the wall. Two passes is normal. Four isn't a sign of failure.
- Rake the light across the wall. Hold a work light flat against the surface rather than shining it at the wall. A settled film shows as a texture under raking light and vanishes under straight-on light.
- Dry the wall fast. Box fans, open windows, or the HVAC on fan-only once the filters are clean. Moisture trapped in drywall invites bubbling now and microbial growth later.
Bag contaminated wipes and debris in sealed heavy-duty bags rather than dropping them in an open bin, and clean tools from the least dirty to the most dirty so the vacuum wand doesn't carry dust back into a finished room. If you don't own a sealed HEPA unit, where to rent HEPA vacuums covers rental options, and it's worth the trip, because a shop vacuum with a fine bag is a different tool with a different result. The rest of the room follows the same logic, and the dusting sequence for the horizontal surfaces applies to shelves, sills, and ledges once the walls are done.
Common Problems and How to Fix Them
A hazy film that reappears an hour after the wall dries is the most common complaint, and it's almost never dust. It's detergent residue, or the dirt a loaded cloth pushed around. The fix is a rinse pass with clean water and a fresh microfiber cloth, not more detergent.
Streaks tell a similar story from a different angle. A cloth that's picked up dirt is a paintbrush, and every stroke redistributes it. Fold the cloth into quarters, use one face per section, and turn it before you reload.
| Symptom | Likely cause | Fix |
|---|---|---|
| Hazy film after wiping | Detergent residue or dirty cloth | Rinse with clean water, rewipe with a fresh cloth |
| Dust returns within days | Settled dust in ceiling, vents or HVAC | Vacuum ceiling and vents, replace the HVAC filter |
| Streaks on painted walls | Cloth carrying dirt | Fold the cloth, switch to a clean side, wipe lightly |
| Drywall bubbling or swelling | Over-wetting of porous board | Dry fully, sand lightly, prime before repainting |
| White chalky marks | Joint compound or plaster powder | Brush and vacuum first, then a light damp wipe |
Dust that comes back within a few days usually isn't coming from the wall at all. It's coming from the ceiling, the vent grilles, or the HVAC filter, and each air cycle drops a fresh layer on the surfaces you just finished. Vacuum the ceiling and the registers, then replace the filter rather than vacuuming it.
White chalky marks deserve their own order of operations. They're usually joint compound or plaster powder, and a damp cloth turns that powder into a thin paste that dries into a stain. Brush it loose and vacuum it first, then wipe.
Rinsing and re-wiping fixes a film or a streak in the same session. Bubbled drywall is a repair job measured in days of drying, a light sanding, and a primer coat before paint, which is why the wrung-dry cloth rule matters more than any product choice.
Clearance Checks Before You Move Back In
Walls that look clean can still leave fine dust in the air, on trim, and on every surface above eye level. HSE's construction dust guidance links repeated exposure to asthma, COPD, lung cancer, and silicosis, and notes that more than 500 construction workers are believed to die from silica exposure annually. Occupational limits for respirable crystalline silica are set far below anything a household should accept, and they exist because residual dust is an air-quality problem that appearance alone cannot measure.
Walk the room with this list before anyone unpacks a box. Each check targets a place where dust either stays hidden or finds a route back in.
- Cloths come away clean. The HEPA-and-damp cycle has been repeated until a white cloth wipes a wall section and stays white.
- No film under raking light. Check walls, trim, sills, and the tops of door casings, since fine dust settles above eye level first.
- The HVAC filter is new or clean. A loaded filter re-releases what it captured every time the system runs.
- The room has been ventilated. Windows open where outdoor conditions allow, fans moving air through rather than around.
- The plastic came down without spreading dust. Mist sheeting lightly, fold it dirty side in, and bag it rather than dragging it through the unit.
- Walls are dry to the touch. Trapped moisture under fresh paint is a problem you'll discover in a month.
Keep occupants and pets out during active dust generation and until settled dust is gone, which for a full renovation means after the final pass rather than when the last trade's van leaves.
Ordinary cleaning cannot certify safety when the work involved cutting concrete, sanding older painted surfaces, or materials nobody can identify. In those cases, testing or qualified remediation is the honest answer, and it's the one families, students, landlords, and short-term rental hosts most often need before a move-in date.
Canes Cleaners takes on post-construction cleaning across Miami-Dade, from Aventura and Bal Harbour to Coral Gables, Doral, and Miami Beach, with a room-by-room finish that covers kitchen and bathroom surfaces, bedrooms and living areas, and the dust that settles on doors, ledges, and accessible baseboards after the trades leave. Post-construction work is priced by custom quote, so the scope matches your unit, your finishes, and your deadline instead of a generic checklist. Visit Canes Cleaners to book online or request a quote for your renovation turnover.