Cleaning the air fryer is a crucial aspect of maintaining its efficiency and ensuring the production of healthy, flavorful meals. The significance of regular cleaning extends beyond mere aesthetics, as a clean air fryer promotes optimal performance and prevents the accumulation of grease and food residue that could affect its functionality. In this guide on how to clean an air fryer, we will delve into the step-by-step process to ensure not only the cleanliness of the exterior but also the interior components such as the basket, tray, and heating element. By understanding the importance of a clean air fryer and gaining insights into the comprehensive cleaning process, users can prolong the lifespan of their appliance, guarantee a hygienic cooking environment, and continue to enjoy delicious, crispy results without compromise.
Effortless Brilliance: A Step-by-Step Guide on How to Clean Your Air Fryer
In this step-by-step guide on how to clean an air fryer, we will navigate through the essential procedures to ensure that every nook and cranny of your appliance is pristine. From the exterior and interior components to the often-overlooked heating element and ventilation system, this guide aims to simplify the cleaning process, enhancing the longevity of your air fryer and ensuring that each culinary venture retains its brilliance. Embrace the simplicity of cleanliness and continue to savor the delight of perfectly air-fried creations with this comprehensive guide at your fingertips.
Step 1. Collect Cleaning Supplies and Materials
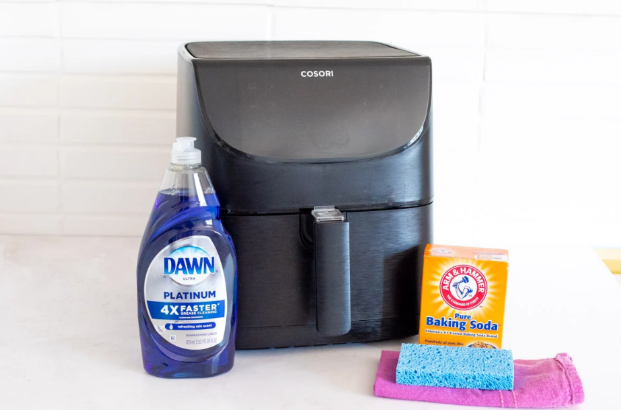
To embark on the journey of cleaning your air fryer, the first crucial step is to gather the necessary cleaning supplies.
These items are essential for ensuring a thorough and effective cleaning process:
- Dishwashing Soap: Select a mild dishwashing soap to create a gentle yet effective cleaning solution. This soap will aid in breaking down grease and residue, ensuring a pristine finish.
- Warm Water: Warm water serves as a versatile solvent, helping to dissolve stubborn stains and grime. It is the base for creating the cleaning solution and is instrumental in wiping away residues.
- Soft Sponge or Cloth: Choose a soft sponge or cloth for wiping down the exterior and interior surfaces of the air fryer. This ensures that the cleaning process is gentle, preventing any potential damage to the appliance.
- Soft-Bristle Brush: For intricate areas and components like the basket and tray, a soft-bristle brush is invaluable. It aids in dislodging stubborn particles and reaching into tight spaces without causing scratches.
- Microfiber Cloth: A microfiber cloth is an excellent choice for drying and polishing surfaces after cleaning. Its fine fibers help absorb moisture and leave a streak-free finish.
- Toothbrush: A toothbrush, preferably one with soft bristles, serves as a handy tool for detailed cleaning. It is particularly useful for reaching corners, crevices, and the ventilation system.
Gathering these supplies sets the stage for a seamless and effective cleaning process, ensuring that every component of your air fryer receives the attention it deserves.
Step 2. Clean the Exterior of Air Fryer
Once you have assembled your cleaning supplies, the next step in rejuvenating your air fryer involves a thorough exterior cleaning to restore its polished appearance.
-
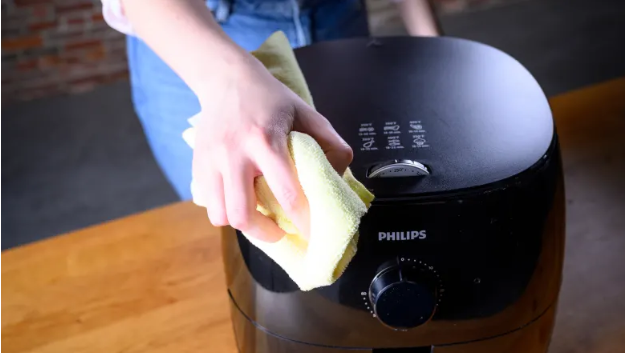
Wipe down the Exterior with a Damp Cloth:
Begin by dampening a soft cloth or sponge with the cleaning solution you’ve prepared using dishwashing soap and warm water. Gently wipe down the exterior surfaces of the air fryer, including the body and handles, to eliminate any surface dust, grease, or fingerprints. This initial wipe sets the foundation for a pristine exterior and ensures that no loose particles interfere with the subsequent cleaning steps.
-
Clean Control Panel and Buttons:
Pay special attention to the control panel and buttons, as these areas are frequently exposed to food splatters and residue during cooking. Dampen a cloth or use a soft-bristle brush to clean these components thoroughly. Take care to avoid excessive moisture near electronic components to prevent damage. By addressing the control panel and buttons, you not only enhance the visual appeal of your air fryer but also ensure its continued functionality. This basic exterior cleaning lays the groundwork for a more detailed cleaning process, addressing both the aesthetics and usability of your appliance.
Step 3. Interior Cleaning
The interior of your air fryer requires special attention to maintain its functionality and hygiene.
-
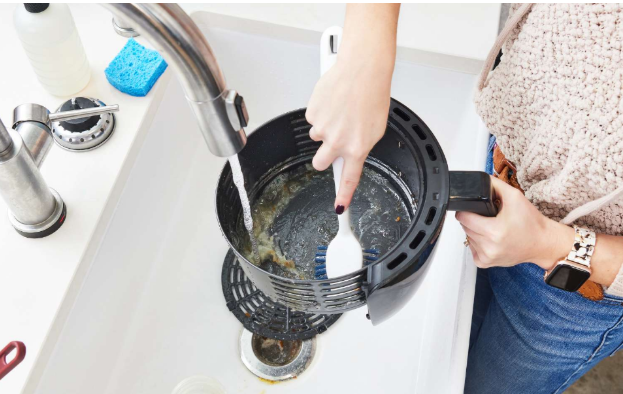
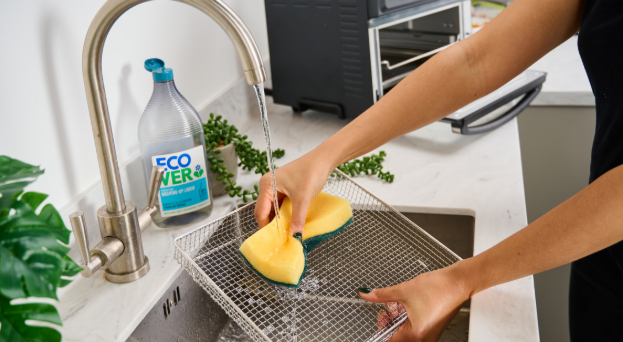
Remove and Clean the Basket and Tray:
Start by removing the basket and tray from the air fryer. These components bear the brunt of cooking residues and oil splatters. Wash them with warm, soapy water, using a soft sponge to remove any stuck-on particles. Ensure thorough cleaning, as these elements play a crucial role in the air circulation and cooking process.
-
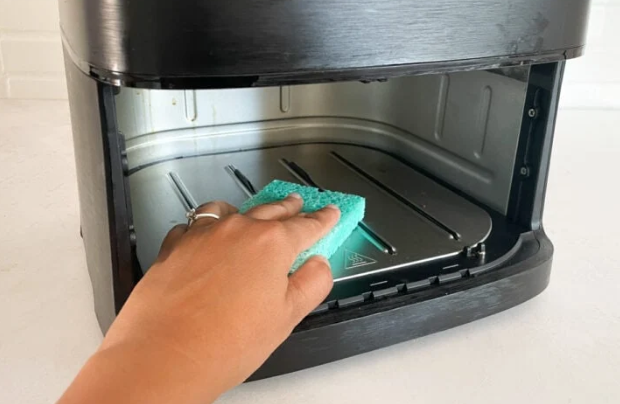
Scrub the Interior Surfaces with Warm, Soapy Water:
With the removable components set aside, turn your attention to the interior surfaces of the air fryer. Create a solution of warm water and dishwashing soap. Dip a soft sponge or cloth into the soapy water and gently scrub the interior surfaces, including the walls and the heating element. Be cautious around the heating element, ensuring it is cool before cleaning. This step effectively removes any lingering food particles and grease.
-
Using a Toothbrush for Hard-to-Reach Areas:
For intricate and hard-to-reach areas such as corners and the air vents, enlist the help of a toothbrush. The soft bristles of the toothbrush prove invaluable in scrubbing away residues without causing damage. This detailed approach ensures that every nook and cranny is free from accumulated grime, contributing to a thoroughly cleaned interior.
By systematically addressing each facet of the interior, from the removable components to the hidden recesses, you guarantee that your air fryer maintains its peak performance and remains a reliable kitchen companion.
Step 4. Cleaning the Heating Element
The heating element is a crucial component of the air fryer, and keeping it clean is essential for optimal performance.
Follow these steps for a thorough cleaning:
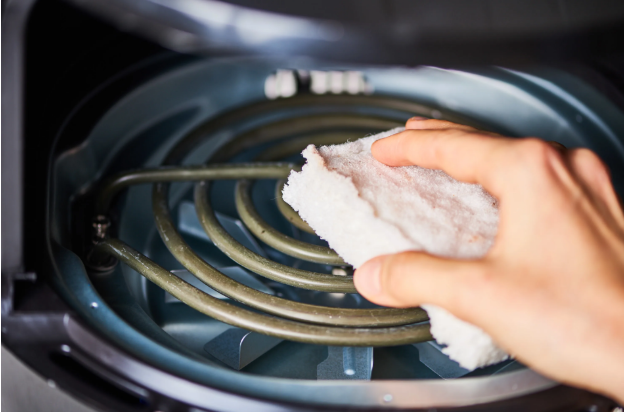
- Allow the Air Fryer to Cool Completely: Before attempting to clean the heating element, it is imperative to allow the air fryer to cool completely. Safety is paramount, and cleaning a hot heating element can lead to burns or other hazards.
- Gently Wipe the Heating Element with a Damp Cloth: Once the air fryer has cooled, use a damp cloth to gently wipe the heating element. This step helps remove any surface residue or grease that may have accumulated during cooking. Take care not to use excessive force, ensuring the longevity of the heating element.
- Use a Soft Brush to Remove Any Debris:For more thorough cleaning, employ a soft brush to remove any stubborn debris or particles clinging to the heating element. A gentle brushing motion helps dislodge material without causing damage. Be meticulous in this step, as a clean heating element contributes to even and efficient cooking.
By adhering to these steps, you ensure that the air fryer’s heating element remains in optimal condition, promoting consistent and effective cooking while extending the overall lifespan of the appliance.
Step 5. Clean the Ventilation System
The ventilation system plays a crucial role in ensuring proper airflow and maintaining the efficiency of the air fryer.
Follow these steps to comprehensively clean the ventilation system:
- Wipe the Exterior of the Ventilation System: Begin by wiping the exterior surfaces of the ventilation system with a damp cloth. This step removes any dust, grease, or residue that may have settled on the outer casing.
- Remove and Clean the Air Intake Vent: The air intake vent is a prime area for the accumulation of debris and dust. Carefully remove the air intake vent cover and clean it thoroughly. Use a soft brush or cloth to dislodge and remove any particles that may obstruct the airflow.
- Inspect and Clean the Exhaust Vent: Inspect the exhaust vent, located on the back or sides of the air fryer, for any buildup of grease or residue. Clean the exhaust vent using a soft brush or cloth, ensuring that it is free from obstructions.
By taking the time to clean the ventilation system, you contribute to the longevity and efficiency of your air fryer. Unimpeded airflow is essential for consistent cooking results, making regular cleaning of the ventilation system a vital component of air fryer maintenance.
Step 6. Cleaning the Air Fryer Drawer and Cavity
Maintaining the cleanliness of the air fryer drawer and cavity is crucial for preventing cross-contamination, ensuring efficient airflow, and preserving the overall hygiene of the appliance.
Here’s a detailed breakdown of the cleaning process:
- Wipe the Drawer Exterior: Begin by wiping down the exterior of the air fryer drawer using a damp cloth. This step removes any surface grime, fingerprints, or cooking residue that may have accumulated.
- Clean the Cavity with a Damp Cloth: Moving on to the interior cavity, use a damp cloth to clean the surfaces thoroughly. Pay close attention to the walls, base, and corners of the cavity where food particles and grease may accumulate. This ensures that no residue is left behind, maintaining a pristine environment for future cooking endeavors.
- Remove Any Food Residue or Debris: Inspect the air fryer cavity for any lingering food residue or debris. Using the damp cloth, wipe away and remove any particles that may have escaped the removable components like the basket and tray.
Regular attention to cleaning the air fryer drawer and cavity contributes not only to the appliance’s cleanliness but also to its longevity and functionality. This meticulous approach ensures that your air fryer remains a reliable and hygienic kitchen companion for a variety of delicious, healthful meals.
Step 7. Deodorize the Air Fryer
Over time, an air fryer can develop lingering odors from various cooking processes. Deodorizing the appliance is a simple yet effective step to refresh its interior and enhance the overall cooking experience.
Place a Bowl of Water and Vinegar in the Air Fryer: To commence the deodorizing process, place a heat-resistant bowl inside the air fryer, filled with a mixture of water and white vinegar. White vinegar is a natural deodorizer with antibacterial properties, making it ideal for neutralizing odors.
Run the Air Fryer: Once the bowl is in place, run the air fryer at a low temperature for a few minutes. The heat will cause the water and vinegar solution to produce steam, helping to distribute the deodorizing properties throughout the interior of the appliance. This step effectively combats and eliminates any lingering smells, leaving the air fryer with a fresh and neutral scent.
Deodorizing the air fryer in this manner is a quick and environmentally friendly way to ensure that the flavors of your dishes are not compromised by residual odors from previous cooking sessions. Incorporating this step into your regular cleaning routine contributes to a more pleasant cooking environment and enhances the overall enjoyment of your air-fried creations.
Step 8. Drying and Reassembling
After the meticulous cleaning process, it’s crucial to ensure that the air fryer is thoroughly dried and correctly reassembled for continued optimal performance.
Before reassembly, confirm that every component of the air fryer is completely dry. Moisture left behind can lead to mold growth and compromise the effectiveness of the appliance. Use a microfiber cloth to wipe down surfaces and absorb any remaining water, paying extra attention to areas that are prone to retaining moisture.
Once satisfied that all components are dry, proceed to reassemble the air fryer. Carefully place the basket and tray back into their designated positions, ensuring a secure fit. Double-check that all removable parts are in their correct places and that there are no loose or misaligned components. This step is crucial for the proper functioning of the air fryer during future use.
By following these drying and reassembling steps, you not only prevent potential issues related to moisture but also set the stage for a seamless cooking experience with your air fryer. Regular maintenance, including proper drying and reassembly, contributes to the longevity and efficiency of this popular kitchen appliance.
Conclusion
In conclusion, understanding how to clean an air fryer involves a comprehensive approach that ensures both the exterior and interior components are immaculate. The key steps include gathering essential cleaning supplies, wiping down surfaces with a gentle solution, and paying special attention to intricate parts such as the heating element. Regular cleaning not only enhances the aesthetic appeal of the air fryer but is integral for optimal performance and the longevity of the appliance. The overview of these key steps serves as a guide for users to maintain a pristine air fryer, promoting a hygienic cooking environment and ensuring that each culinary venture continues to deliver exceptional results. Encouraging a routine of regular cleaning emerges as the secret to preserving the brilliance of your air fryer, allowing it to function at its best with each use. Embrace these practices, and your air fryer will not only be a reliable kitchen companion but a testament to the transformative power of regular maintenance.