Embarking on the journey of learning how to clean a couch is not just about maintaining a spotless piece of furniture; it is a commitment to the comfort, health, and longevity of one of the central elements in our living spaces. The importance of regularly cleaning a couch extends far beyond mere aesthetics. As our couches become hubs for relaxation, family gatherings, and movie nights, they unwittingly collect a myriad of dust, allergens, and stains. Understanding how to clean a couch becomes crucial not only for preserving its visual appeal but also for creating a healthy environment within our homes. The frequency of couch cleaning depends on usage and lifestyle factors, and recognizing the benefits of a clean couch goes beyond the surface – it contributes to a fresh, inviting atmosphere, extends the life of the furniture, and promotes the wellbeing of those who enjoy its comforting embrace. So, let’s delve into the world of couch cleaning, exploring the practical steps and insights that will keep this beloved piece of furniture not just clean but a sanctuary of comfort and cleanliness.
Step by Step Guide to Clean a Couch
In this step by step guide, we’ll unravel the intricacies of couch cleaning, offering practical insights and techniques to ensure that your cherished furniture not only remains visually appealing but also provides a hygienic haven for relaxation. Whether you’re dealing with stubborn stains, lingering odors, or simply aiming to refresh your couch’s overall appearance, this guide will equip you with the knowledge and skills needed to transform your couch into a clean and inviting centerpiece within your home. So, let’s dive into the details, demystifying the process of couch cleaning and revitalizing your living space one step at a time.
Step 1: Gather Supplies
Before diving into the process of cleaning your couch, it’s crucial to assemble the necessary supplies. A well prepared arsenal of cleaning tools will ensure that you tackle every aspect of the cleaning process effectively. Here’s a checklist to get you started:
- Vacuum Cleaner with Upholstery Attachment: Begin by removing loose dirt, dust, and debris from the surface of your couch. A vacuum cleaner equipped with an upholstery attachment is ideal for reaching into crevices and along seams.
- Upholstery Cleaner or Mild Detergent: Select an upholstery cleaner or mild detergent suitable for your couch’s fabric. Ensure that the chosen cleaner is compatible and safe for use on your specific upholstery material.
- White Vinegar or Commercial Upholstery Cleaner: White vinegar serves as an effective natural cleaner, particularly for odors and stains. Alternatively, a commercial upholstery cleaner designed for your couch’s fabric type can provide specialized cleaning power.
- Clean, LintFree Cloths or Sponges: Soft, lint free cloths or sponges are essential for applying cleaning solutions, blotting stains, and ensuring a gentle yet effective cleaning process without causing damage to the upholstery.
- SoftBristled Brush: A soft bristled brush is valuable for agitating the cleaning solution, particularly in areas with stubborn stains or high traffic. It aids in lifting dirt and grime from the fabric without causing abrasions.
- Water: Have a clean water source readily available for diluting cleaning solutions, rinsing clothes, and maintaining an overall balance in the cleaning process. Water is a versatile companion in ensuring thorough and effective cleaning.
Step 2. Prepare the Couch
Before diving into the cleaning process, it’s crucial to prepare the couch adequately to ensure effective and safe cleaning.
- Remove cushions and pillows: Start by removing all cushions and pillows from the couch. This not only provides better access to all surfaces but also allows for a thorough cleaning of each individual component.
- Check for manufacturer’s instructions: Refer to the manufacturer’s instructions or care label attached to the couch. This step is essential as it provides specific guidelines on recommended cleaning methods, suitable cleaning agents, and any precautions that need to be taken.
- Test cleaning products on a small, inconspicuous area: Before applying any cleaning solution to the entire couch, perform a patch test on a small, inconspicuous area. This helps ensure that the chosen cleaning product does not cause discoloration or damage to the fabric.
- Vacuum the couch to remove loose dirt and debris: Use a vacuum cleaner with an upholstery attachment to thoroughly vacuum the entire couch. This step helps remove loose dirt, dust, and debris from the surface and crevices, preventing them from being spread or ground into the fabric during the cleaning process. Pay extra attention to seams and corners where dirt tends to accumulate.
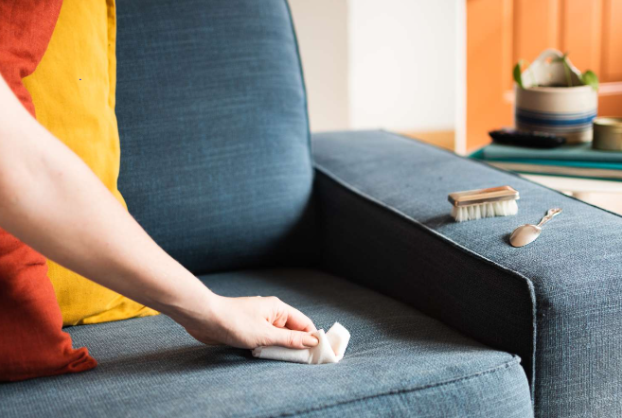
Step 3: Spot Cleaning
Spot cleaning is a targeted and effective approach to tackle specific stains and blemishes on your couch.
- Identify and treat stains individually: Begin by carefully examining your couch for any visible stains. Identify the nature of the stain, whether it’s from spilled liquids, food, or other substances. Treating each stain individually allows for a more tailored cleaning process.
- Use appropriate cleaning solutions for specific stains: Different stains demand different solutions. Employ water based solutions for water stains, as they are less likely to damage the fabric. For odors, a mixture of white vinegar and water can work wonders. Understanding the composition of the stain guides you in choosing the most effective and gentle cleaning agent.
- Blot stains with a clean cloth or sponge: Armed with the appropriate cleaning solution, gently blot the stained area with a clean cloth or sponge. Avoid aggressive rubbing, as it can spread the stain or damage the fabric. The goal is to lift the stain without compromising the integrity of the couch material.
Step 4: General Cleaning
Once you have successfully addressed specific stains and spots, it’s time for a thorough general cleaning to ensure an overall fresh and rejuvenated couch.
- Dilute upholstery cleaner or mild detergent in water: Begin by preparing a cleaning solution. Dilute an upholstery cleaner or a mild detergent in water according to the product’s instructions. This ensures an effective yet gentle cleaning process that won’t harm the fabric.
- Dampen a clean cloth or sponge: Take a clean cloth or sponge and saturate it in the prepared cleaning solution. Ensure it’s damp but not overly wet to prevent oversaturation of the couch.
- Gently scrub the entire couch: Begin the general cleaning process by gently scrubbing the entire surface of the couch. Start from the top and work your way down to prevent dripping onto already cleaned areas. Use circular or back and forth motions, depending on the fabric type, and be mindful of seams and edges.
- Pay extra attention to high use areas and visible stains: Focus on high use areas such as armrests and seat cushions, giving them a bit of extra attention during the cleaning process. For visible stains, apply a bit more pressure while maintaining a gentle scrubbing motion to lift stubborn residues.
This general cleaning step aims to ensure that every inch of your couch receives a comprehensive cleaning treatment, leaving it not only visually refreshed but also free from accumulated dirt and grime.
Step 5: Rinse and Dry
After the thorough cleaning process, it’s crucial to remove any remaining cleaning residue. Wipe down the entire couch with a clean, damp cloth, ensuring all traces of the cleaning solution are gone. Following this, allow your couch to air dry completely. To expedite the drying process, consider using fans or opening windows to promote air circulation. This step is vital to prevent moisture related issues and ensures your couch is ready to provide a clean and refreshed lounging experience.
Step 6. Deodorize the Couch
Deodorizing your couch is the final step in ensuring a fresh and inviting atmosphere in your living space. Follow these simple steps to eliminate odors effectively:
- Sprinkle Baking Soda: Begin by evenly sprinkling a generous amount of baking soda over the entire surface of the couch. Baking soda is known for its natural deodorizing properties and ability to absorb unpleasant odors.
- Allow it to Sit: Allow the baking soda to sit on the couch for at least 15 minutes. This gives it ample time to absorb and neutralize any lingering smells embedded in the fabric.
- Vacuum the Baking Soda: After the designated time has passed, use the upholstery attachment on your vacuum cleaner to thoroughly remove the baking soda from the couch. Ensure that you reach all crevices and seams to extract the absorbed odors effectively.
- Enjoy a Fresh Couch: Once the vacuuming is complete, take a moment to appreciate the refreshed and deodorized ambiance of your couch. This final touch not only eliminates unwanted scents but also contributes to a clean and inviting living space.
Step 7. Reassemble the Couch
With your upholstery now revitalized, it’s time to reassemble your couch for a complete transformation. Replace cushions and pillows, making sure to fluff them for a plump and inviting appearance. Arrange the seating area to its original configuration, paying attention to details that enhance both comfort and aesthetics. As you step back and admire your freshly cleaned and reassembled couch, revel in the renewed allure it brings to your living space.
FAQs: How to Clean the Couch
How often should I clean my couch?
The frequency of cleaning your couch depends on usage, lifestyle, and the type of upholstery. Generally, a thorough cleaning every 6 to 12 months is recommended, with more frequent spot cleaning for spills and stains.
Can I use household cleaners on my couch?
It’s essential to check the manufacturer’s guidelines for your specific couch. While some household cleaners may be suitable for certain materials, others can damage upholstery. It’s often safer to use cleaners specifically designed for upholstery or recommended by the manufacturer.
How do I remove stains from my couch?
Stain removal depends on the type of stain and the upholstery material. Blot the stain with a clean cloth immediately and use an appropriate cleaning solution. Always test the solution on a hidden area first to ensure it doesn’t cause damage or discoloration.
Can I clean my couch myself, or should I hire a professional?
Routine cleaning, such as vacuuming and spot cleaning, can often be done at home. However, for a deep and thorough cleaning, especially for delicate fabrics or extensive stains, hiring a professional upholstery cleaner is recommended. Canes Cleaners in Miami provide affordable home cleaning services in Miami.
How long does it take for a couch to dry after cleaning?
Drying time varies based on factors like upholstery material and cleaning method. Proper ventilation, using fans, and avoiding excessive moisture are essential for faster drying. It may take a few hours to a day or more for the couch to dry completely
Conclusion
In conclusion, mastering how to clean the couch is not just a practical skill but a transformative endeavor that enhances both the aesthetics and hygiene of your living space. As we’ve navigated through the step-by-step process, from routine maintenance to stain removal and deodorizing, it becomes evident that a clean couch is more than just a piece of furniture – it’s a cornerstone of comfort and a reflection of a well-cared-for home. The combination of diligence, proper techniques, and occasional professional care ensures that your couch not only looks inviting but also contributes to a healthier environment by eliminating allergens and preventing the accumulation of dust and grime. So, as you bask in the comfort of your freshly cleaned couch, revel in the knowledge that you’ve not only revived its appearance but also prolonged its lifespan, making it a centerpiece of warmth and cleanliness in your home.